
Part 1, Part 2, Part3, Part4, Part 5, Part 6
The model was masked up and sprayed with orange car paint from a spray can. The masking was reversed and the detail areas were sprayed with a "sandable" car primer which is a darker grey than the normal car primer. I'm not sure what the difference is, other than the shade of grey, as primer generally is usually easily sandable.
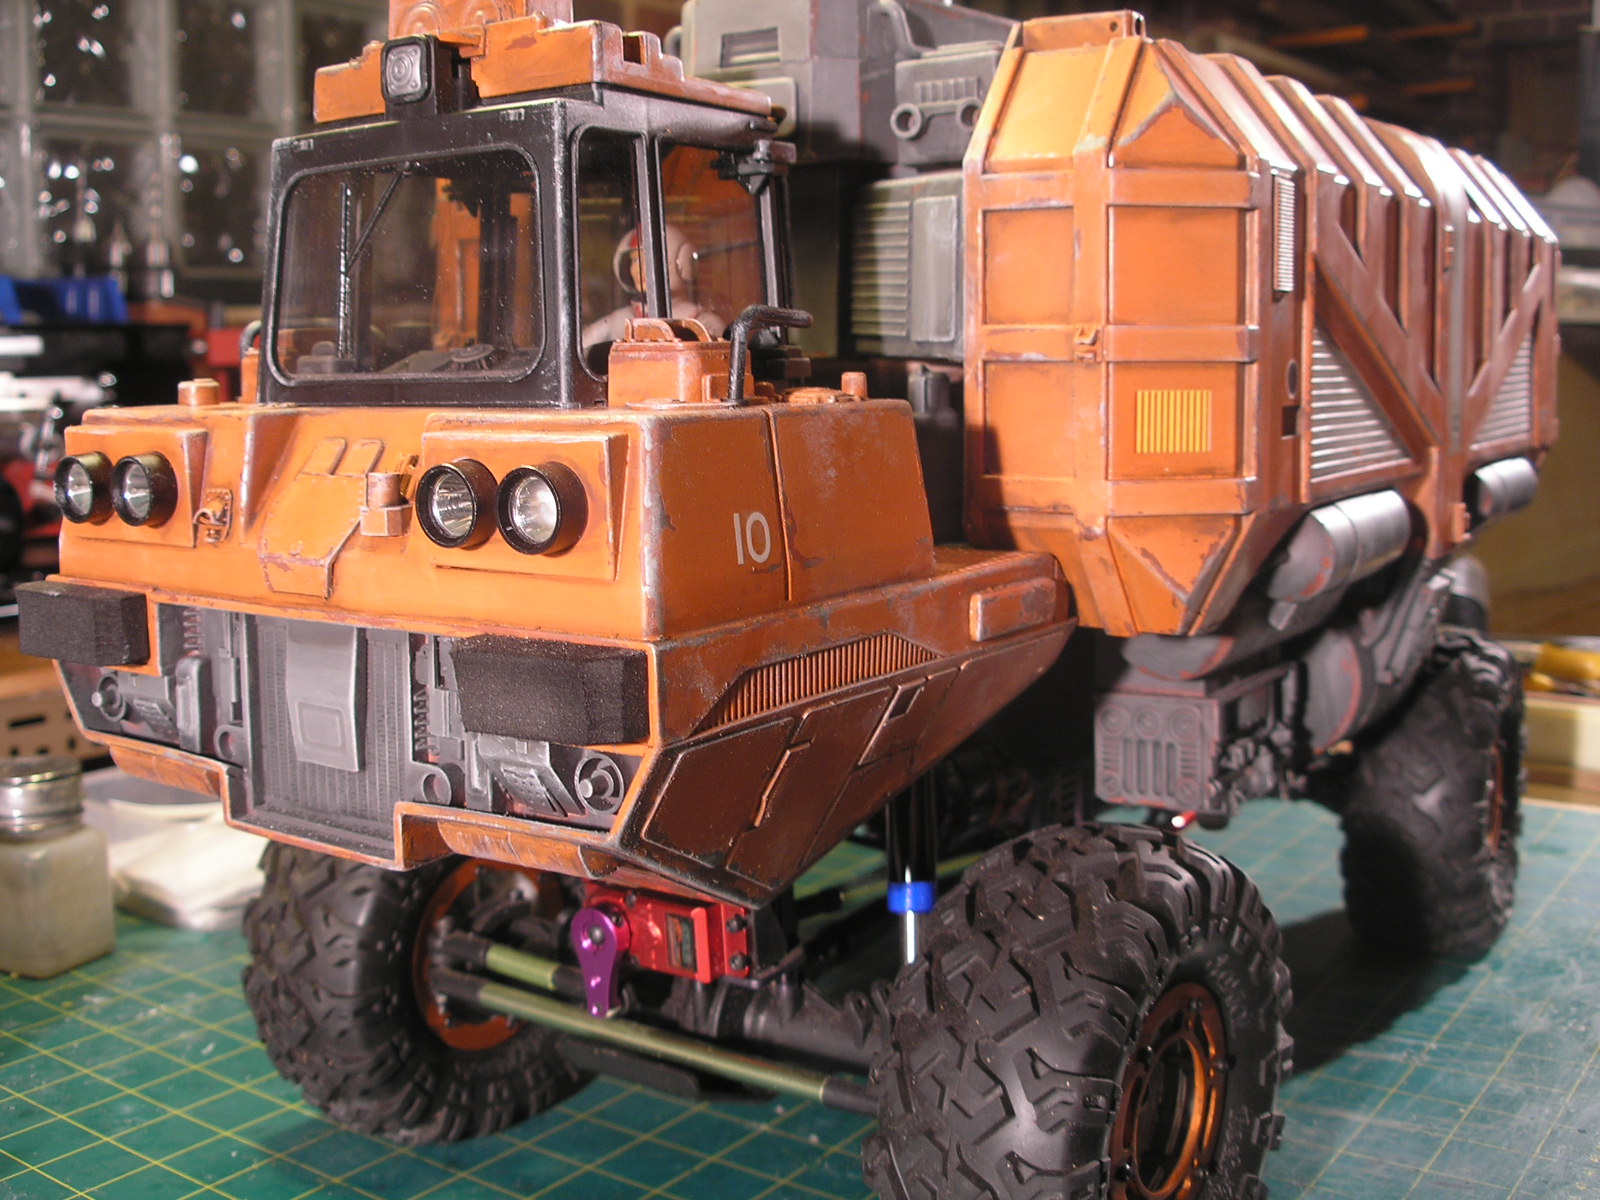
I also masked up and sprayed some white primer markings on the sides and added some old decals from random model kits.
The liquid latex masking (applied earlier in previous post) was peeled off leaving chipped paint revealing the original red primer and silver metal scrapes from the paint pen.
After the paint has been allowed to dry for a at least a day ( 2 days or more is better) I start the application of "poo juice", a roughly five to one mix of methylated spirits ( alcohol) and Tamiya flat black mixed in a jar. Essentially this is a wash that is flowed onto the surface into all the vents, grooves, depressions, edges, lumps etc. Then metho dampened rag is used to wipe it off from the high spots leaving it in the low. The rag is wiped in the direction that grime would run and flow leaving grubby streaks. It is essential for this method to work that the underlying paint is not dissolved by alcohol, so any water based hobby paint such as Tamiya is not suitable. Acrylic car paints and primers are fine, and enamels such as Humbrol will work given sufficient time to dry.
I have seen Randy Cooper on You tube demonstrating his technique using a water based wash on a wet model getting similar visual results. I find that for me that the methylated spirits based wash flows along edges better with a capillary action that is more effective than I have been able to get using a grime wash based on water.
After the poo juice wash has dried, (it dries pretty fast) I then dry brush white students acrylic paint using a stiff flat oil paint brush onto all the raised spots and edges. The student acrylic is a cheap artists acrylic that is not as densely opaque as a quality artists acrylic so builds up slowly onto the models edges with a pleasing lightening of the underlying value. If you make a mistake the metho dampened rag will easily remove the white for another go.
To people used to subtle pastel shaded weathering on 1/35 scale military models, the result to the eye may seem ludicrously over the top, but in my experience you really have to exaggerate the weathering for the camera to see any of it.


After looking at the photos I realise the chassis needs a bit of weathering to tone down all the colorful anodising on display. More than likely a good run on some dusty dirt tracks will naturally take care of that.
A momentous event for this blog, as a project has actually come to completion and for me personally as it is the first Sci-fi model I have completed in maybe 20 years. I hope there will be plenty more to come.
Thanks for reading.


No comments:
Post a Comment