About this Blog

This is about the combination of two interests, Radio Control vehicles and Science Fiction models. This blog documents my science fiction spaceship and radio controlled vehicle projects.

Tuesday 26 April 2022

Container Spaceship part 8

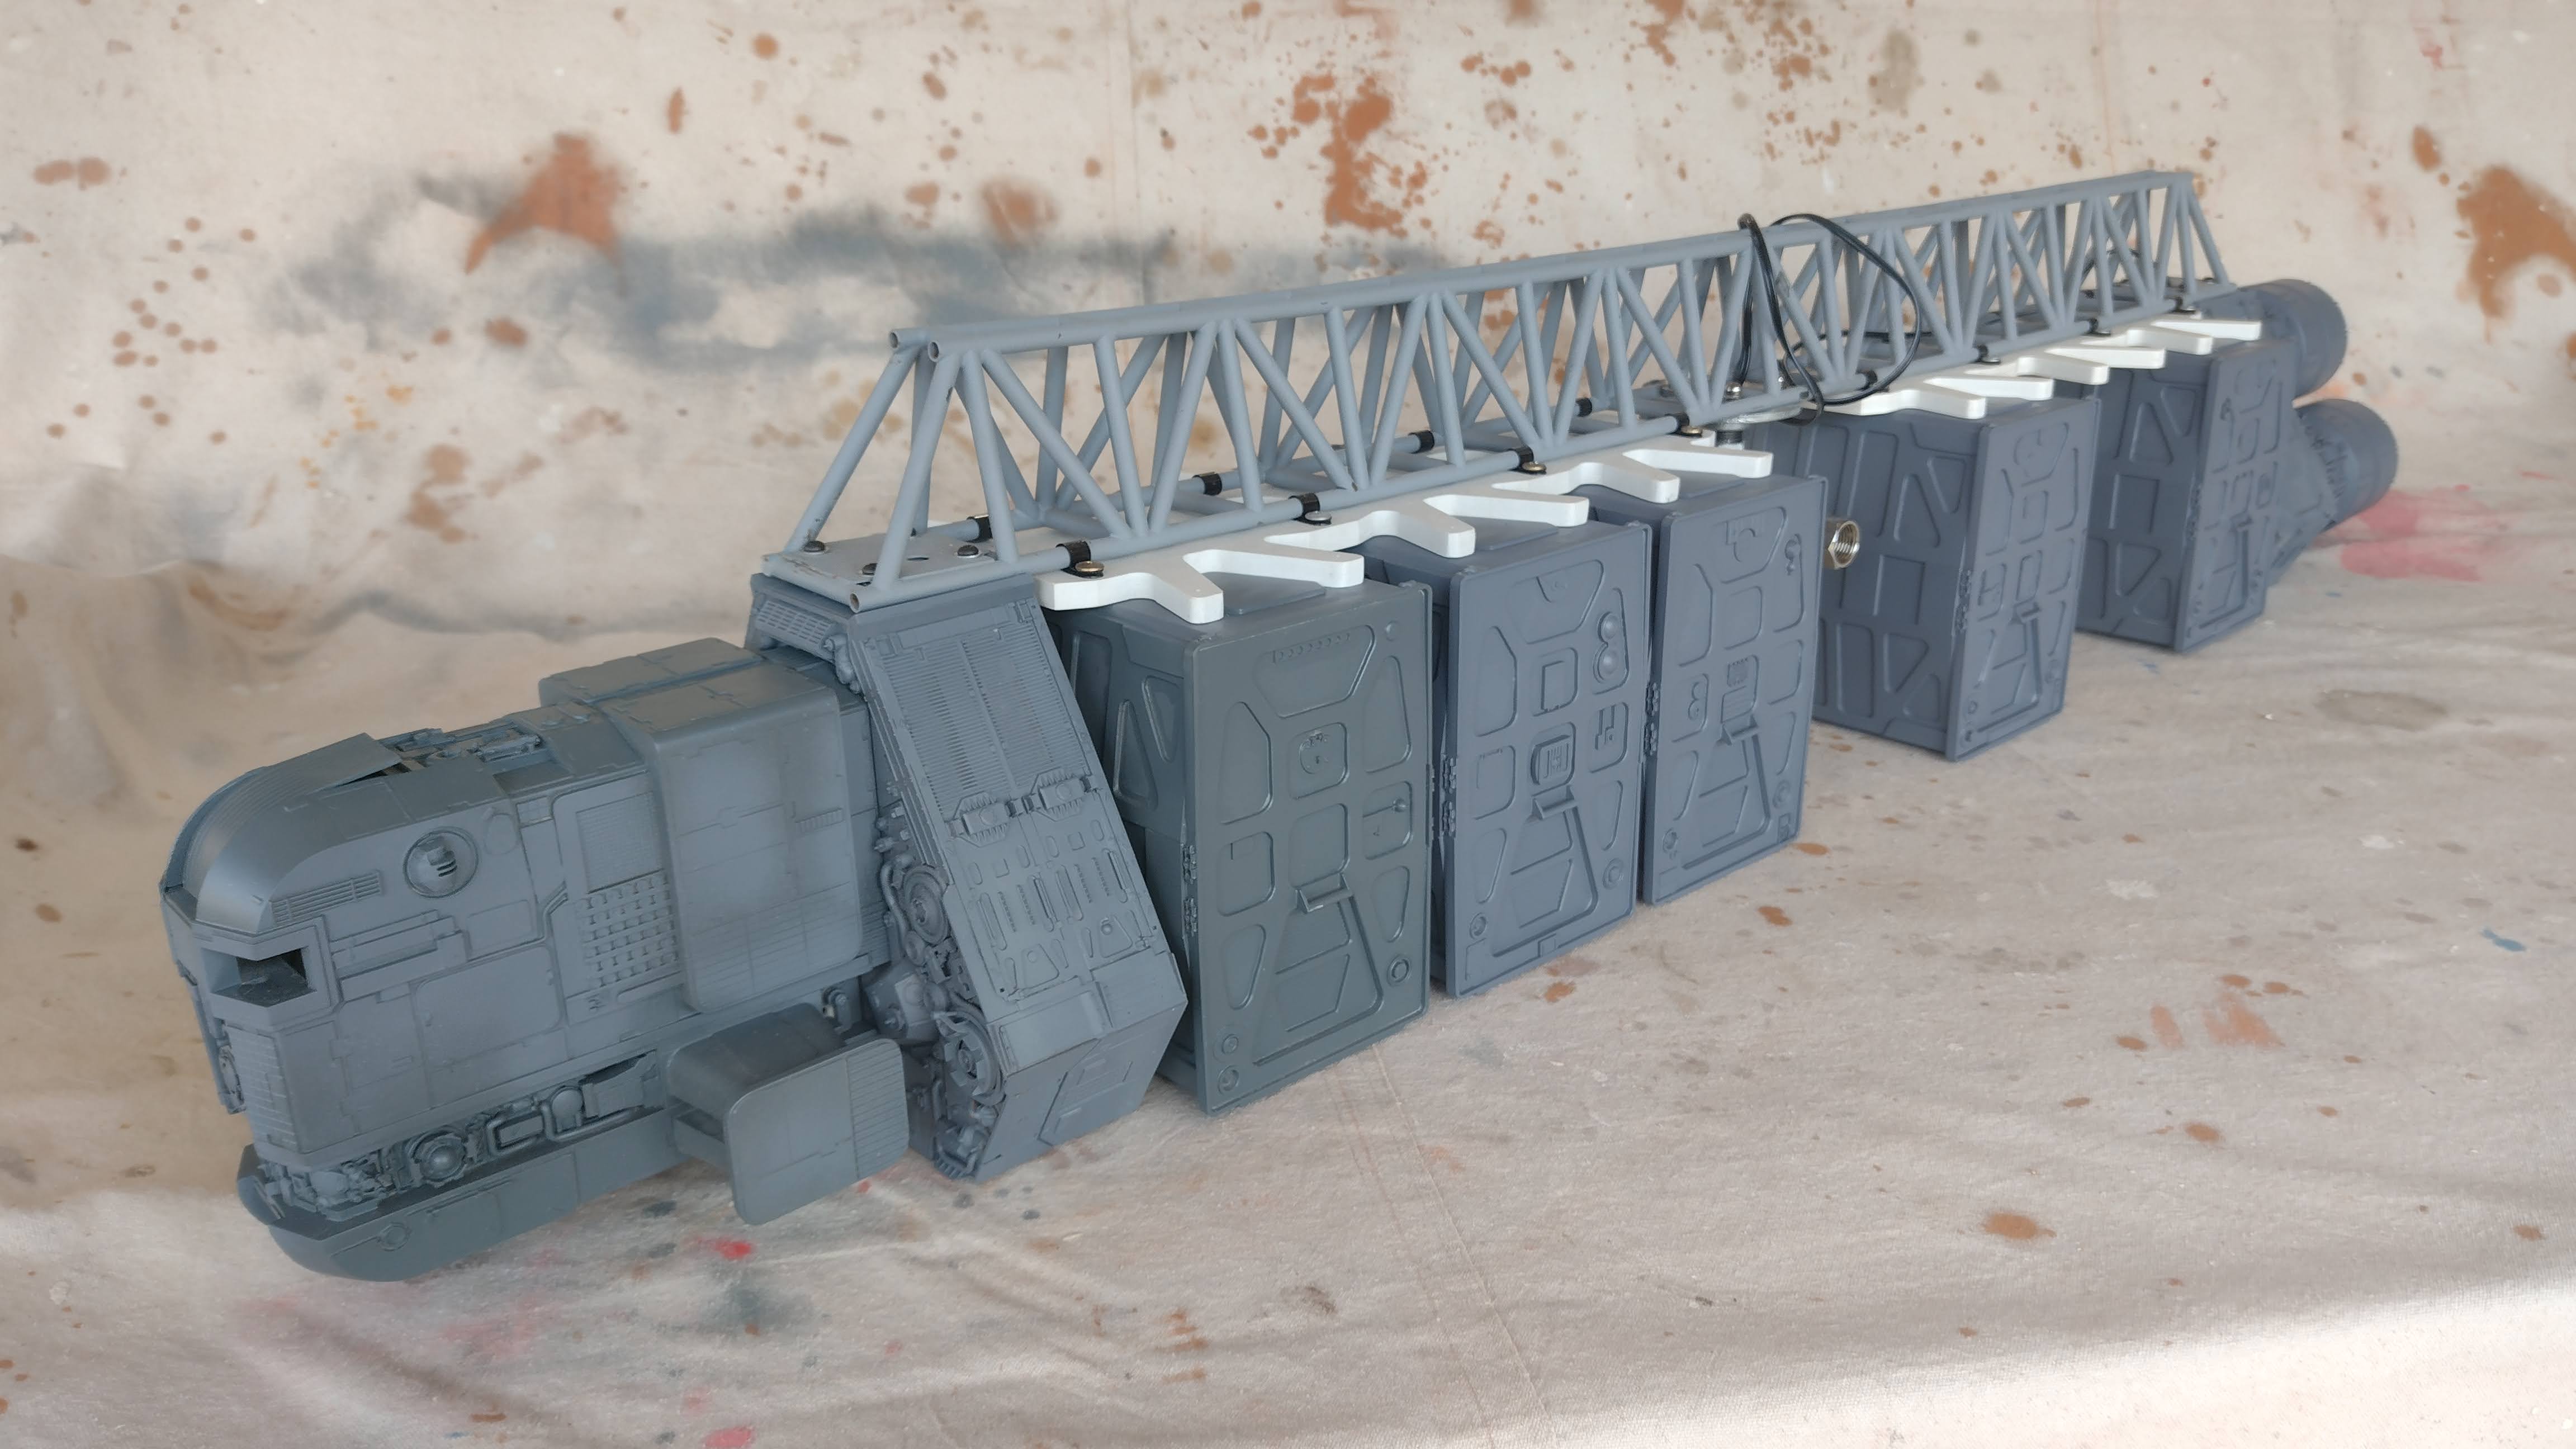
 I have completed the sixth and final container pod for the Container Spaceship project.

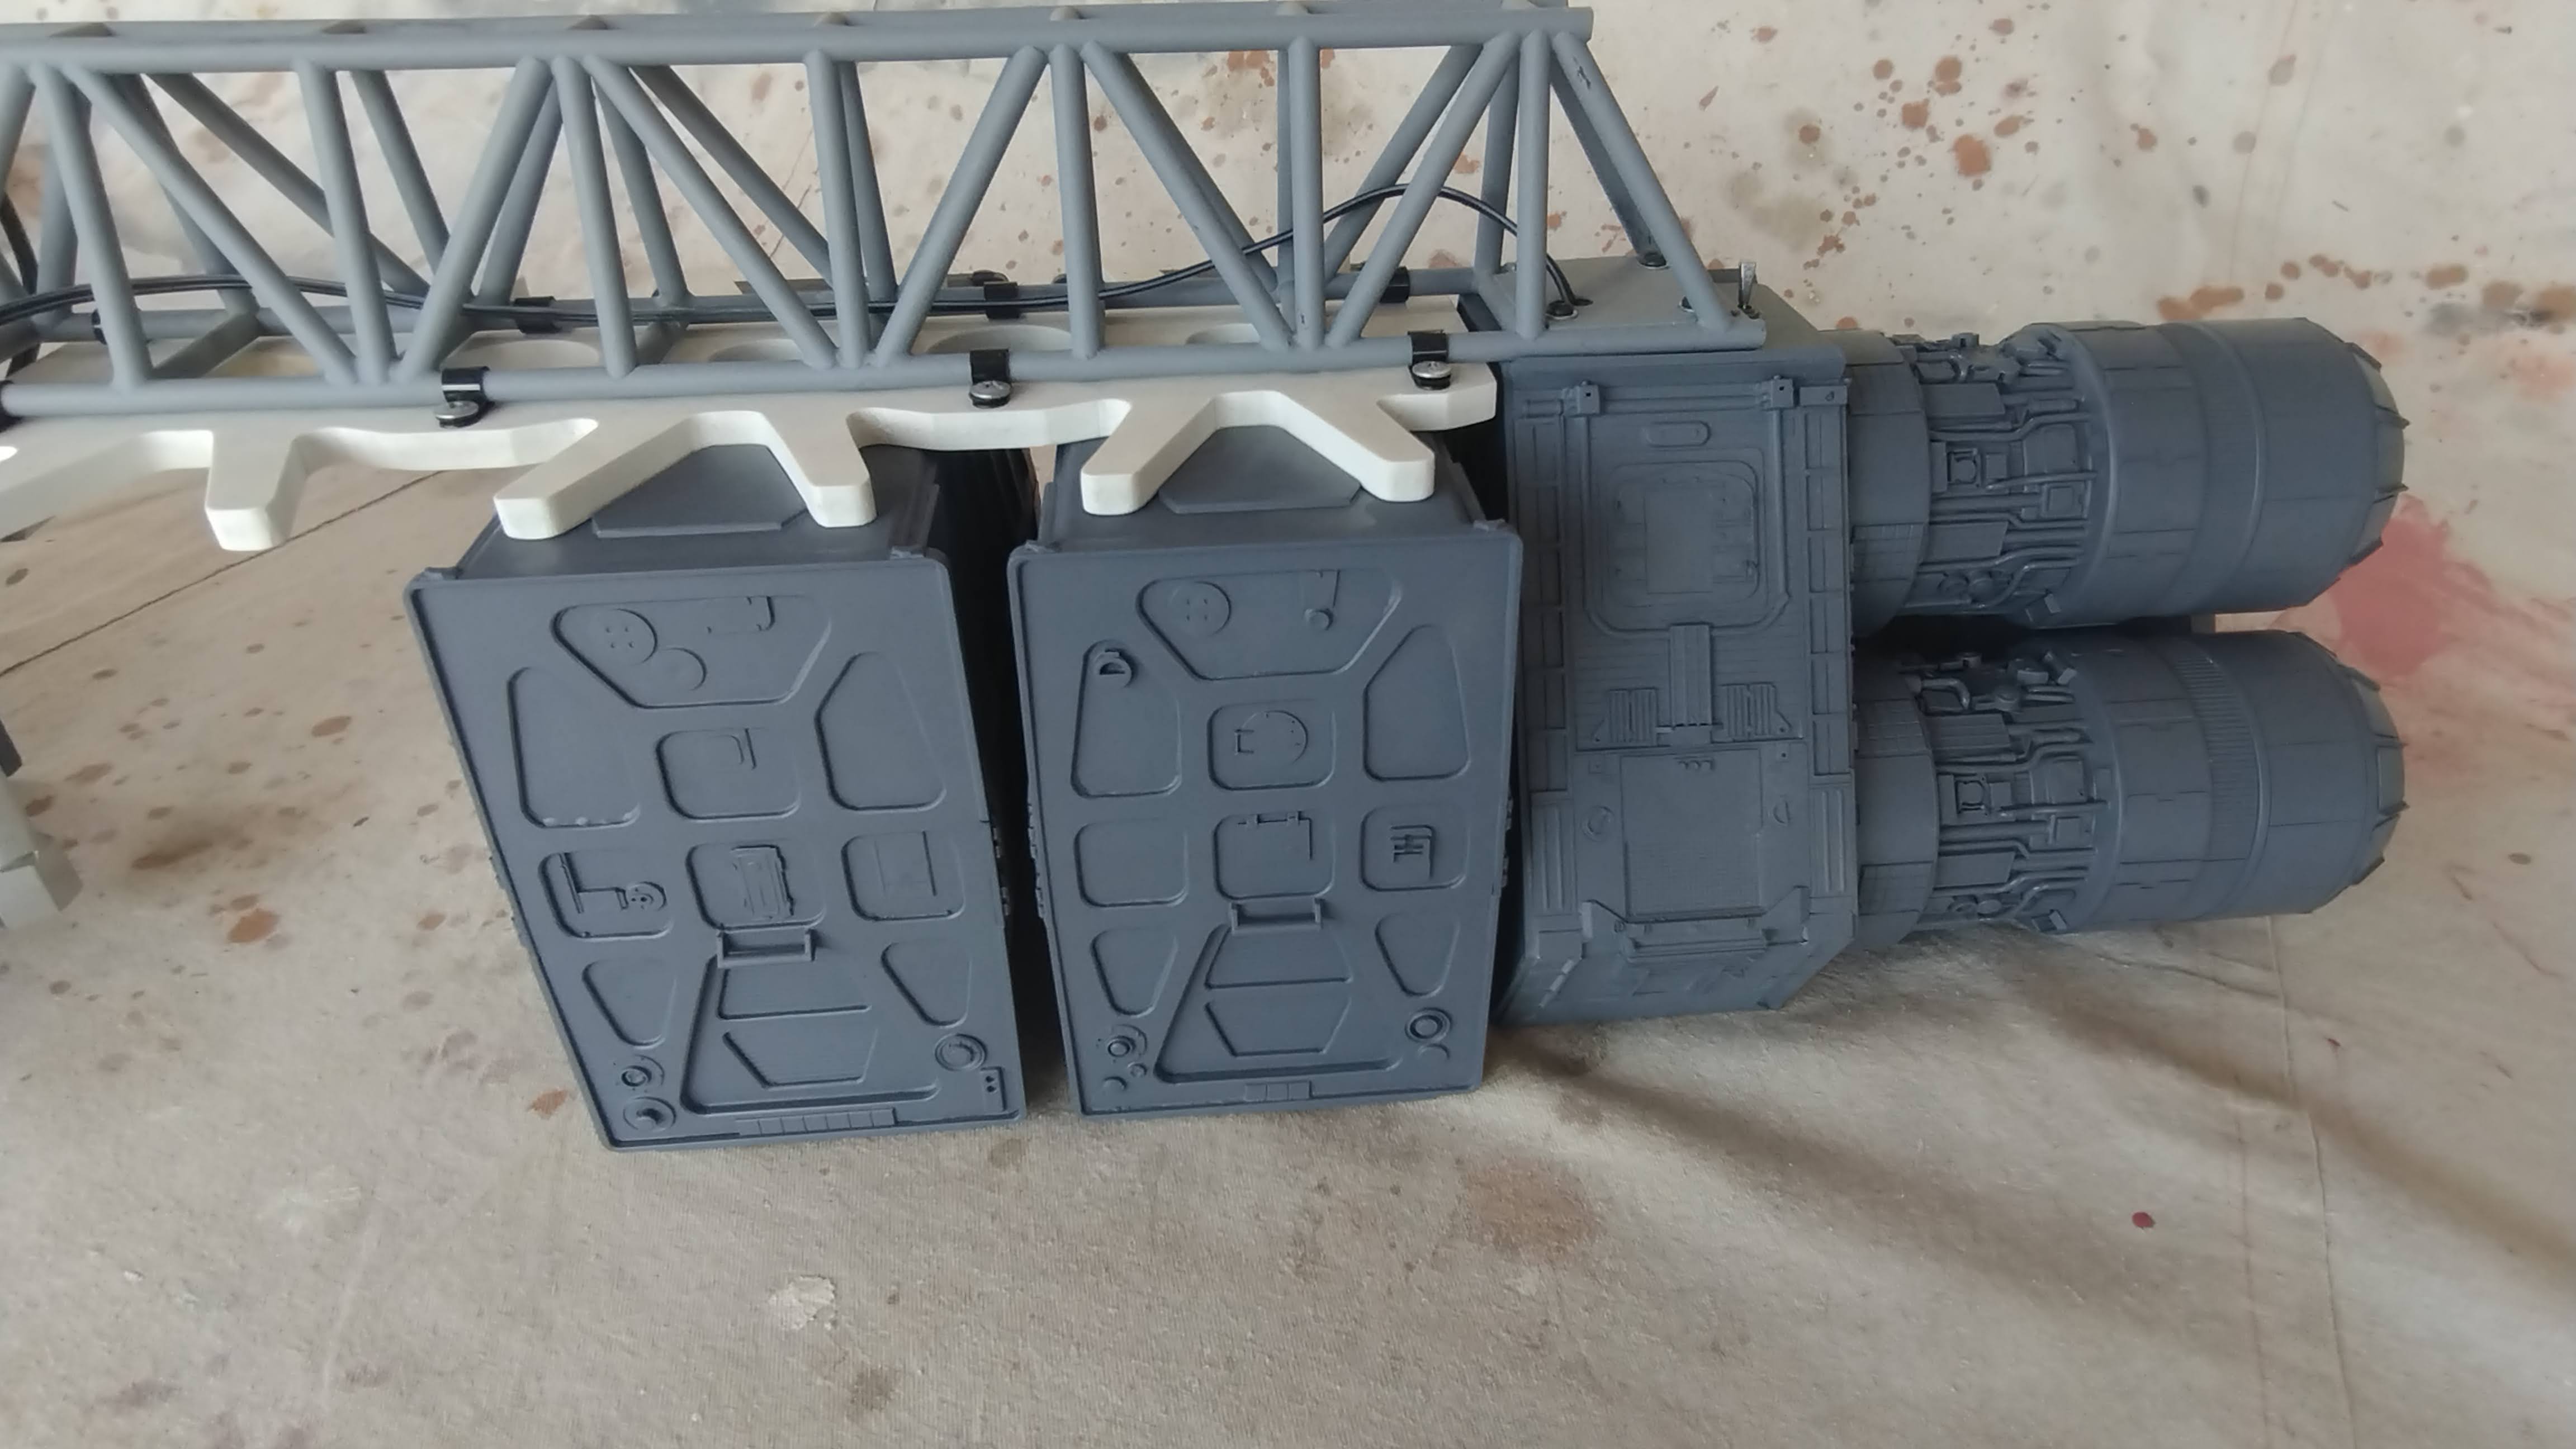
For a bit of variety and with a nod to the Hunter Gratzner spaceship from the movie Pitch Black I made a double decker storage tank pod. The profile echoes the shape of the existing containers.


Some of my scruffy thumbnails coming up with a design for the tank pod.

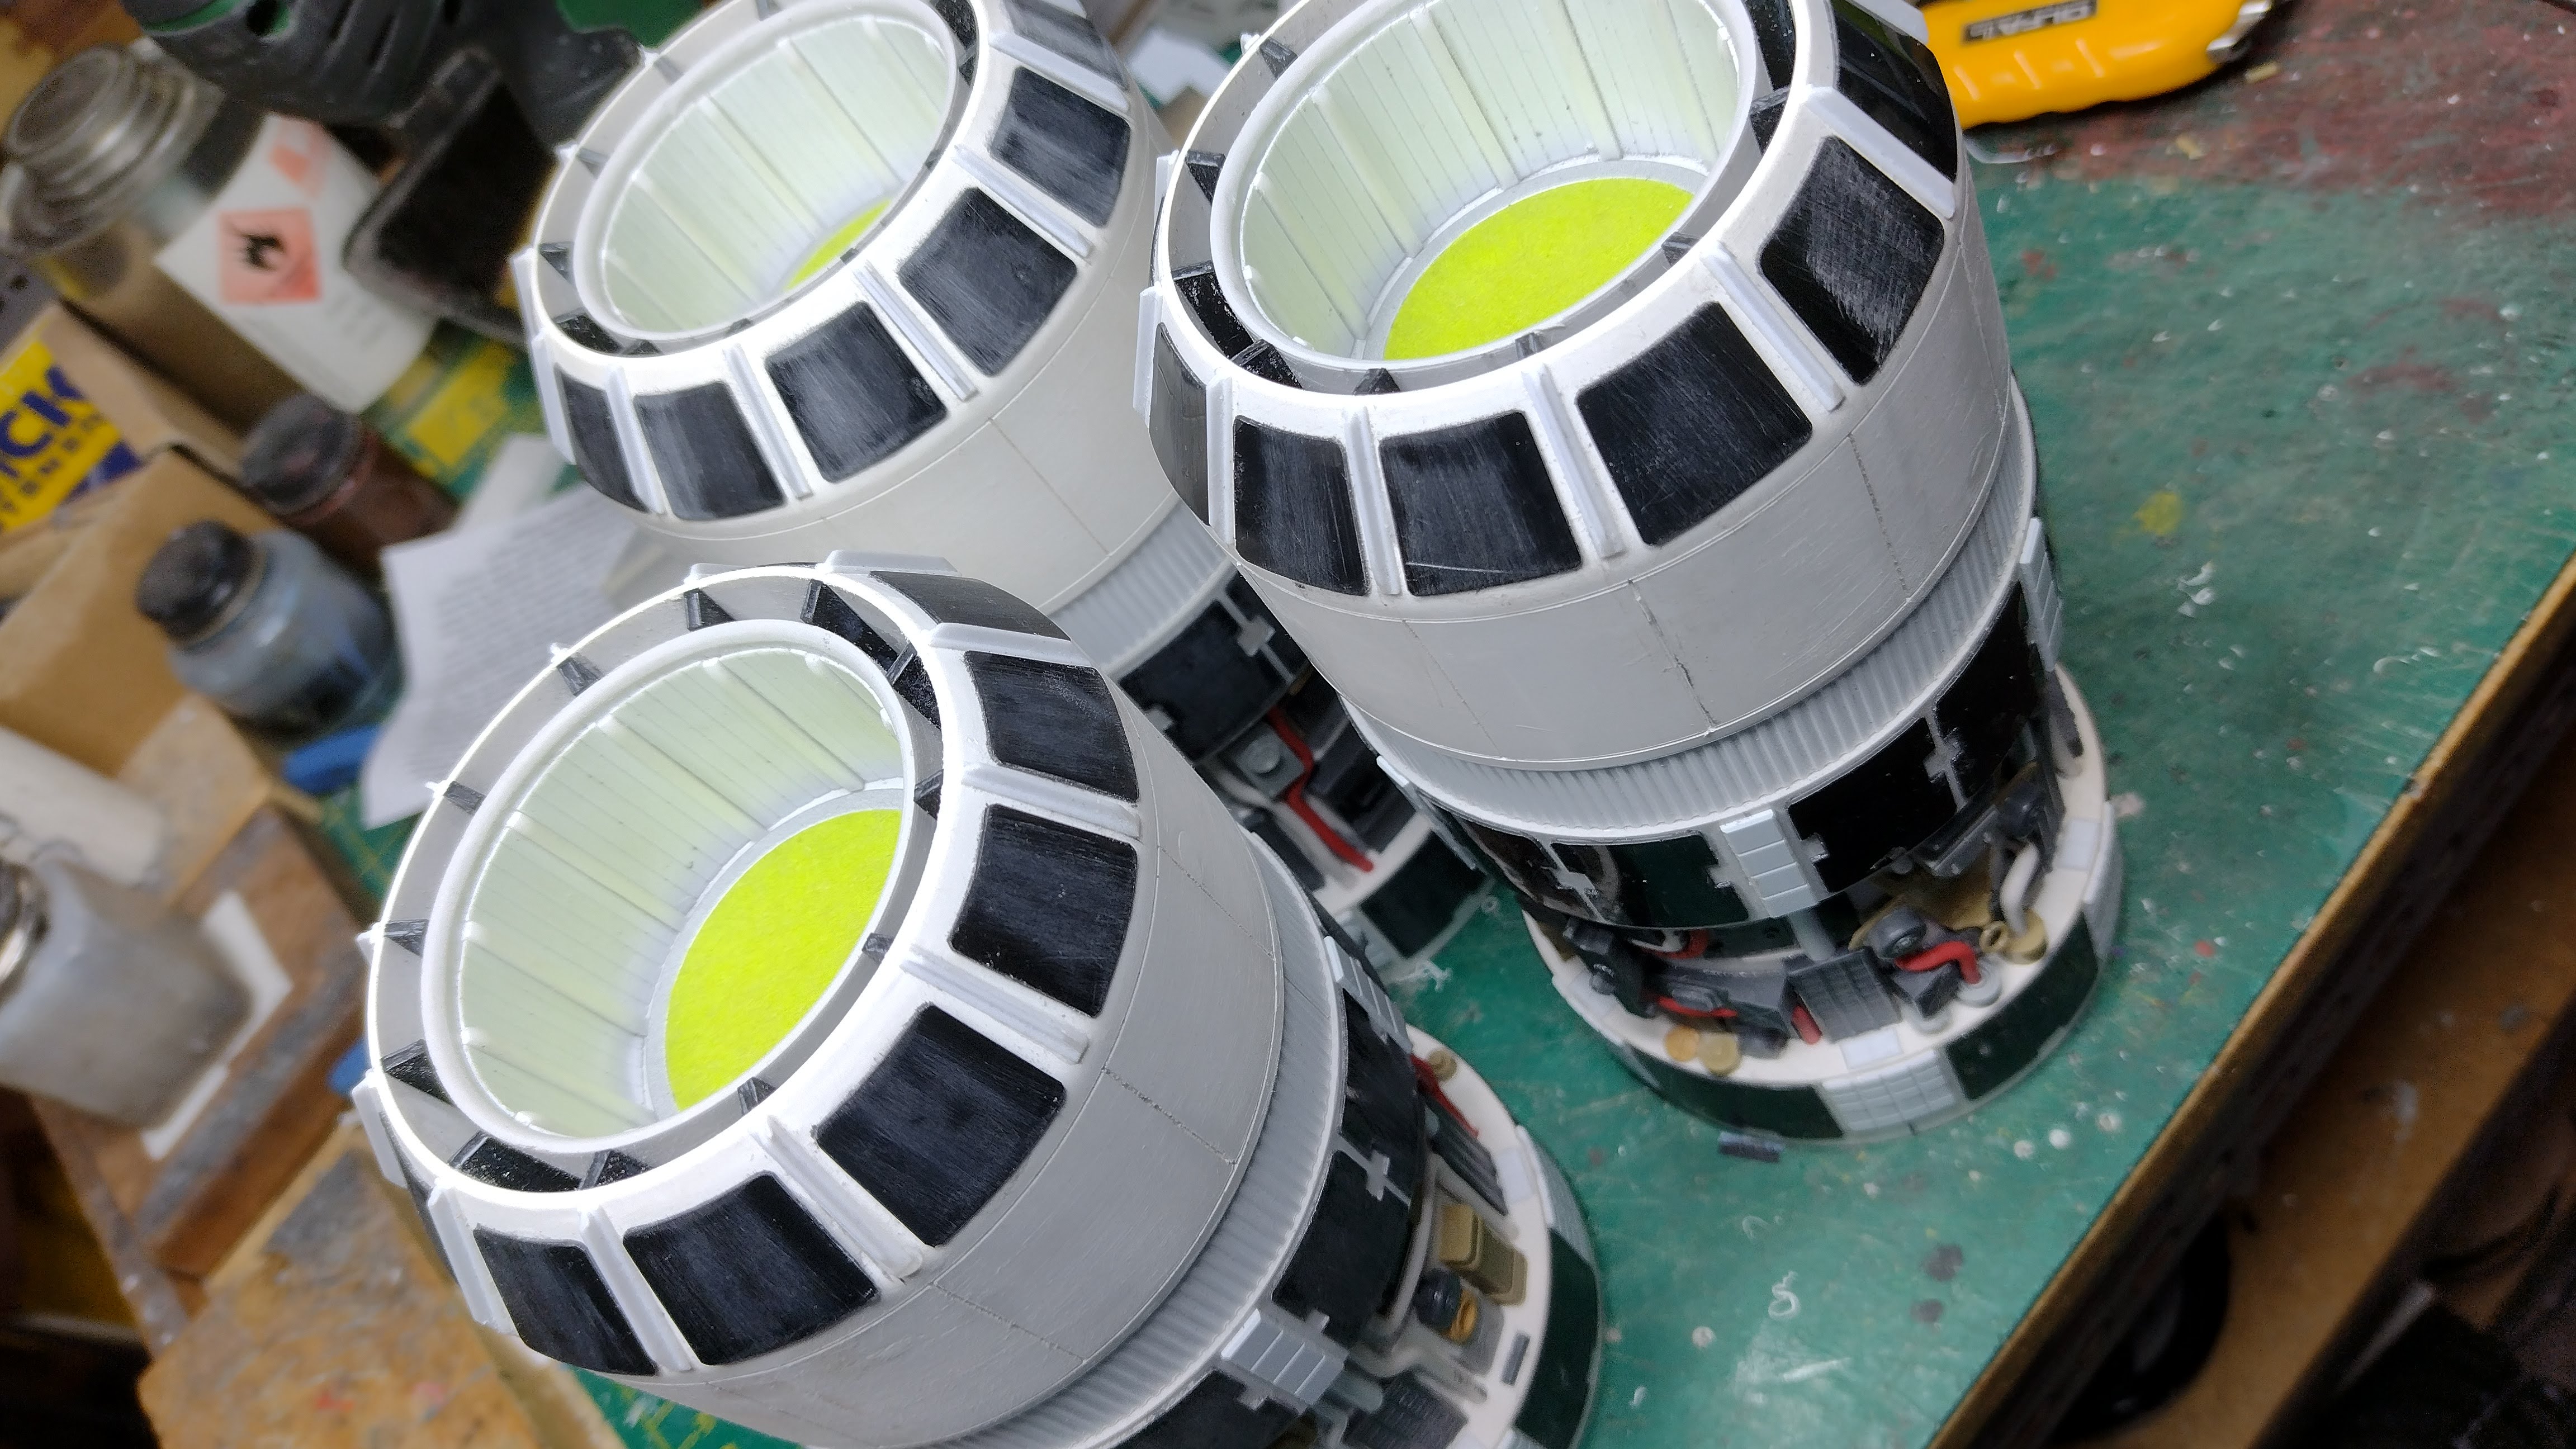
The tanks are  two lengths of 75mm PVC pipe with heat formed 2mm styrene elliptical vessel heads at each end. I first made a buck from 10mm foamed PVC by spinning it on my mini lathe with a long M5 bolt, washers and nut as a mandrel. It was shaped with a sanding stick and then skinned with thin super glue wiped on using a disposable rubber glove as it slowly rotated on the lathe. This skin was then fine sanded and re-applied and fine sanded again.


 The dome shape was then stuck to a circle of 6mm foamed PVC to increase the height and then stuck to a base of scrap plywood. The diameter was made to be about 3mm less than the OD of the PVC tank tubes to allow for the thickness of the 2mm styrene when heated and stretched over the buck.

Another piece of scrap 9mm plywood with a roughly 75mm diameter hole was used as a support for the 2mm styrene while heating withe a heat gun and pressing over the form when soft. To adhere the styrene blank to the plywood I used drops of  thick super glue which as I only needed 4 caps worked fine the fewer drops the better for removing it once cooled.


 Styrene when heated will initially start to warp and wrinkle slightly before it then tightens back up and appears rubbery when wiggled or tapped. The rubbery phase is when the heat is removed and you push the styrene over the buck so it is pressed up through the hole and let it cool.

The first one I tried was 1.5mm ABS and it just bubbled and sagged straight away so I switched to the 2mm styrene and they all came out well. Each cap was cut off using a flush cut Zona saw and the edge squared off on a flat sanding board. They were then superglued to  each end of the PVC tubes.


The rest of the structural formers of the pod were designed on Libre CAD and printed out full size on paper and stuck onto 2mm styrene for cutting out, first drilling out all the corner radii with a step drill.

They were assembled with 2mm thick 8mm wide styrene cross members and 1mm x 8mm styrene strip edging.


The detailing panel comprised some reject resin printed parts I was given and a part from a disposable camera along with some random kit parts. The Universal Greeblies on the end of the tanks were part of the reject 3D printed parts and are probably at least 5 times the diameter of the kit parts from the 1/72 Hasegawa Leopold kit.


It was sprayed with primer grey to check the final result of the construction. It has the same 4 magnets as the rest of the containers so it can be clipped into any of the 6 positions under the hanging deck.


Thanks for looking.

More soon...


Wednesday 20 April 2022

Pocket Rocket part 2

 I found a 1/20 scale figure on ebay that I thought might be a good candidate for a pilot for the Pocket Rocket cockpit, with the bonus that he came with a helmet.


 Putting him next to the 1/20th MaK figure shows his cartoony proportions however I figured he would be easier to modify into a seated position.


I heated his knee area carefully and bent his legs down then sawed them off at the bottom of his jacket. The legs were then glued on to the front of his torso and fared in with some baking soda and thin superglue. He was then primed and painted, once again showcasing my poor figure painting skills. I added a small cushion of 2mm styrene so he sits at the right height in the cockpit.


Thanks for looking.

More soon...


Saturday 16 April 2022

Container Spaceship part 7

 I have finally completed the other four of the five box like containers for the Container Spaceship project.

I found that the screws in the containers did not stick to the magnets in the hanging deck sufficiently well so I got some more of the 8mm diameter rare earth magnets and mounted them flush with the top of the containers instead. The magnet to magnet bond is plenty strong enough to support the weight of the containers securely. 8mm holes were drilled into the tops of the index card holder the magnets inserted flush and then a mound of baking soda and thin superglue was applied to the inside. Once the magnets were secure the box could be assembled and glued up with each taking a full day to complete.


The model measures 1515mm long which is just under 60 inches or 5 foot.


 I am now working on the sixth and final pod which is a tank pod for a bit of variety.

Still to do as far as construction goes, is the cabin interior, central housing that hides the model support and the power connectors and detailing the hanging deck.

Thanks for looking.

More soon...

Friday 1 April 2022

Container Spaceship part 6

 I have finished detailing the engines for the Container Spaceship project. 


The panels on the tapered part of the nozzle were cut after making a pattern from masking tape. The masking tape was applied over the tapered section and the a pencil line was marked on the edge. This was then carefully peeled off and applied to some 0.5mm styrene sheet and then the curve was cut. I used a pair of dividers to mark a second curve marking out the width of the cutout.

I also made a small set square with the matching curved guide to cut them to length with the correct radial angle. The panels were then pre-curved around a small dowel and stuck to the PVC with thick super glue. Both surfaces were sanded first to provide a good key for the adhesive.


The Engines have been sprayed with grey primer and permanently fixed to the rear engine module.


 The nozzles are a push fit so they can be removed to access the connectors for the engine lights.

Thanks for looking.

More soon...


Most Popular Posts in the Last 7 Days