Part 1
I am astounded that it has been over a year since I did the first part on this project.
I have done a bit of detailing work on the very top and bottom of the ship. The two central round shapes marked top and bot are removable caps that hide the mounting points and are yet to be detailed.
I have also been working on the cockpit and led lighting as well as starting some of the panel work. The main effort in paneling has been at the front and I needed the cockpit to figure out where the windows should sit. The panels are cut from the 1mm styrene I formed around the clear plastic crayola dome halves, as described in part 1. It varies in thickness depending on how much stretching of the plastic sheet has taken place.
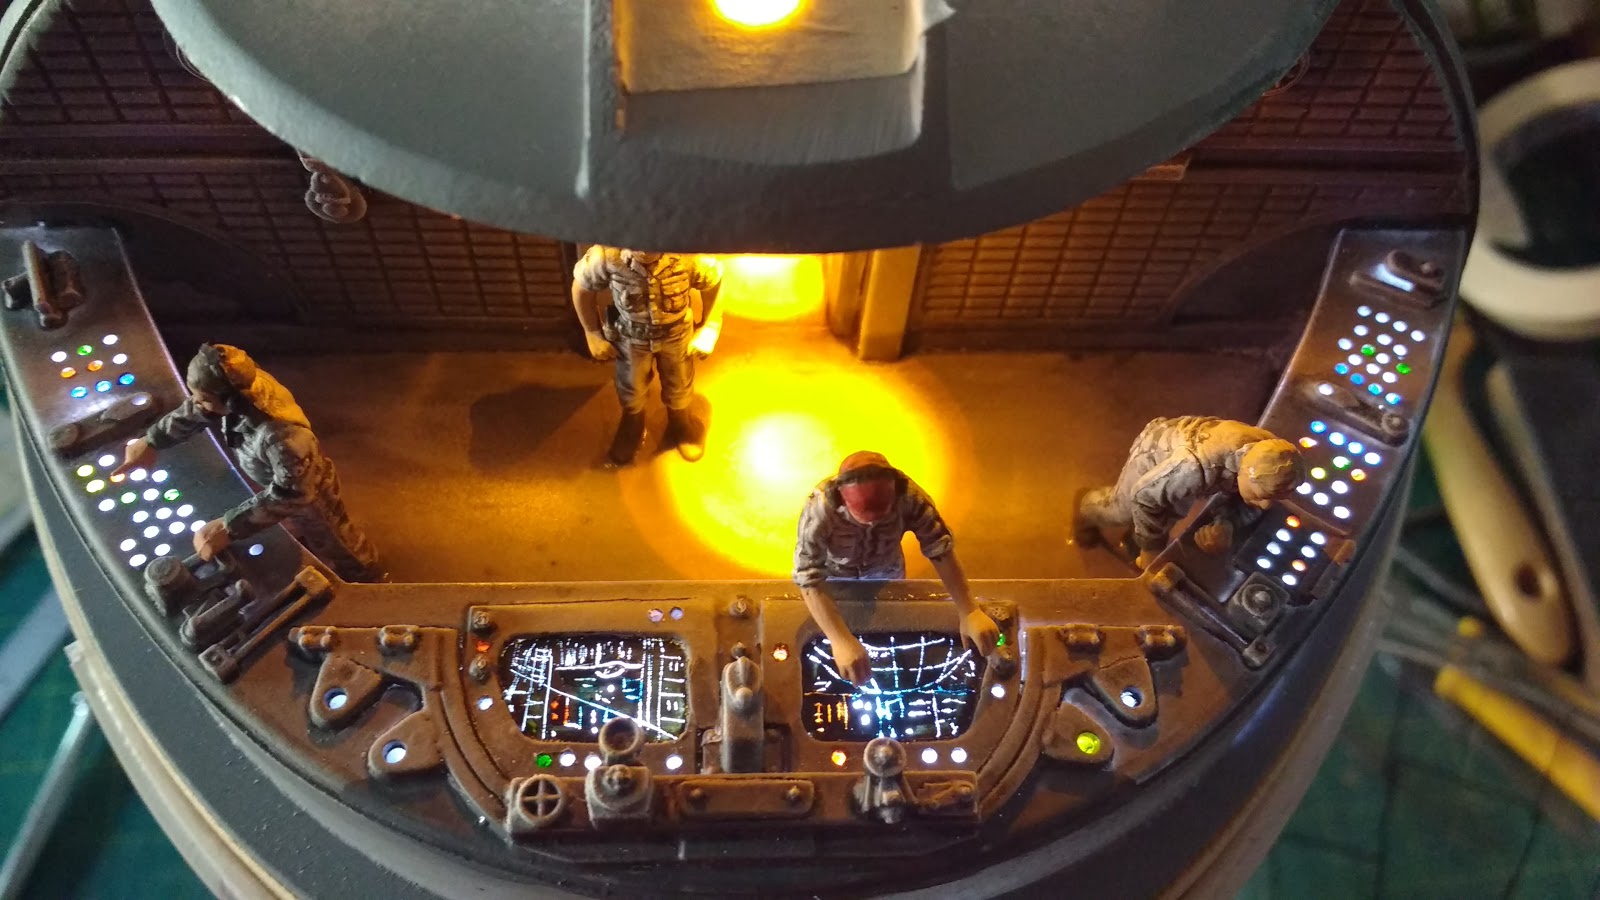
The cockpit is made from 2mm and 1mm styrene sheet. The console top is made from one of the clear panels that come in the crayola domes. It is backlit by four white leds that have a voltage drop of 3 volts each and so don't need a resistor on 12volts DC that is being supplied from an old computer power supply, modded as per the instructions on one of the many you tube videos which describe the process.
The room lighting is by 4 amber leds with a 240 Ohm resistor preceding in series for the 12 volt supply as they only drop 2 volts each. Below you can see the rough test of the lighting with the front top dome half in position. This will be removable for access and is held on with 5 screws as described in
part 1.
Detailing of the cockpit interior has been completed. One of the more interesting features is the textured back wall made from a disassembled VHS video cassette shell which has been cut up.
I filled a green wheely bin with old VHS tapes that I had lovingly collected over the years filled with rare monster, sci fi and VFX documentary films. I have not had a working VHS machine for over 6 years so I figured it was time to get rid of them,
keeping some of the shells with the most interesting textured patterns for just such a use.
Below you can see the 1/48 deck crew figures temporarily placed in position.
After painting with a few coats of grey primer and weathered in my usual way I removed dots of the paint with a 1mm drill so the light from the white leds shine through revealing panel lights. Various dabs of Tamiya clear colours make the differing hues. The two central screens were painted with Tamiya flat black and when dry scratched away in a random fashion to suggest some sort of tech screens.
When the camera is lower, you get the full effects of the amber leds and that coupled with the two crew members that look like they are spinning some decks, makes for a decidedly club like atmosphere.
It looks like there is some serious Doof going on in there.
More soon...