
I obtained some more Hasegawa 1/48 deck crew figures. A couple of the standing ones went into the Merchant Vessel project while I saved the seated figures for this project. They were glued to some seats out of a 1/35 scale military vehicle kit. the seats were mounted on bases made from some styrene tube and some parts from my small round parts box.

The cockpit was wired up with LEDs and the detailing finished. I then sprayed on some grey primer and when that was dry went over it with my usual heavily diluted Tamiya flat black poo juice, followed up by dry brushing with students white acrylic.


The figures were then glued into position and the lighting tested.


Most of the effort on the cockpit interior will be very hard to see once the cockpit exterior is affixed in place. The clear windows from the donor kit produce quite a lot of optical distortion when attempting to look through them.
While on the subject of lighting I managed to retrofit some of the same LED cob lights I used on the Merchant Vessel project into the engines of this project. When I started this model originally in the 1990's I made no provision for lighting or for that matter a model support. I was worried that the acrylic tap handles used as the engine nozzles, might crack apart while drilling them and the acrylic cup they are glued to as the acrylic is very brittle. Fortunately the drilling was successful and I then drilled a small hole down through the engine bells into the bulkhead they are attached to with a long series drill. This allowed me to feed a wire down which could then be used to pull the wires from the engine lights down the full length of the rear hull.
I also added a hatch and docking ring to each side.
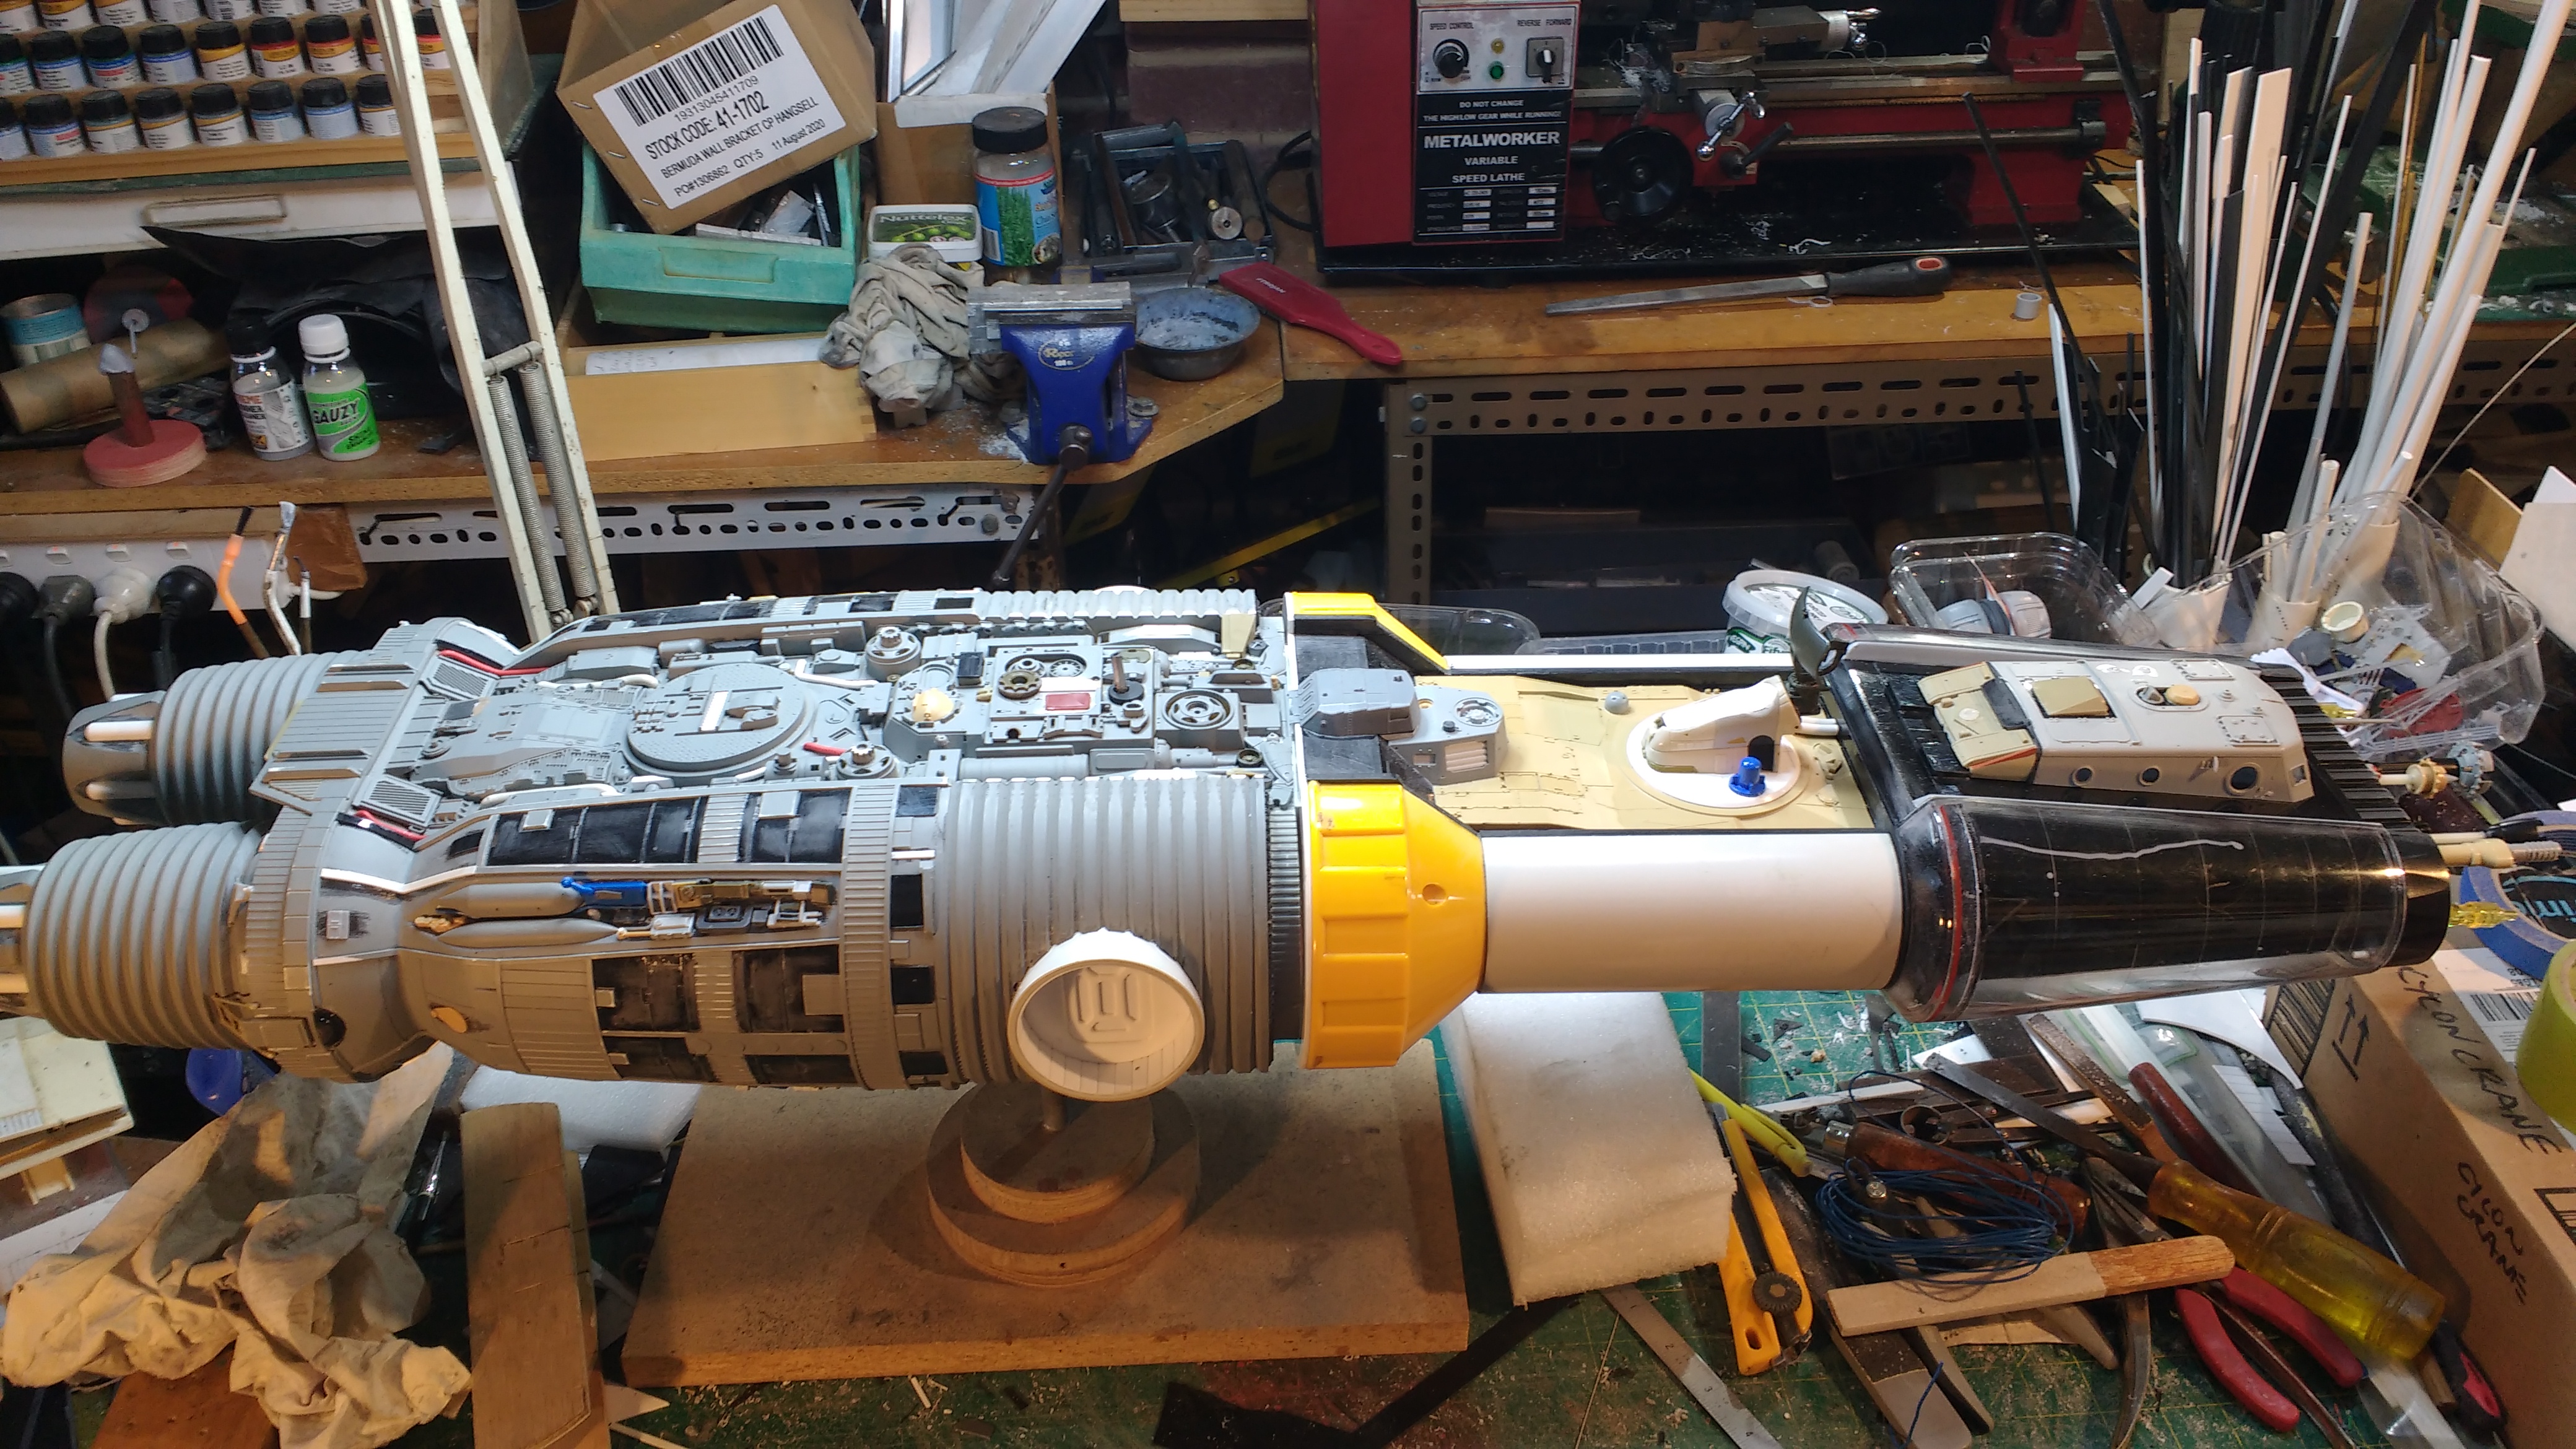
The rear end of the model is now structurally and surface details complete. I added more kit parts, 0.5 mm styrene panels and solid single core wire piping. In the following photos everything that is not primer grey has been recently added. The front section from the yellow bit forward is yet to be permanently attached and is still removable to make working on it easier.
The next step for the back end will be to spray grey primer.


The front section surface paneling is the next task.
Thanks for looking.
More soon...


No comments:
Post a Comment