
True to form, with many unfinished projects on hand begging for completion, I started a new project. In fact I have outdone myself this time, starting another new project on top of that new project and it is the second new project that is the subject of this post.
I came up with an idea to use the second abandoned front end of the "unfinished old spaceship" that has since become the Science Vessel. Below are a couple of pictures of that abandoned front end.


It was made from a cheap disposable salad bowl found in the supermarket. The bowl was cut in half and cut down in height and glued back together with an extended scratch built section made from 6mm PVC foamex sheet bulkheads skinned with 1mm styrene.
As usual, while at work I had an idea of how to employ that abandoned shape and doodled a rough thumbnail of the concept on some scrap paper.


The vertical panels at the end of the "wings" were inspired by the fact that I had a couple of Object279 1/35 scale tank hulls on hand which I thought would be ideal. I picked up one of these Amusing Hobby kits quite cheaply a few years ago at a model show and was always on the lookout for another one at a price I could afford. It was a couple of years later, that finally this year 2021, at the same model show (which was cancelled last year due to Covid) I stumbled across another one at an affordable price.
The next part of the process was to take the thumbnail concept and rough out the proportions on the computer in 3D. I generally only do this if most of the shape is going to be scratch built. If the model is predominantly going to be made of found objects this step is not necessary as you can physically lay out the parts in front of you taping them temporarily together and see roughly how it will look.


In the computer I build roughly to scale with each of the major divisions on the grid 100mm long and each subdivision 10mm. You can see that the model will be roughly 650mm long. Divide that 650 by 25.4 to get inches, so roughly 2 feet 1.5 inches. I then scale all the views in the computer so the grid lines are all the same size, screen capture each top, side and end views and print them out. Measuring the grid on the print out and comparing it to the 100mm divisions then gives me the scale to multiply the measurements from the drawing to then mark out the bulkheads on the 6mm PVC foamex sheet I am making them from.

For this model I decided to use a flat 19mm (3/4") piece of pine wood for a spine that the bulkheads would be attached to as well as the 15mm (1/2") water pipe flange I use as a strong model support.
Each of the bulkheads had a 19mm slot cut out centrally so they could be slid to the correct position a secured with super glue. There is a flange mounted on a 9mm plywood spacer top and bottom of the wooden spine with bolts. To locate that existing front end I glued in a PVC fitting that mates with the 32mm PVC pipe that goes through the front end bulkheads. You can also see I have started laying out the the wiring for the 12v DC power connectors and cockpit and engine lighting.


Below you can see one of the DC power connectors mounted to the 2mm styrene skin panel. The pictures below that show the installation of a switch on the under side that allow the engine lights to be switched off separate from the cockpit lighting. This switch will be buried amongst a load of detailing in a trench so will be reasonably hidden.


The next area to be tackled was coming up with something for the engines. The thumbnail and the rough CG model deliberately leave this area pretty vague as I was pretty confident that a rummage through my shapes stash would provide something suitable. The picture below show the result of combining several shapes I had on hand.

From right to left the parts comprise a childrens torch with its handle sawed off, in this case a Barbie version. This is then attached to a disc of 2mm styrene glued to a yellow wheel half from a Wall-E truck toy, followed by some PVC tube, a half wheel form a babies toy and then a PVC pipe vent as an engine nozzle.

The second engine is identical except in this case the torch was a Bananas in Pajamas version of the same design. Both the torches came from a charity store. I always try to obtain duplicates of interesting shapes made from the right sort of plastic as it is always handy to have at least two of everything.


Here are the engines just loosely placed on the rear end bulkhead.

The engine lighting is provided by these 12volt cob LED lights I found on ebay. I originally got these for RC vehicle headlights but they were a convenient size for this project. They have a threaded stem with a nut so a hole was drilled through the PVC vent nozzle and also the babies toy wheel to secure them in place along with some super glue. The lights also sit on a similarly drilled model truck kit wheel inside the nozzle to space them out a bit and for a bit of extra detail.


The torches have a cut away section where the handle was and the gap between them was filled with a 2mm styrene box that will get heavily detailed.


The concept for this ship features some heavily detailed recessed sections that are only hinted at in the pencil thumbnail. The rest of the ship has a skin that slightly overlaps these recessed sections so I decided to detail up these areas before overlaying the outer skin parts. I also reasoned it will be easier to get paint in there before the overlapping skins go on.
First up I skinned the recessed sections and then went to town on the application of the nurnies, the bit I enjoy the most, starting with the underside.


I then flipped the model over on its mount and started detailing the top surface as well as adding some preliminary bits to the engines. The olive green round part is a plug that uses a bit of PVC conduit inside that fits into the pipe thread of the mounting flange to hide the mounting hole. It can be swapped to the opposite hole when changing mounting points.


I plugged in the front end and screwed on the vertical wing panels to get a rough idea of how it is coming together.


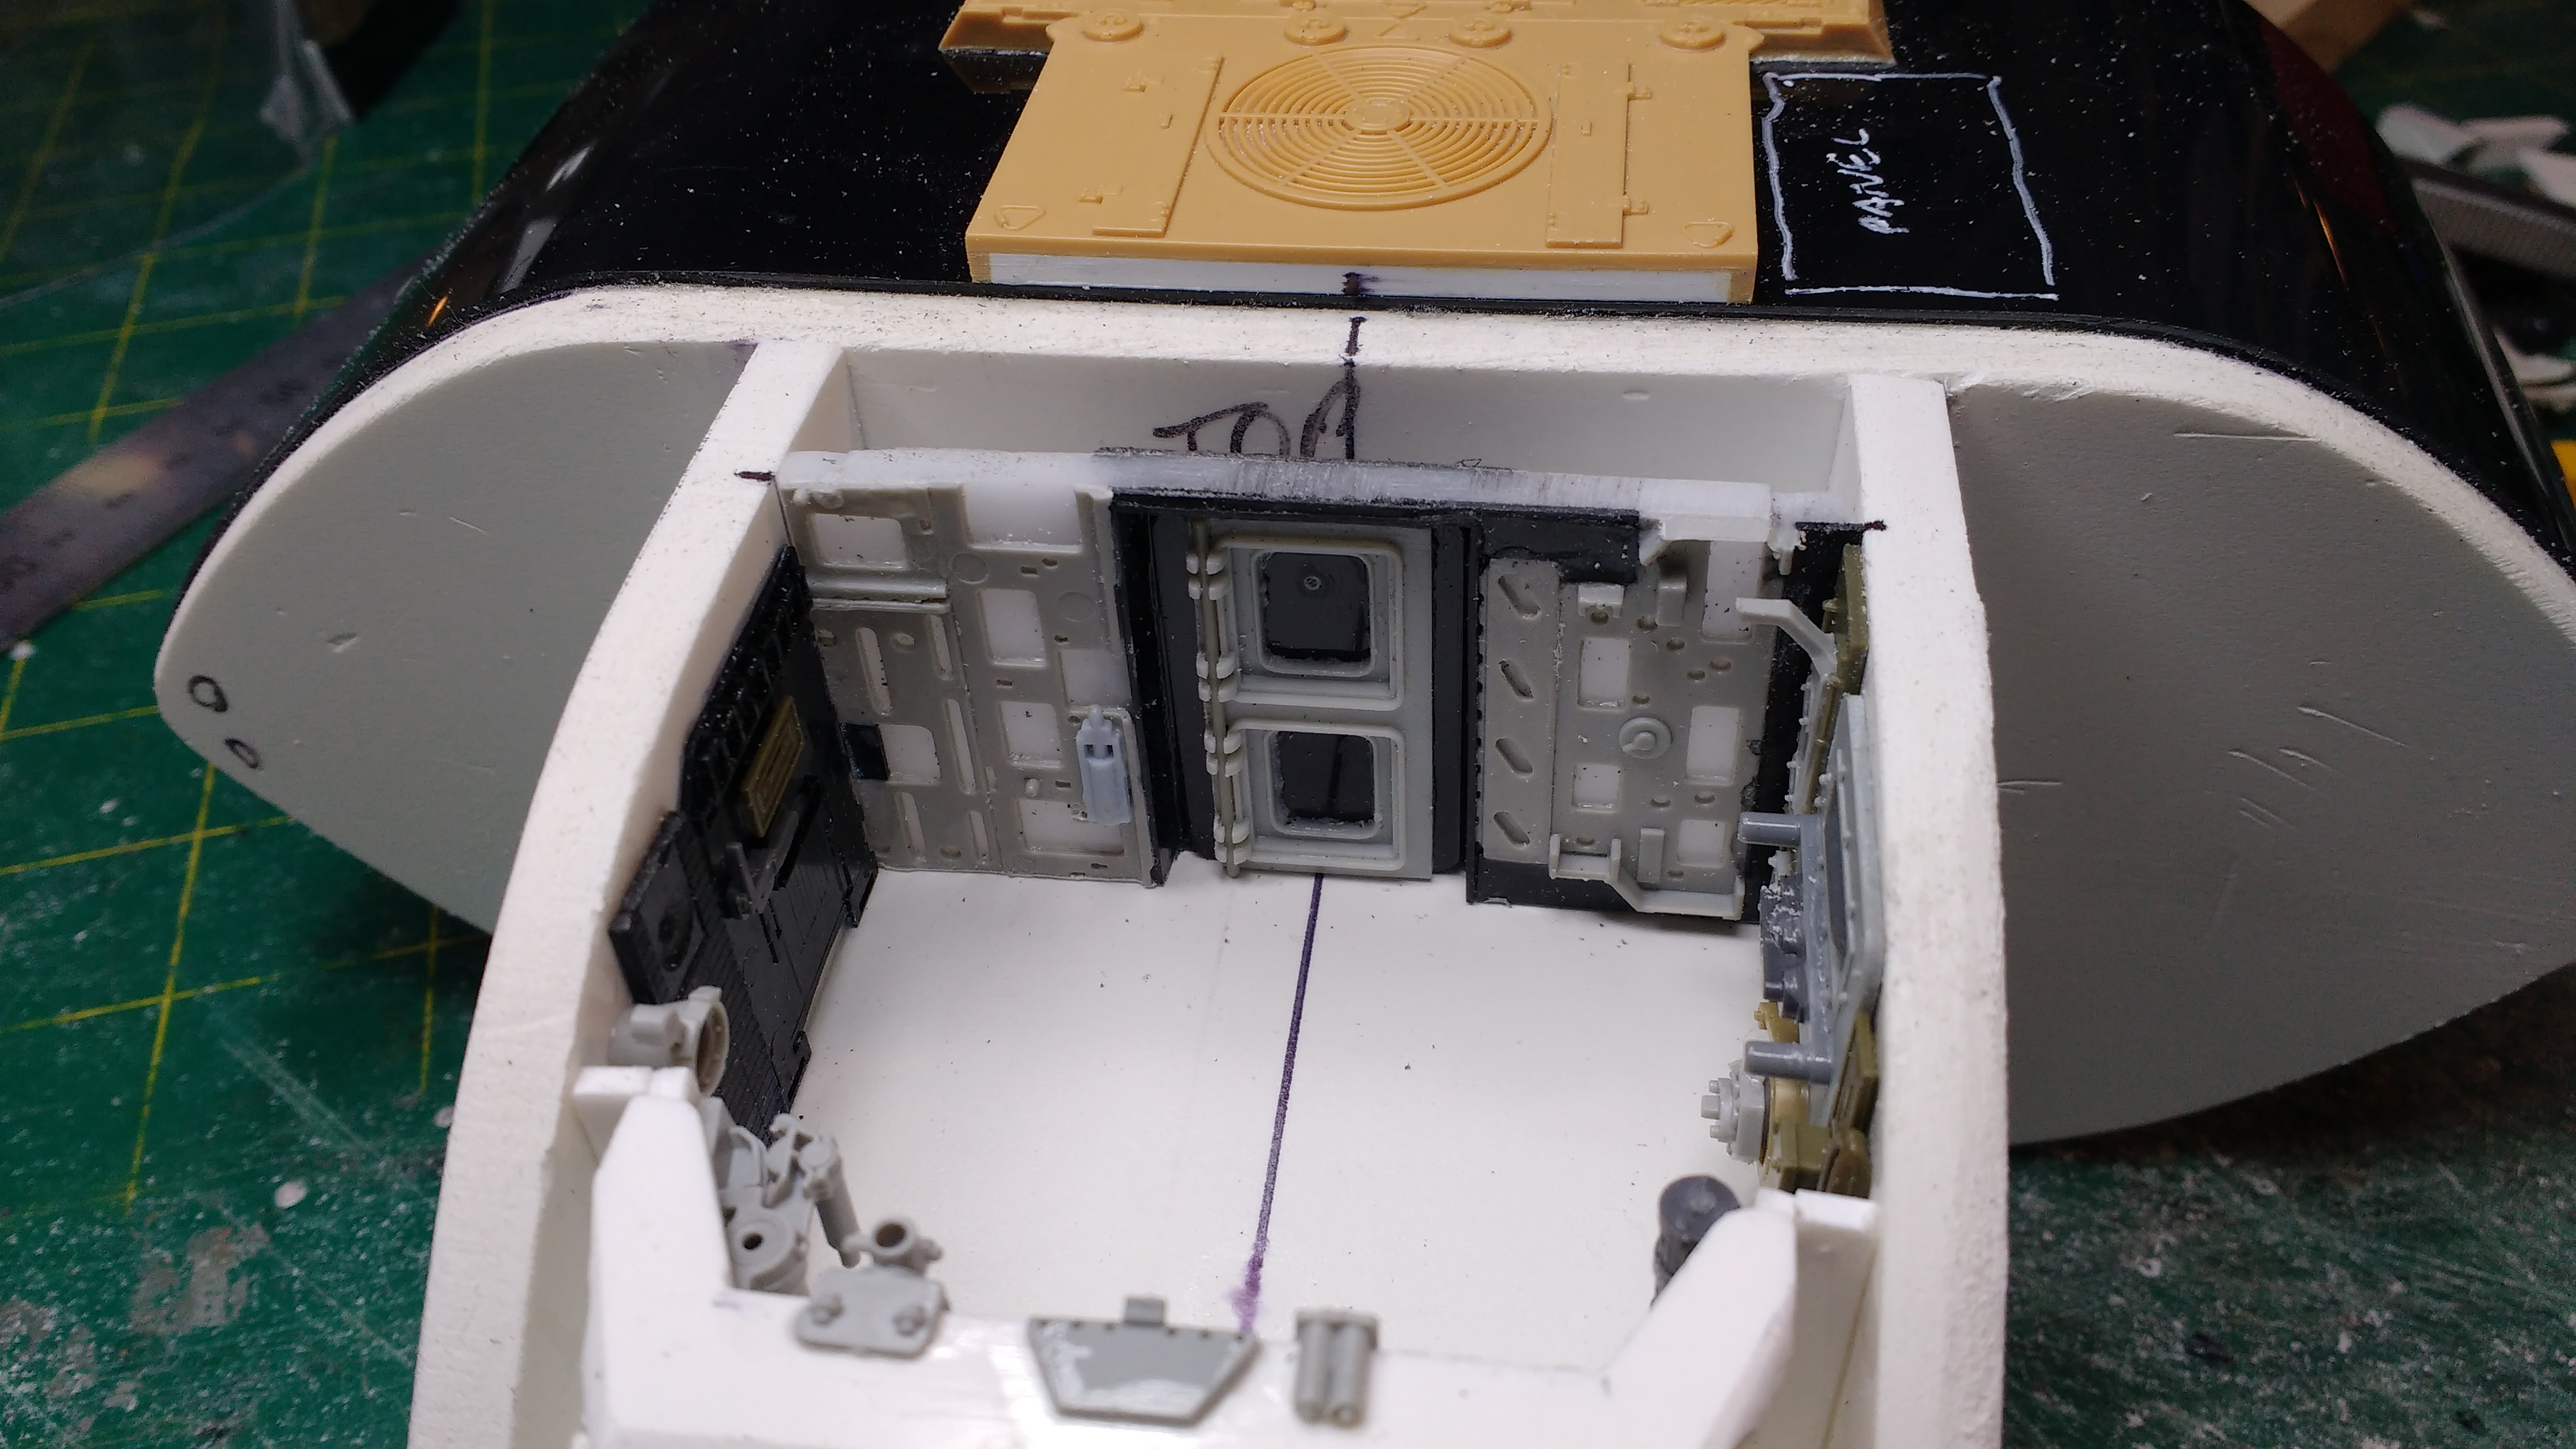
At this point I still felt the front end was a bit lacking and needed something extra. While contemplating the front end of the other new project (which will be covered in future installment) I dug out a 1/35 scale Japanese amoured vehicle kit I have had for a long time. It didn't really gel with the other project but it did seem to have potential for spicing up the front end on this one. With a renewed enthusiasm I started on building a cockpit interior that incorporated the hacked off vehicle kit exterior grafted onto the salad bowl arrangement.
I decided to make up a light cavity behind the rear wall and detail the rear wall with kit parts that had interesting shaped holes to let the light through. The kit parts were glued to a piece of opal perspex which will diffuse the light. Along with my usual practice I used a red a white and a blue LED on each side of the cavity. To mix it up a bit one side has the red at the top and the blue at the bottom and the other side the order is reversed. I found that adding a central white divider of styrene to separate the light box into two separate sides increased the light intensity a bit and kept the colours from each side mixing together. White LEDs are quite blue so when they mix with the light from the red LED you get a very pleasing magenta and the blue mixes with the white and makes a nice pale blue. You can see what I mean in the photos. All this is not particularly realistic but makes an interesting effect that works well for all you can see through the tiny cockpit windows.


I decided that the scale for this project was 1/48 and had some suitable figures I could use in the cockpit. They came from the Hasegawa 1/48 pilots and flight crew kit. I used a couple of the standing figures and modified them into a seated position as I already have the seated figures earmarked for the Science Vessel project. I made some simple seats from some heat bent 2mm styrene and evergreen strip.


In the front under the console I originally added three red LEDs to throw some light up on the faces of the figures but found this was too intense a mono-colour so left the centre LED red and swapped out the sides with a white which I found more pleasing. All the groups of three LEDs had the correct resistor added to the positive lead to run on 12 volts.


I then moved on to making up detail inserts to go inside the vertical wings, which is the hole the turret would normally occupy. These were made from the battery compartment of something, I forget what it was, they happened to be the right diameter. After I finished detailing them I realised they were too thick to get the tank hull sides to fit together so I cut 2mm from the lip and had to dremel half a millimetre from the back inside surface of the hull part that mounts to the wing. Eventually I got them to fit and glued the two halves together with the help of some wooden pegs and small spring clamps.


Below is the model to this point. You can see that I have grey primered the recessed detailed sections.


I am determined that this one will go through to completion. As enthusiasm on this project remains pretty high I have every reason to be confident, though I said exactly the same thing before on the Science Vessel. The difference being that on the Science Vessel project I was waiting for the figures to arrive to work on the cockpit so there was a natural break in the build process.
Thanks for looking.
More soon...


What Hull Kit piece did you use as the side wings?
ReplyDeleteThe vertical wings are from the Amusing Hobby 1/35 scale Object279 tank kit. The Object 279 was a Russian experimental tank that is a pretty wierd sci-fi looking thing. As soon as I looked in the kit box I figured it would be perfect for a spaceship, I just needed to get another one at a price i could afford. The quest for the second one took a few years until I found one at a decent price. Thanks for asking.
ReplyDelete