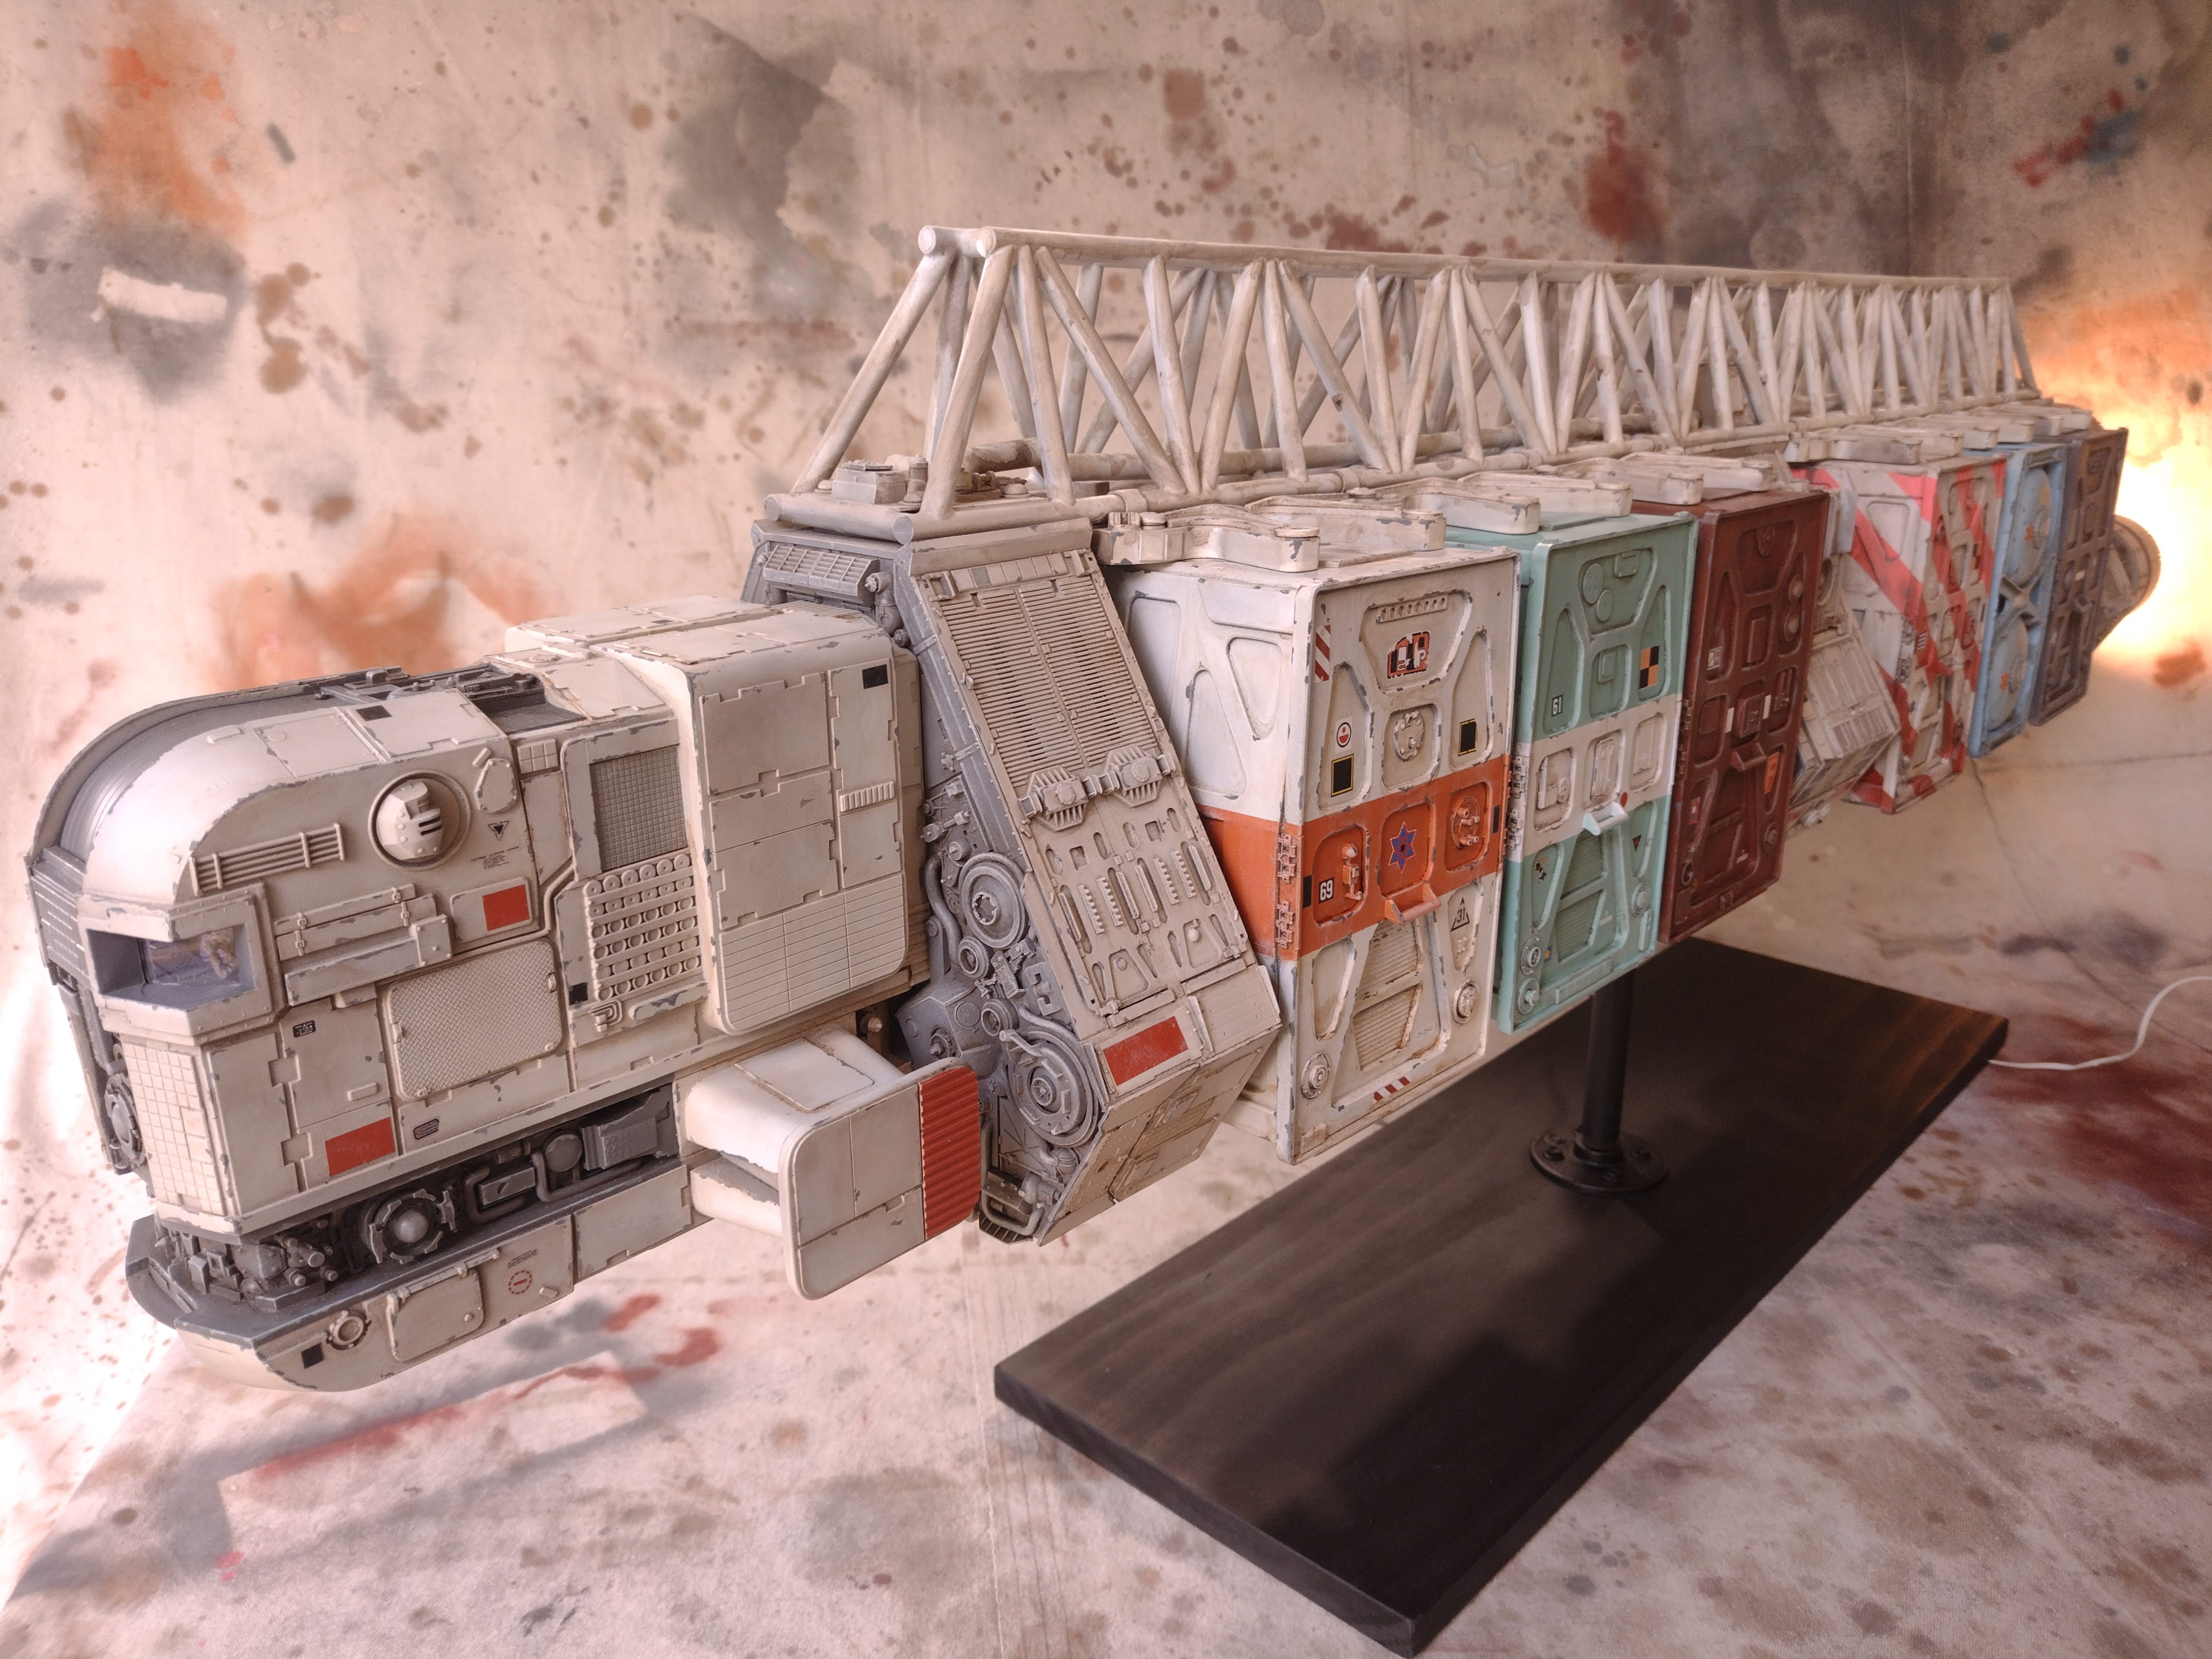
Started in 2016, the container spaceship project is finally done. It has been worked off and on (mostly off) for around nine years.
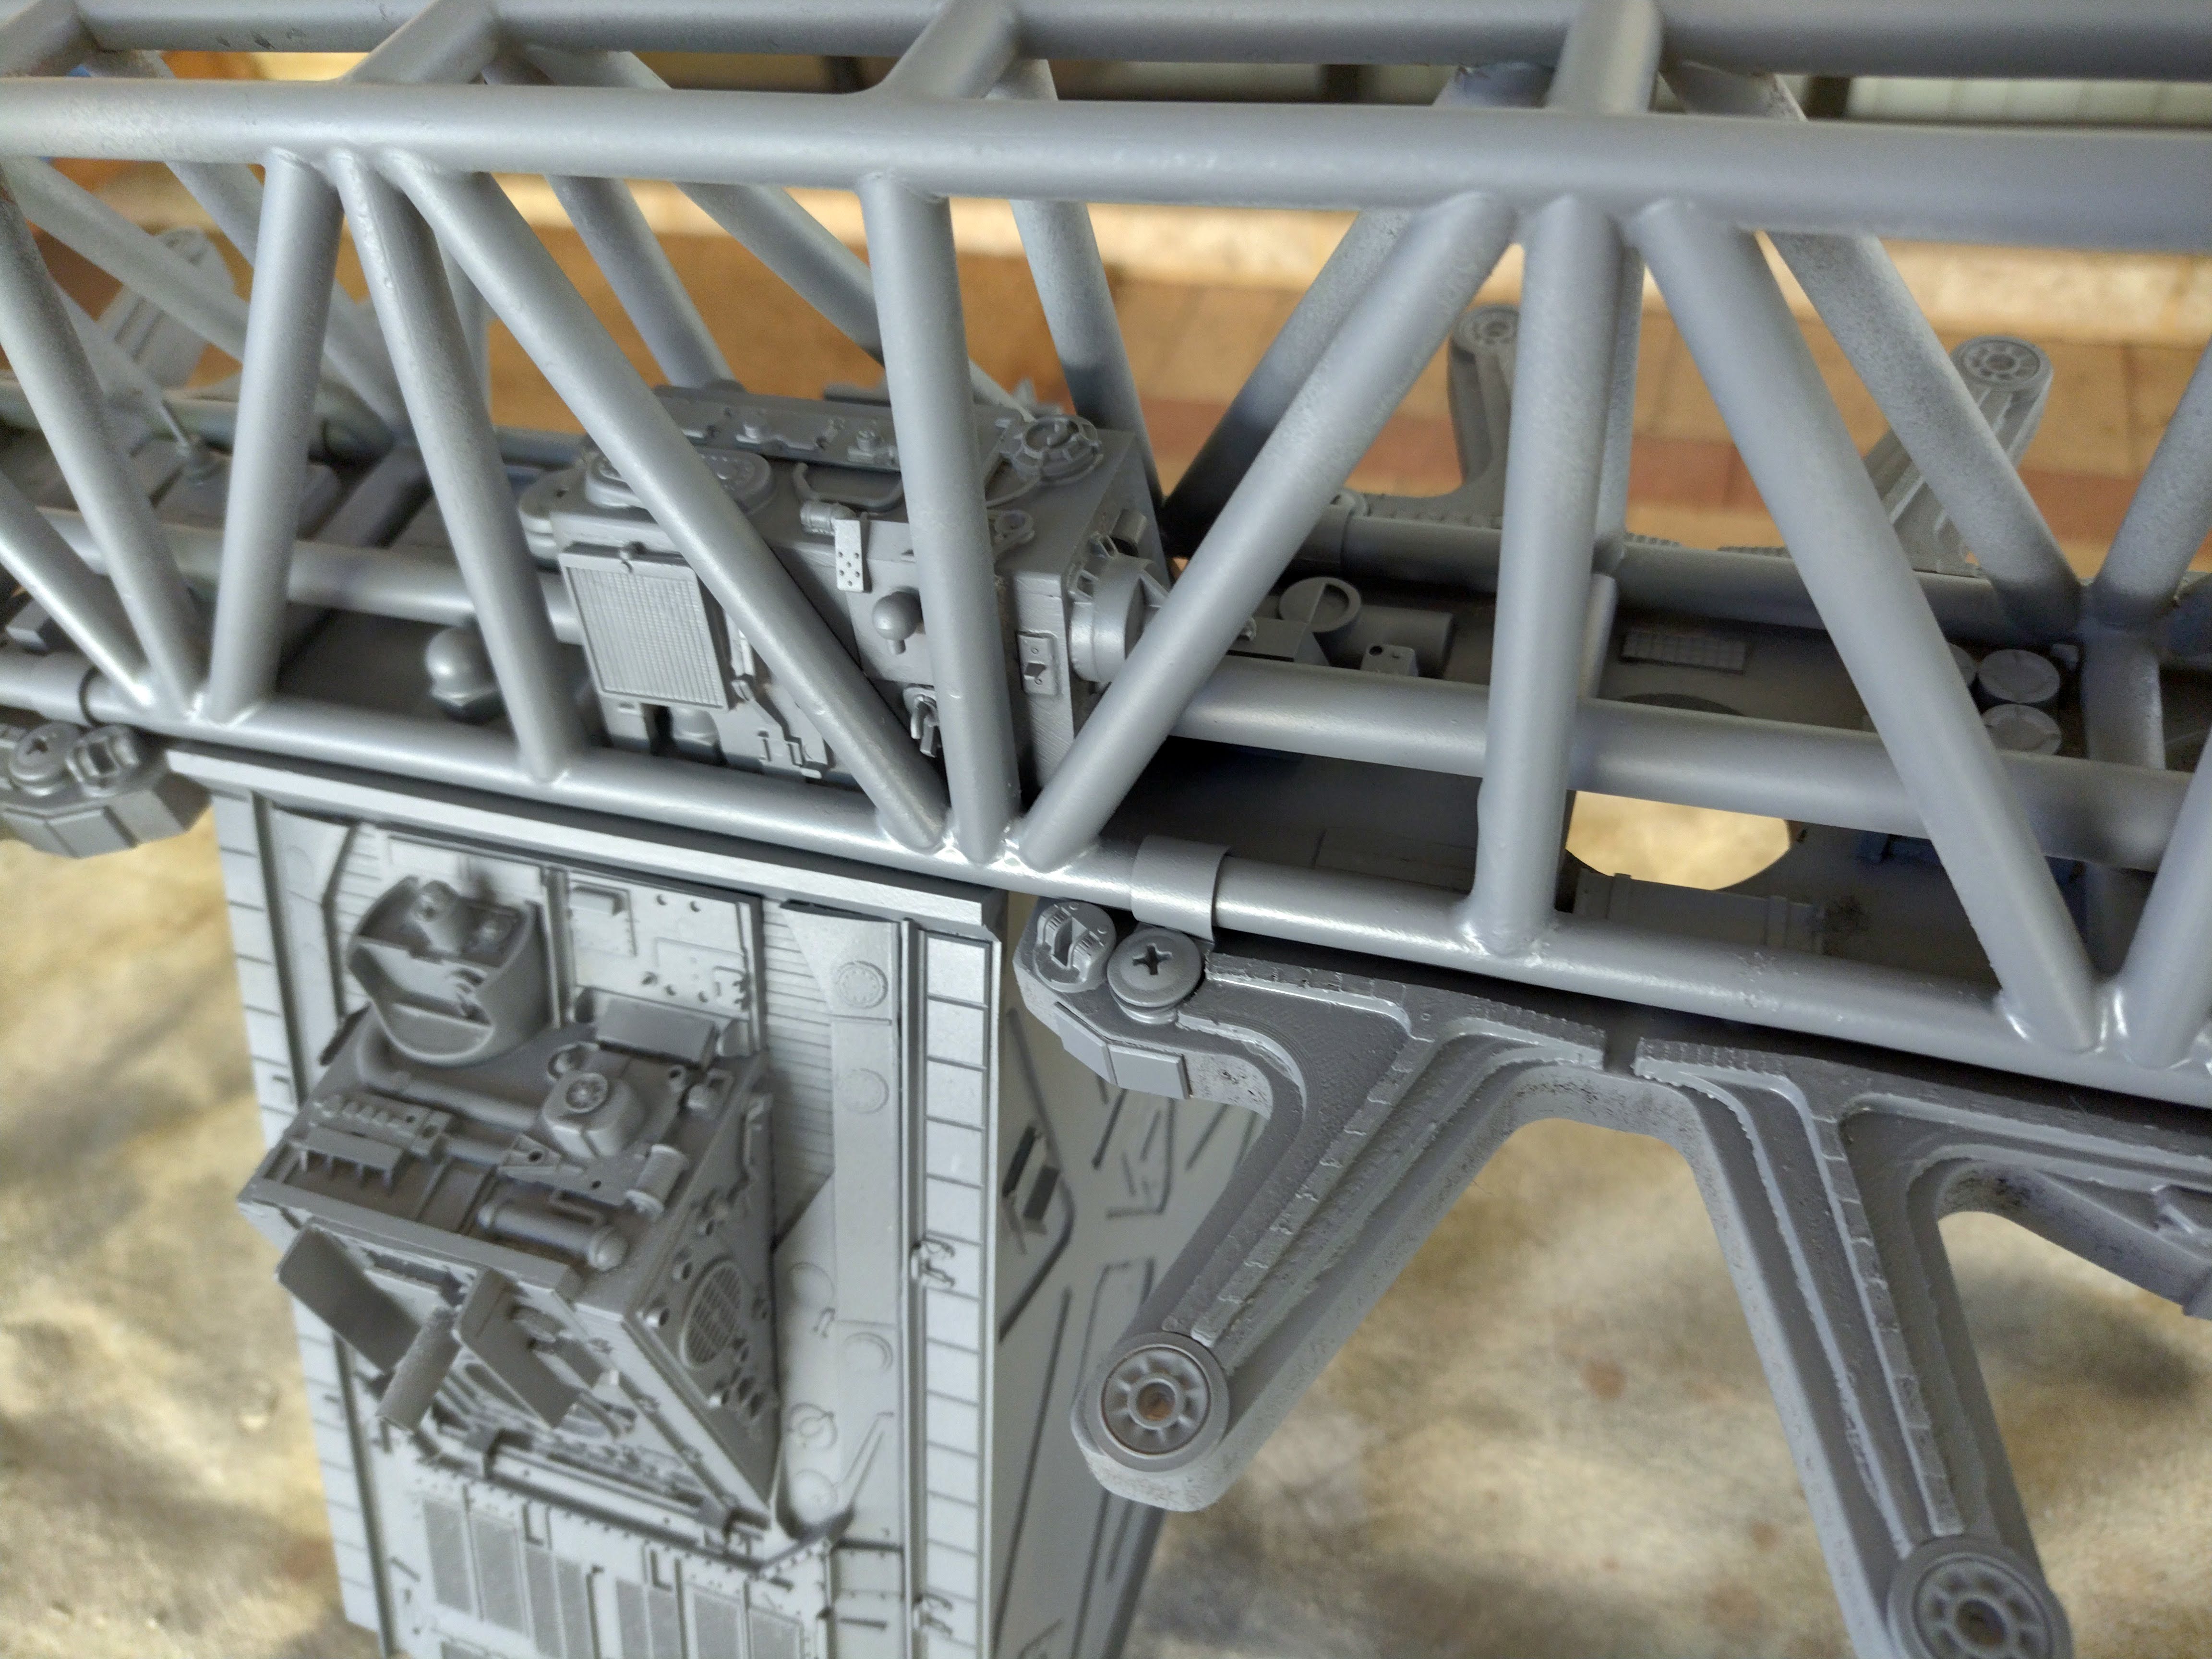
It has been a big task painting and weathering this model as it is reasonably lengthy at 1515mm (roughly 60 inches) and each container was a separate paint job in itself.
The main ship colour is white primer stained with an oil wash made from burnt umber and a bit of black. The containers were also sprayed using various colour spray cans I already had on hand.
An assortment of homemade and plastic model kit decals were applied along with small rectangles and circles cut from self adhesive vinyl in black , white, blue and red. where the decals had to go over matte paint I painted on a layer of coat of clear gloss first. Once the decals were dry I sprayed over them with a squirt of matte spray. I do not like to cover the entire model in matte spray as real objects tend to have varying levels of glossiness over their surfaces. A perfectly matte surface seems too artificial to me.
Panel edge chipping was all hand painted with a small brush.
Inside the engines I sprayed some Tamiya clear orange around the rim of the lights in an attempt to give a more graduated edge to the glow of the engines.


As a reminder, this was the original inspiration for this project found in an August 1991 Hobby Japan magazine apparently from a Tomy toy line called Z Knights.

This means it was 34 years ago that I first thought about making a model inspired by that illustration.
Thanks for looking.
More soon...