About this Blog

This is about the combination of two interests, Radio Control vehicles and Science Fiction models. This blog documents my science fiction spaceship and radio controlled vehicle projects.
Showing posts with label Tamiya. Show all posts

Sunday, 16 August 2020

Moon Bug part 4

I have been building a rear door and finishing up the external detailing on the Moon Bug project as well as starting the interior of the cabin.

Rear Door.


Right side.

Left side.

The picture above shows the louvre arrangement of the roof over the rear door.

I also added a second smaller grey blister to each side. 

These blisters are made from plastic measuring spoons with the handle sawed off. The nub of the handle was then sanded back to the contour matching the oval shape.

Some detailing has been added to the underneath of the hull front where it meets the chassis. I also added a few bits of detail underneath along the sides to fill in some gaps that could be seen through the chassis. I have some small tanks (not shown) made from PVC pipe end caps which will be affixed to the chassis after they are painted.


The cabin interior still needs some control consoles to be made up with some backlit screens and some arm rests for the seats.

The Bruder figures seem happy with their new seats. The padding for the seats is made up from half round ABS strips.


Through the door in the middle and down two steps is a back wall that will look like a transverse corridor to the interior of the vehicle. The back wall has been detailed with a recessed section. There is some 12 volt strip lighting in this corridor which hopefully will be brighter than the cabin interior which I plan to light just from the as yet unmade console screens.

I have also made some detailed inserts for the cockpit sides with kit parts mostly from the Tamiya 88mm Flak kit.. 

I am a bit concerned that perhaps the detail is a little too fine scaled for the vehicle and looks out of place compared to the rather chunky detailing elsewhere.

I will reserve judgement for now and wait till some primer goes on to see if some alternative inserts need making.

This model is getting close to completion of the build phase with a bit of piping to do, the cabin sides to think about and the consoles to sort out.


 Thanks for looking.

More soon...


Tuesday, 12 June 2018

Kong Head Toybash part 3

At the end of the last post I decided to add a few more nurnies to the front of the cab and have now done so completing the construction process by finalising the primer.


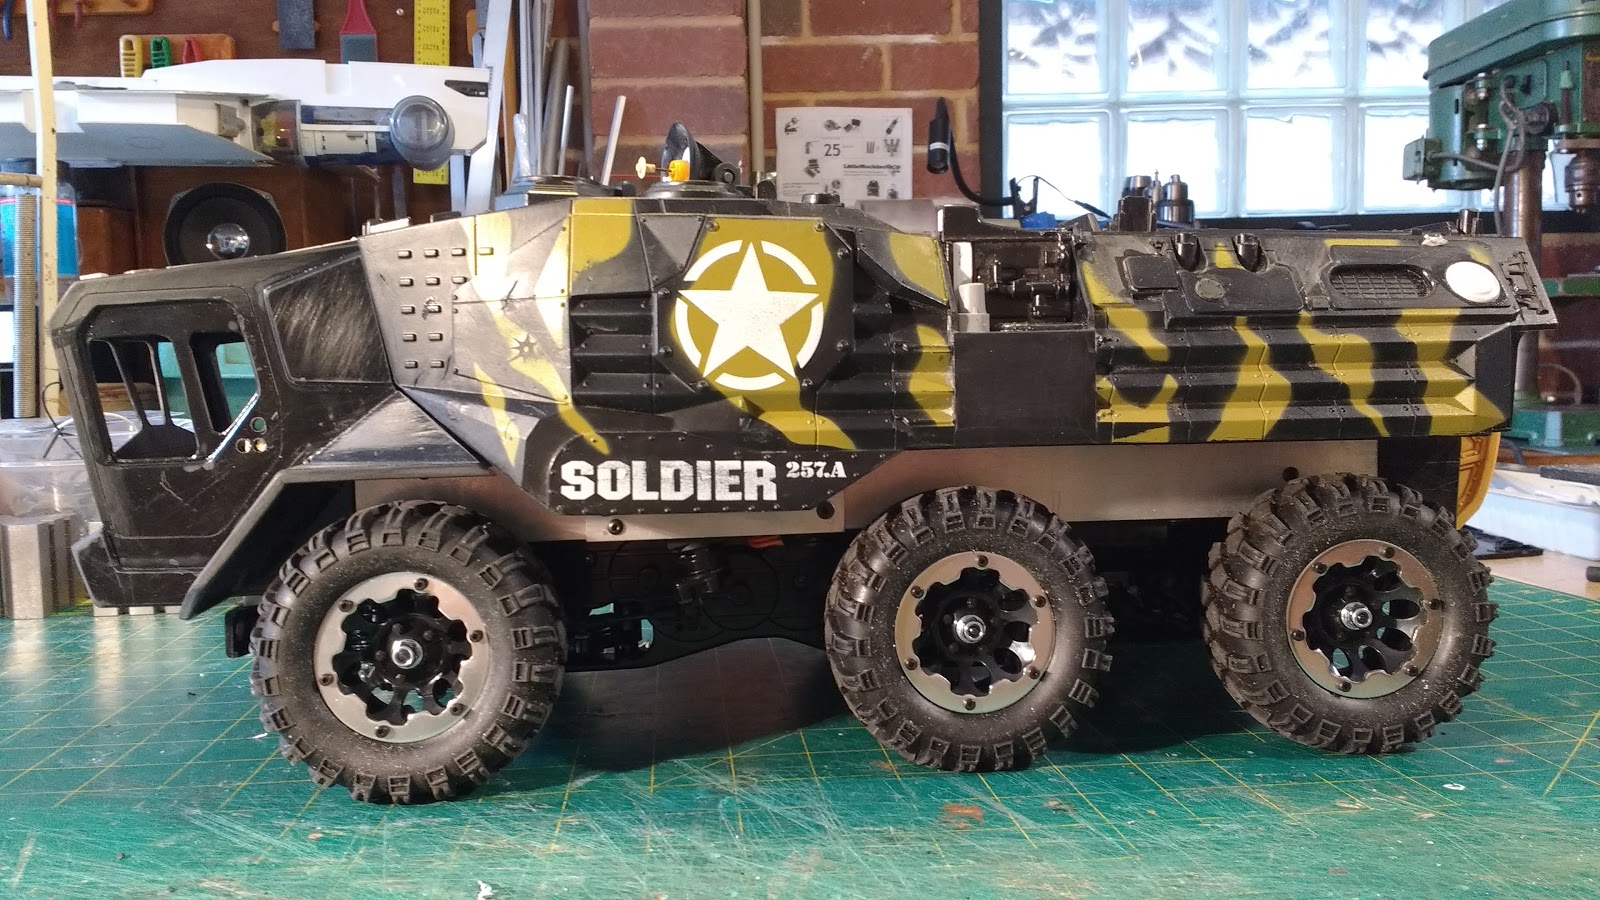
Then it was into photoshop to come up with a suitable colour scheme. I wanted to go bold with the colours for this truck and looked over a number of vehicle concept art pictures I have collected from the internet for inspiration. Here's what I arrived at as a very rough paintover of the primered side view;


I went to the auto parts shop and purchased some spray cans in the appropriate colours. The first can I tried was an old one that had been sitting on the shelf for quite some time. On pressing the trigger an ooze of thick goo came out of the nozzle. I shook it up some more and tested the spray on a piece of wood and it seemed to come good so I started spraying the model... the spray coming out was not a fine mist but a series of thick blobs. I tried the other similar colour I purchased and it was a newer can and sprayed a perfectly fine mist. So one side ended up with a thick textured finish and the other was more like I was expecting. This ended up causing me problems as the too thick acrylic lacquer paint and the perfectly fine primer will start coming straight of the styrene when you pull off the masking tape. It seems to dissolve the primer styrene bond interface and the stuff will almost fall off which it did in several places. Everytime I removed some masking I had to repair the paint, the model needed and got more and more heavily weathered through the process. The other issue is that I am trying to complete this model and at least another before exhibiting them at the Perth SupaNova event coming up in nearly a week and a half, so there is a deadline. I am taking some holidays before the show to get them done and I dont need any more disasters besides the fact thet the weather has not been conducive to paint drying.

The model is now pretty much done except for a voltage booster board from Hobby King to power the 12 volt lighting from a 7.2 volt battery. I have had the board on back order for a number of months and still no show.

Here is the result of the last few days;


On to the next model for completion.
More soon...


Sunday, 6 May 2018

Kong Head Toybash part 2

I believe I have completed the Kong Head Toybash build, I'll know for sure once the grey primer goes on.

I painted up the driver figures using some old Humbrol enamels after first spraying them with grey automotive primer. You can see that I also painted over the beard of one of them as well as painting on a different hairstyle. The flesh paint gave him a very pock marked facial skin texture. For the driver I added a steering yoke type set up out of a scratch made handle and some kit parts.


 I also made a console back lit by 6 amber LEDs which I forgot to get some photos of before securing the figures in the cockpit and masking off the windows ready for primer.


I decided to make the whole cockpit section removable rather than permanently cement it into position so that I can gain access should any need arise. It is held on by a lip at the top and a couple of screws in the bottom of the wheel arches which screw into a couple of wedges of foamed PVC and the styrene the toy body is made of.

 
The front of the cab was finished off with a bullbar bumper made from a plastic knitting needle heated and bent round a simple wooden former. It is secured in the middle by a brass tube and some holes in the 2mm styrene protrusions that make up a volume added under the cockpit that transitions back to the front suspension. The body is held on by two screws here that fix into a bulkhead on the Tamiya Kong Head chassis that normally holds the front bumper. The rear of the body is secured by a single long screw that goes through the Kong head rear Bumper into the 2mm styrene that makes up the rear door box.


Next up the model was cleaned with some wax and grease remover and sprayed with grey primer.


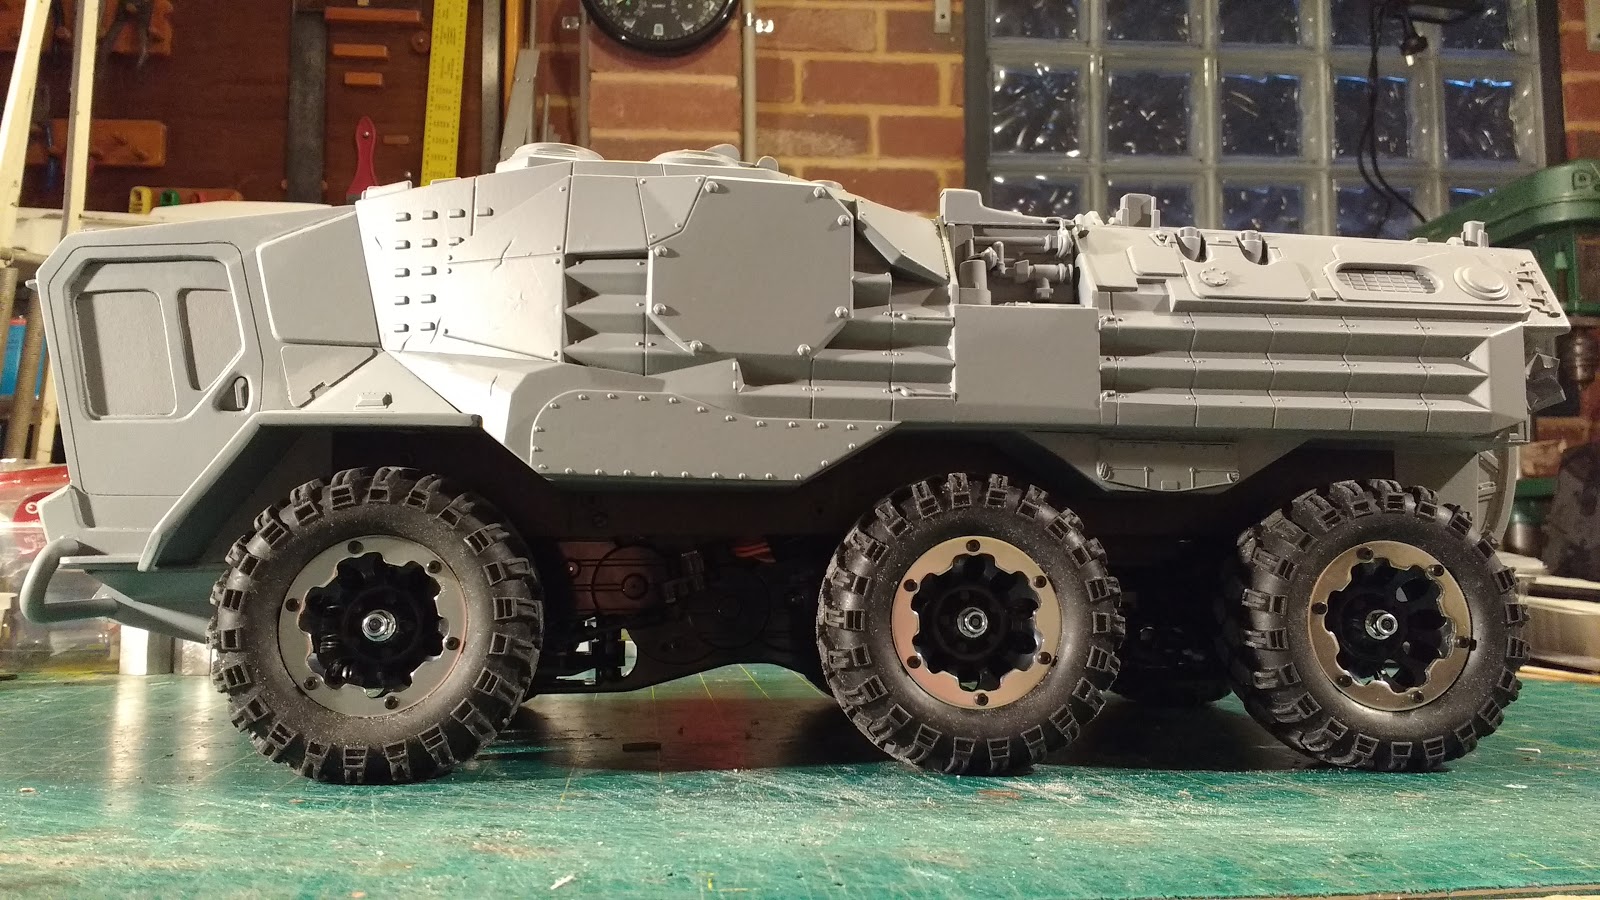
The grey primer tells me that the front cab section needs some more surface detail on the front and sides to match better with the rest of the hull, however the rest of the surfaces, I think, turned out reasonably well.


So I need to add a few more bits and pieces to the cab sides and then figure out a colour scheme.

More soon, thanks for looking.

Saturday, 14 April 2018

Kong Head Toybash part1

Here's a new project that for me has come together rather quickly due to its relatively small size and the fact that the toybash donor is already covered in much sci-fi like detail.

I stumbled across a youtube video of the Tamiya Kong Head 1/18 scale RC vehicle tearing about with what looked like rock crawler wheels and tyres mounted in place of the stock ones. Given that I am quite partial to 6X6s, I investigated further and found the parts to build the chassis could be had for around $150.00 (Australian) on eBay.  I also had 6 Venom creeper wheels spare and picked up 3 pairs of the tyres at runout prices. Once the parts arrived I assembled the chassis stock and then discovered the 2.2 inch wheels and tyres don't fit they are too big for the small stature chassis and it must have been 1.9 inch wheels and tyres on the video. Well as it happens I have a set of 5 axial 8 hole 1.9 beadlock wheels with Proline Flat Iron tyres fitted and unused, all I need to do is get a 6th tyre and wheel and Frank's your Auntie.
Unfortunately you cant get the original Flat Iron tyre any more at least I couldn't find one, as Proline now only seem to make a newer XL version which is bigger and doesn't match. Trawling on ebay the cost of 6 new 1.9 tyres was more than I wanted to spend but I stumbled across a set of Venom 96mm diameter beadlock wheels and 1.9 tyres going cheap and looked like they would suit the project so I snapped up 3 pairs.


I added a couple of lengths of aluminium angle to the Tamiya chassis using the existing side protrusions, the front and rear needed some PVC rod spacers. This provides a level platform to attach the body work. One side had to navigate around the front steering servo, so was made from three bits of angle bolted together with some 6mm PVC sheet spacers. The Kong Head comes with extra parts to make the rear most axle steer as well and improve the turning circle, which I made full use of adding a second servo. I purchased 4 so called 30kg servos from BangGood and in testing on a servo tester work very well, once mounted in the vehicle with the Tamiya ESC  turned on however they twitch a fair bit at idle. I might try a separate bec to see if that cures the problem.

The body is principally comprised of a charity shop find, a toy Assault Amphibious Vehicle or AAV. Here's what it would have looked like originally in the shops. I just got the hull itself from the charity shop. Somthing was rattling around inside and a couple of parts were missing. When I removed the screws and opened it up I found a blue plastic dinosaur inside. A number of  parts on the toy were made from either poly polypropylene or polyethylene and as is my usual policy with these materials were discarded.


It came apart in two halves and I did the usual thing of widening it by inserting lengths of black 2mm styrene. I also extended it lengthwise by around 50mm in the middle.


I found that the part of the hull that says soldier fitted very conveniently between the front and middle set of wheels and looks like it was designed that way. The middle length extension is denoted by the black panel on the side. I added a step here and filled it with kit part detailing. Some very obvious moulded in rope detail on this side and some pick and shovel detail on the other was dremelled and sanded off. The resulting holes were covered with styrene panels or as is the case on this left side made into a recessed vent. I also started adding detailing to the top surface.


 The rear was boxed in to fit around the chassis and a loading door started with a part from a Wall-E toy, another charity shop find.


The work continued with more detailing and the construction of a suitable cab. The Tamiya Kong Head is nominally 1/18th scale but I decided to boost it up to my favorite 1/16 scale in line with most of my vehicle projects. The cab still has more work to do on it both exterior and interior so for the moment it is separate from the rest of the body.


I decided to use some cheap figures from Target in the cab. They will need some paint work in order to not look like clones. The seat they are mounted on is removable so I can build in a console of some sort and glue in some windows. The three holes in the door are to make a recess for a door handle. The front of the cab has a short piece of 12volt LED strip consisting of 6 lamp nodes.


More detailing has been added to the roof and the rear door completed. The communications dish was made by putting a bit of 1mm black styrene over the end of the vacuum cleaner hose and heating it with a heat gun with the vacuum turned on. It was a pretty crude way to do it and I had many attempts before I got a usable evenly shallow dome. I really should build a vac former.
Twin red LEDs in chrome bezels were added for rear lights on each side.


Like I say every time, I am hoping to finish this project soon (along with the Reverse trike Project), but as this is quite a small project in size there is every chance that may happen.

Thanks for reading.
 More soon...

Most Popular Posts in the Last 7 Days