About this Blog

This is about the combination of two interests, Radio Control vehicles and Science Fiction models. This blog documents my science fiction spaceship and radio controlled vehicle projects.
Showing posts with label kit parts. Show all posts

Saturday, 29 August 2020

Moon Bug part 5

I believe I have finished up the construction phase of the Moon Bug project with the completion of the Cabin interior.

I made a central console out of a 1/35 scale tank hull front and part of the casing of an old radio control transmitter, the bit that the telescopic aerial was mounted in. 

The interior has 4 LEDs wired up inside, two white in the centre and two red on the outer edges. They are wired up to the 12 volt supply with a suitable resistor on the positive side and held in place with blobs of hot glue.

A piece of opal perspex is added to the front as a screen and light diffuser along with a surround of 0.5 styrene. Various tiny kit parts complete the detailing.


The seats have had arm rests and control panels added with a rudimentary joystick.

Detailing of the side tanks has also been completed. These will be adhered to the chassis once painted.


Once the interior is painted I can glue the cabin side bowls in position. They may need some further detailing but I will wait and see after the primer has gone on.

Actually, looking at the photo above, it occurs to me that the front window struts on the interior could do with some detailing as well.


Thanks for looking.

More soon...


Saturday, 14 April 2018

Kong Head Toybash part1

Here's a new project that for me has come together rather quickly due to its relatively small size and the fact that the toybash donor is already covered in much sci-fi like detail.

I stumbled across a youtube video of the Tamiya Kong Head 1/18 scale RC vehicle tearing about with what looked like rock crawler wheels and tyres mounted in place of the stock ones. Given that I am quite partial to 6X6s, I investigated further and found the parts to build the chassis could be had for around $150.00 (Australian) on eBay.  I also had 6 Venom creeper wheels spare and picked up 3 pairs of the tyres at runout prices. Once the parts arrived I assembled the chassis stock and then discovered the 2.2 inch wheels and tyres don't fit they are too big for the small stature chassis and it must have been 1.9 inch wheels and tyres on the video. Well as it happens I have a set of 5 axial 8 hole 1.9 beadlock wheels with Proline Flat Iron tyres fitted and unused, all I need to do is get a 6th tyre and wheel and Frank's your Auntie.
Unfortunately you cant get the original Flat Iron tyre any more at least I couldn't find one, as Proline now only seem to make a newer XL version which is bigger and doesn't match. Trawling on ebay the cost of 6 new 1.9 tyres was more than I wanted to spend but I stumbled across a set of Venom 96mm diameter beadlock wheels and 1.9 tyres going cheap and looked like they would suit the project so I snapped up 3 pairs.


I added a couple of lengths of aluminium angle to the Tamiya chassis using the existing side protrusions, the front and rear needed some PVC rod spacers. This provides a level platform to attach the body work. One side had to navigate around the front steering servo, so was made from three bits of angle bolted together with some 6mm PVC sheet spacers. The Kong Head comes with extra parts to make the rear most axle steer as well and improve the turning circle, which I made full use of adding a second servo. I purchased 4 so called 30kg servos from BangGood and in testing on a servo tester work very well, once mounted in the vehicle with the Tamiya ESC  turned on however they twitch a fair bit at idle. I might try a separate bec to see if that cures the problem.

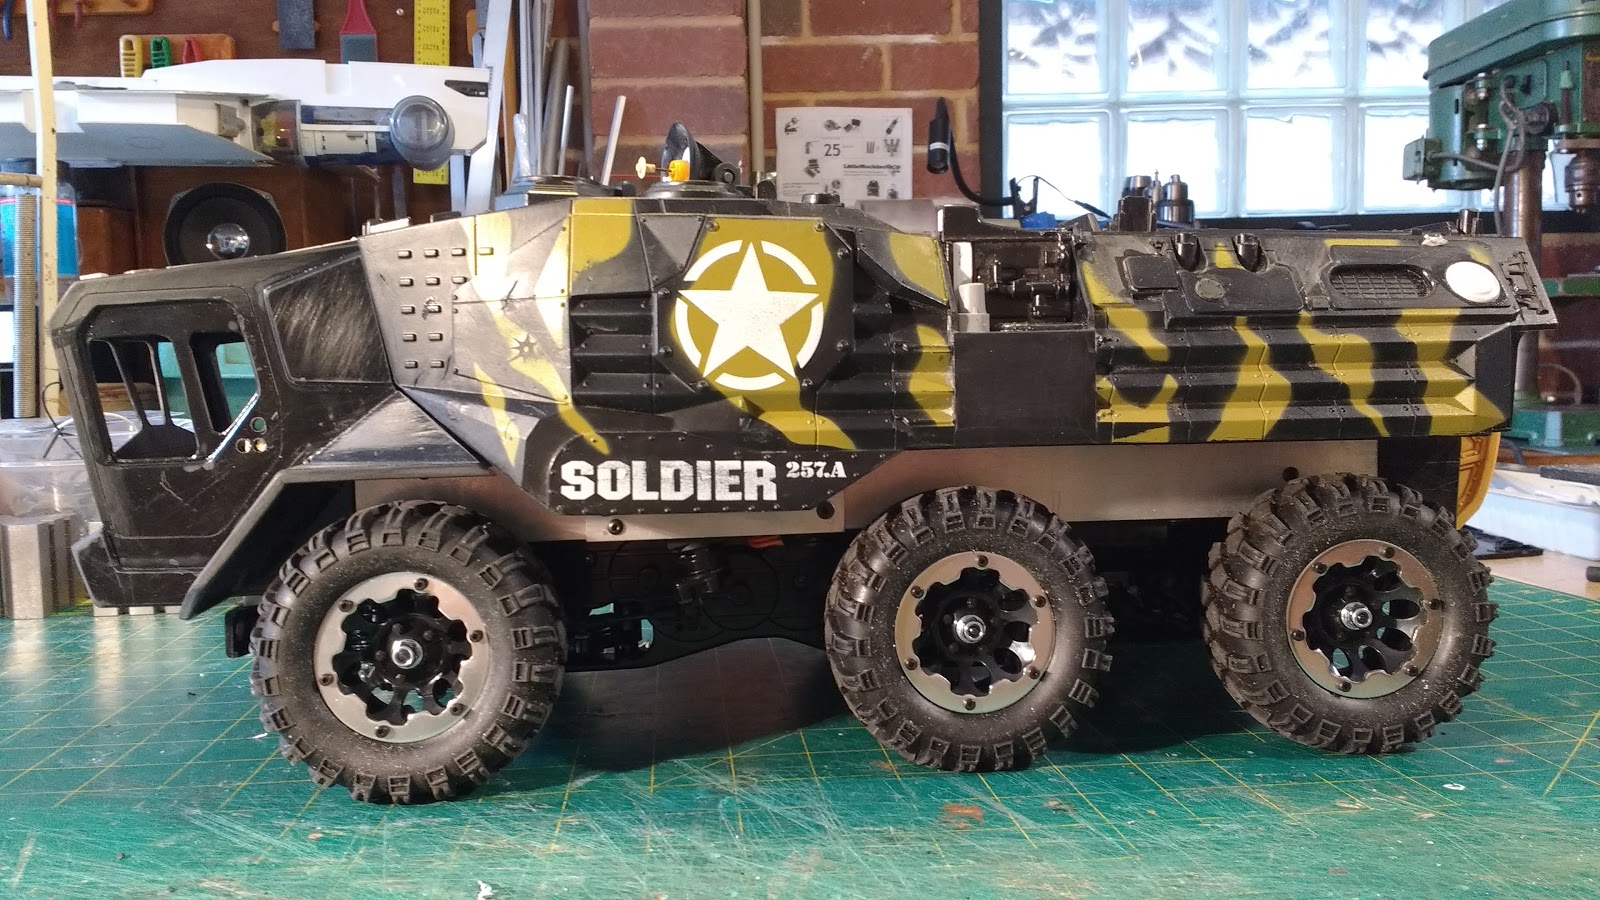
The body is principally comprised of a charity shop find, a toy Assault Amphibious Vehicle or AAV. Here's what it would have looked like originally in the shops. I just got the hull itself from the charity shop. Somthing was rattling around inside and a couple of parts were missing. When I removed the screws and opened it up I found a blue plastic dinosaur inside. A number of  parts on the toy were made from either poly polypropylene or polyethylene and as is my usual policy with these materials were discarded.


It came apart in two halves and I did the usual thing of widening it by inserting lengths of black 2mm styrene. I also extended it lengthwise by around 50mm in the middle.


I found that the part of the hull that says soldier fitted very conveniently between the front and middle set of wheels and looks like it was designed that way. The middle length extension is denoted by the black panel on the side. I added a step here and filled it with kit part detailing. Some very obvious moulded in rope detail on this side and some pick and shovel detail on the other was dremelled and sanded off. The resulting holes were covered with styrene panels or as is the case on this left side made into a recessed vent. I also started adding detailing to the top surface.


 The rear was boxed in to fit around the chassis and a loading door started with a part from a Wall-E toy, another charity shop find.


The work continued with more detailing and the construction of a suitable cab. The Tamiya Kong Head is nominally 1/18th scale but I decided to boost it up to my favorite 1/16 scale in line with most of my vehicle projects. The cab still has more work to do on it both exterior and interior so for the moment it is separate from the rest of the body.


I decided to use some cheap figures from Target in the cab. They will need some paint work in order to not look like clones. The seat they are mounted on is removable so I can build in a console of some sort and glue in some windows. The three holes in the door are to make a recess for a door handle. The front of the cab has a short piece of 12volt LED strip consisting of 6 lamp nodes.


More detailing has been added to the roof and the rear door completed. The communications dish was made by putting a bit of 1mm black styrene over the end of the vacuum cleaner hose and heating it with a heat gun with the vacuum turned on. It was a pretty crude way to do it and I had many attempts before I got a usable evenly shallow dome. I really should build a vac former.
Twin red LEDs in chrome bezels were added for rear lights on each side.


Like I say every time, I am hoping to finish this project soon (along with the Reverse trike Project), but as this is quite a small project in size there is every chance that may happen.

Thanks for reading.
 More soon...

Tuesday, 8 August 2017

ToyBash 2 part 1

True to form I started a new project, when I have so many others crying out for completion.

I have had the tracked lower section of the Bruder dozer toy from the original ToyBash truck project lying around without any concept of what to do with it . Very recently I acquired a Wall E Truck toy on ebay and when it arrived in the post I had an idea about combining the two.


But before that I wanted to be see if I could add a drive mechanism to the Bruder tracks so they could be radio controlled. I had a couple of gear motors, another ebay find, which were were very cheap at around $12.00 (including postage from China) and have  really well made metal gears inside a plastic housing. The question was would they fit into the space available in the Bruder chassis at the correct track width. After a bit of measurement it looked like they could be just squeezed in. I built a sturdy mount from aluminium angle and a bit of 3mm sheet and then hacked away at the ABS plastic of the chassis  so the whole unit could be slid into position. Some epoxy putty was slapped into the rear of the chassis and a piece of PVC sheet superglued in to the middle allowing for tapped holes so the mount could be securely bolted in place with m4 cap screws.


At 12 volts with no load they produce  only 70 rpm which may be a bit slow so we will see how that works out in due course.
The Bruder dozer has molded-in fake rollers that the tracks just slide over. I wanted to reduce the friction so I decided to try and modify the track supports and add actual rolling rollers. I hacked away all the bits of ABS that were the non-functioning rollers leaving the support brackets. These were then drilled to take a 2mm piano wire pin cut with a Dremel metal cut of disc. The rollers needed to be 16mm in diameter, I had some 12mm PVC rod and then found some PVC conduit in my stock with a 12mm ID and a 16mm OD, so in my mini lathe I machined up 16 sets of roller parts. I also made the top track return roller using the original molded ABS one I cut off. In the picture below you can see the modified track support above with the un-modified version still with the non-working rollers at the bottom.


I mostly used pair of electronic flush cutting nippers to hack away the unwanted plastic along with a razor saw and much careful sanding and filing. Below is another comparison of before and after on the track supports plus the new rollers and pins.


The separate roller parts were glued together with thin superglue wicked into the join and then once set they were assembled with the pins being retained with another small drop of thin superglue, being careful not to get any on the rollers. The result has been quite successful the tracks now roll smoothly along and the friction has been substantially reduced.


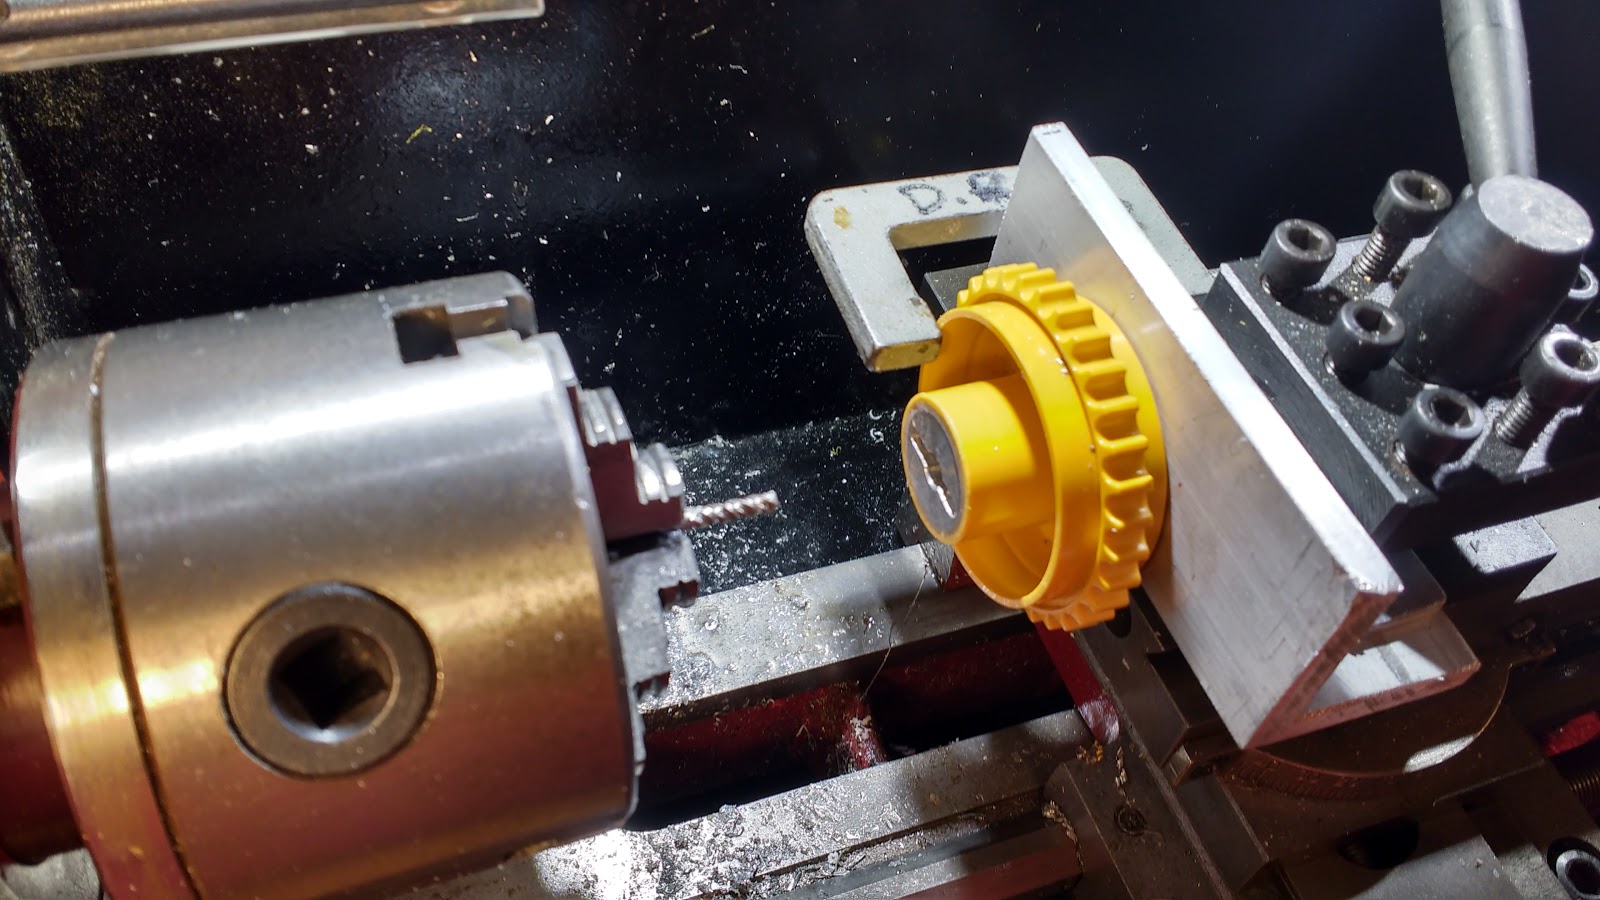
The next drive train job to tackle was the drive sprockets onto the motor gearbox shafts. Conveniently the output shaft on the motors has a M3 tapped hole in the end and a 3mm hole in the shaft to take a pin. I just had to machine a hub with a slot to engage with the pin. I had already made the hubs using some aluminium rod and glued them into the plastic sprocket wheel with thin super glue and baking soda to fill the gaps. It was after this I came up with the idea to mill some pin slots, so I needed a way to hold the sprocket in the tool post of the mini lathe spinning a 3mm endmill in the 3 jaw and use the cross slide to move the workpiece, like a poor mans milling machine.


 I cut a piece of thick aluminium angle and clamped it in the tool post. Then with a 2.5mm drill in the 3 jaw chuck, moved the carriage forward thus drilling a hole at the exact centre height of the chuck. This was then tapped M3 and the sprocket bolted in position through a pre drilled 3mm hole in the hub. The hub also has a 6mm hole that only goes about halfway in which is the size of the output shaft on the gear motor. With a tiny clamp stopping any rotation the slot was gingerly cut from the centre out in both directions a millimeter deep at a time for a total depth of 3mm.
This slot engages with a pin in the shaft locating it radially and axially at the correct track centre distance and the sprocket is retained with a 3mm cap screw into the the threaded portion at the end of the shaft.

Of course it would have been sensible to cut the slot before gluing the hub into the plastic sprocket but when you are working this stuff out as you go along sometimes the penny drops a bit later than would have been ideal.

I have yet to wire up the motors for a preliminary test but so far it all looks like it will work.

Now with all the major mechanical issues addressed what does the vehicle itself look like, well here it is so far...


I was originally thinking of using the Wall E cab but remembered I had a 1/25 scale truck cab lying around which I think looked a lot more interesting when combined with the digging tooth from the Bruder dozer. The cab section is held on with some screws so it can be removed and worked on separately.
Some acrylic plastic wine glasses from a charity shop are being used as tanks at the rear, covered with a plethora of pipes and kit part detailing. The whole rear tank module is removable (held on with a couple of cap screws into some more superglued PVC sheet drilled and tapped M3) so the motor mount can be extracted for servicing if necessary.


I thought the arms at the side of the Wall E truck which held some wacky tractor wheels could be re-purposed for some laser like devices making this some kind of laser mining vehicle. I had a Nerf gun toy that might fit the bill for this and found another one new for only $7.00 at Target for the other side. I removed the handle which is conveniently a separate part.


Various holes in the body have been filled with styrene strip and detailing of the surfaces has begun.


More soon...

Most Popular Posts in the Last 7 Days