About this Blog

This is about the combination of two interests, Radio Control vehicles and Science Fiction models. This blog documents my science fiction spaceship and radio controlled vehicle projects.
Showing posts with label model kit parts. Show all posts

Monday, 28 August 2023

Film Can Spaceship part 2

 As I am currently unemployed I have been able to put in a lot of build time on this project. 

I realise that I have not shown the general layout of the whole model, so to rectify that omission here it is in its full length with all the major sub-assemblies in place.


One of the jobs I tackled was the landing pads. The pads themselves are made from two layers of 10mm foamed PVC sheet. The bottom layer was designed in LibreCAD and printed out full size on paper which was then glued to the PVC with UHU stick glue and cut out on the bandsaw.


.A disc was then cut out of the same material on the drill press (at the lowest speed) and then sanded on the disc sander with the table set to roughly 10 degrees to make the edge slightly tapered.


The discs were then drilled out to 1/2" superglued to the base plates and some Evergreen 1/3" tile textured sheet glued to the underside.


I then made a connecting piece from 1/2" solid PVC rod which is press fit into the pad and hooked up to the spring landing strut with a pin made from a short length of brass tube.

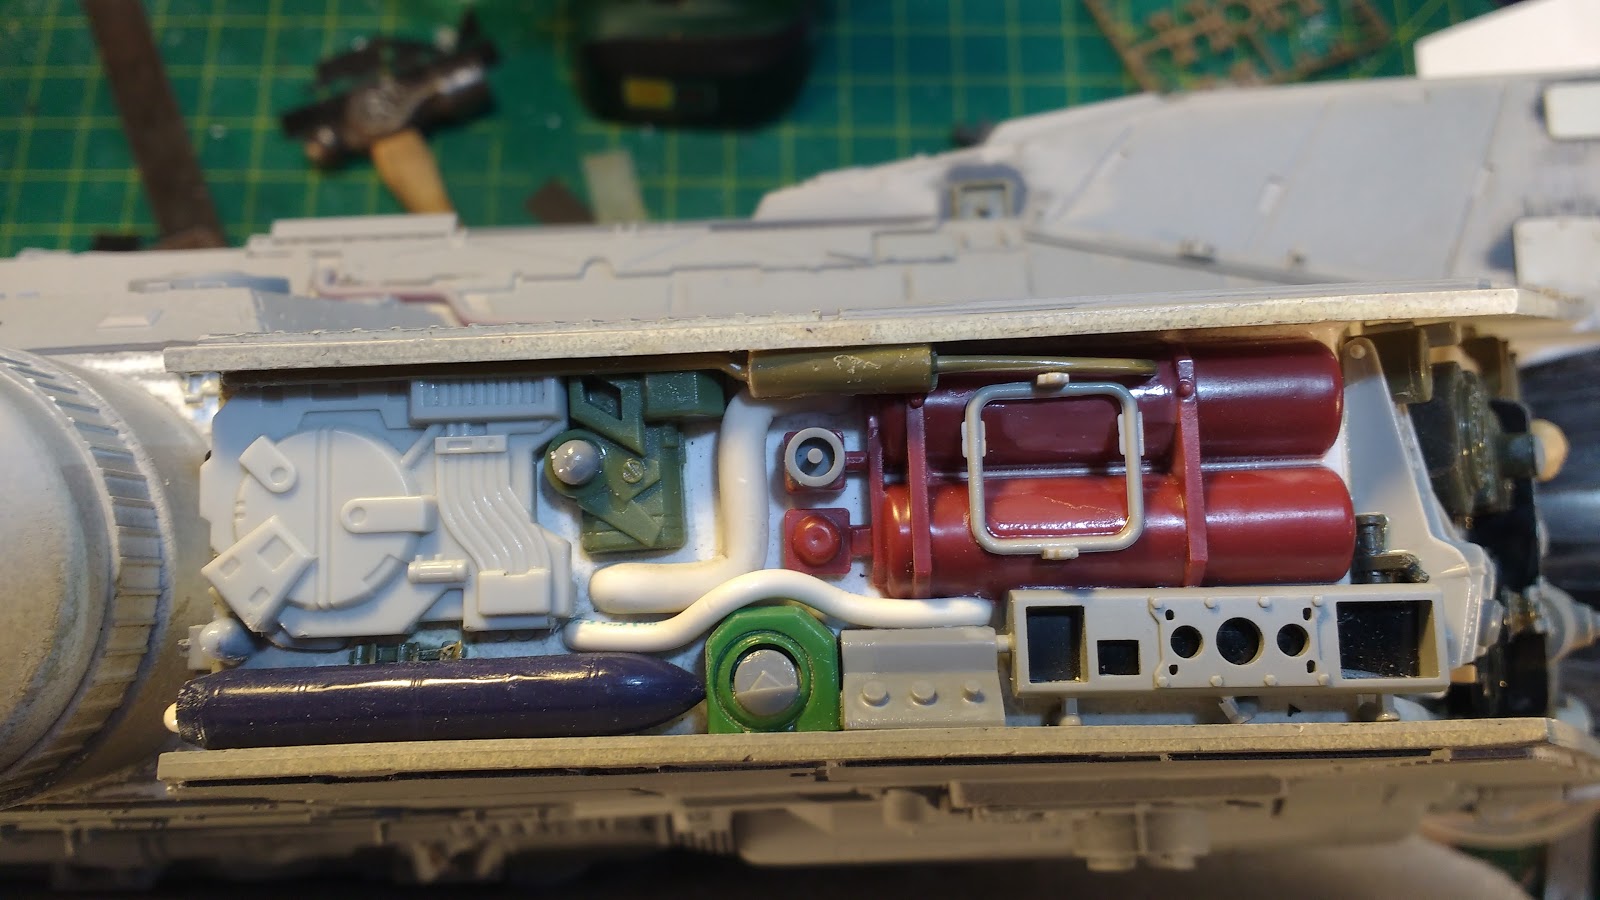
I also started detailing the rear landing cross beam. On the top surface I used the cut-off front grip from the Nerf Nitron. Underneath I used some classic kit parts form the Hasegawa 1/72 Leopold which can be seen all over the 1978 Battlestar Galactica studio miniatures. A bunch of piping was added using solid ABS rod bent using a heat gun and some made from single solid core electrical wiring.


 The blue part seen in the picture above is a dial from a washing machine. One other interesting part I used which you can see on the top of the landing pods is the white plastic reels from inside an old VHS video tape.


I have placed a 1/72 figure next to the pad to show the scale. The model has turned out to be reasonably lengthy and measures 1290mm long which if you divide by 25.4 will give you inches, so nearly 51 inches or 4 feet 3 inches.

The other major construction was the film cans themselves. They have been raised up to make them thicker by about 12mm. The tops have the addition of the cut off  sides from 3D printing filament reel with the centre cap of an old vacuum cleaner's wheels added on top.


I have also detailed the sides of the film cans with more still to be done on the top and bottom surfaces.
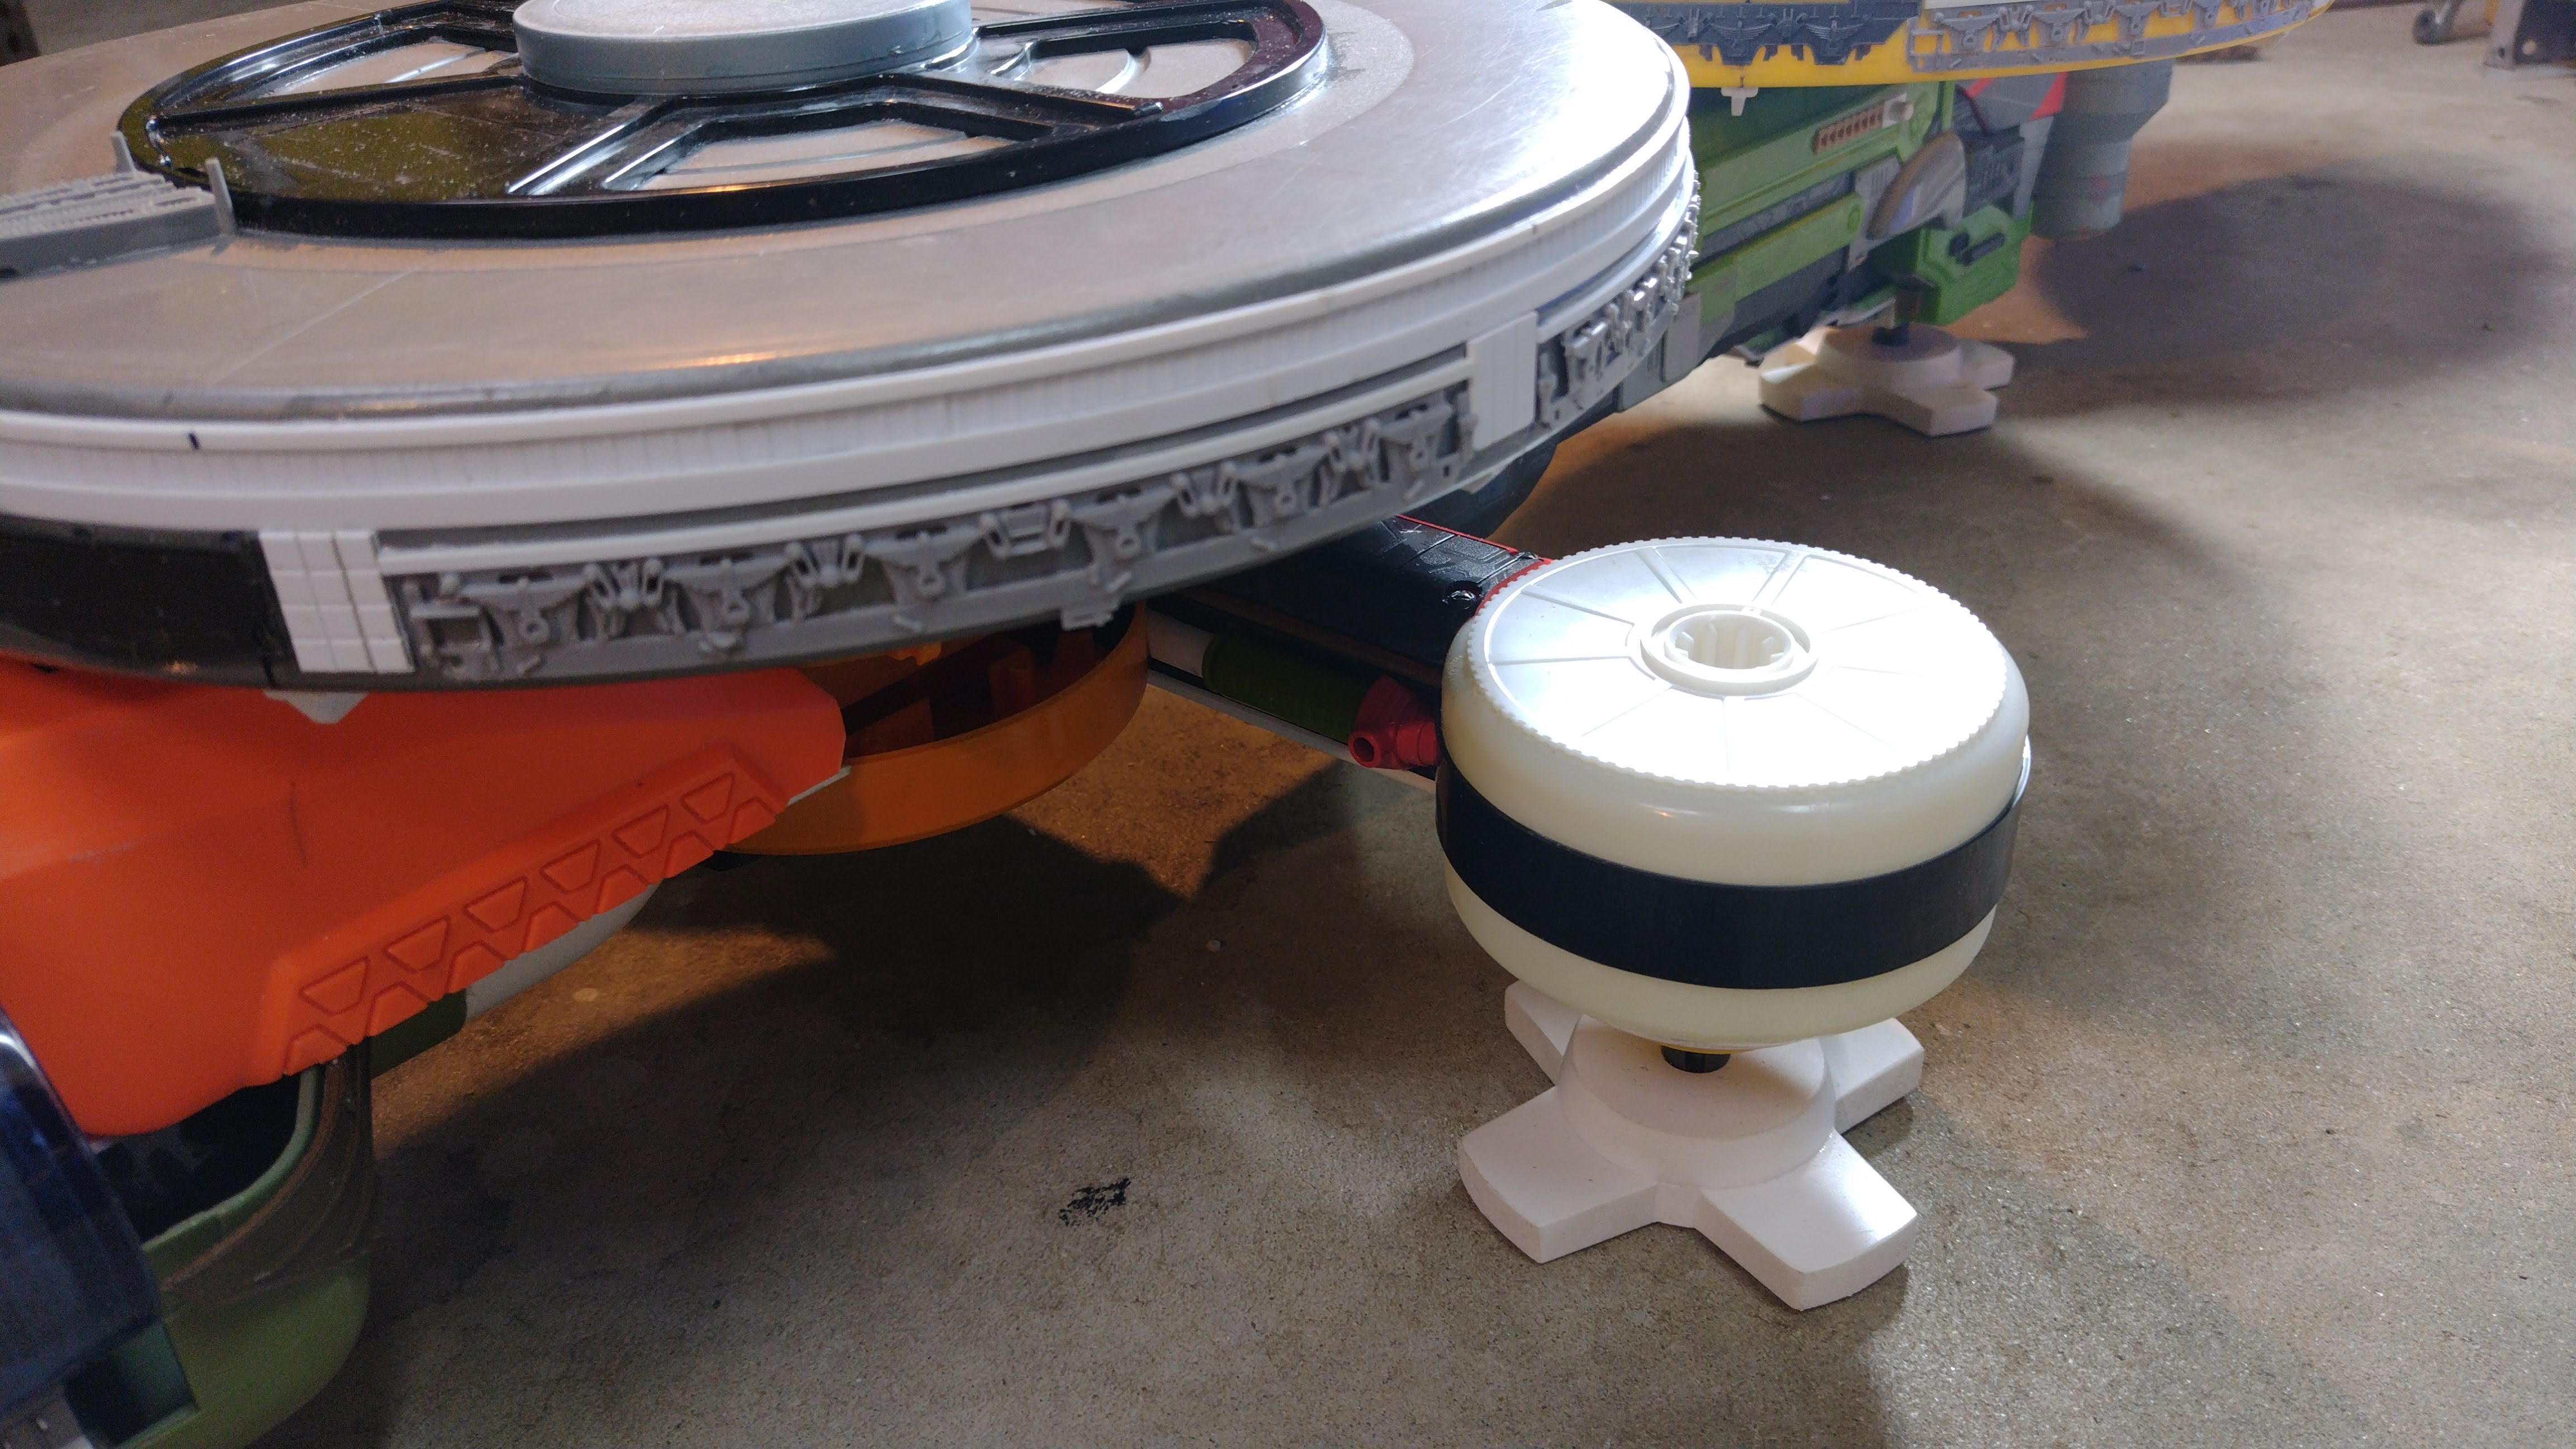


Other areas have begun to receive detailing here and there with a start made on the engine pod.


Thanks for looking.

More soon...


Saturday, 29 August 2020

Moon Bug part 5

I believe I have finished up the construction phase of the Moon Bug project with the completion of the Cabin interior.

I made a central console out of a 1/35 scale tank hull front and part of the casing of an old radio control transmitter, the bit that the telescopic aerial was mounted in. 

The interior has 4 LEDs wired up inside, two white in the centre and two red on the outer edges. They are wired up to the 12 volt supply with a suitable resistor on the positive side and held in place with blobs of hot glue.

A piece of opal perspex is added to the front as a screen and light diffuser along with a surround of 0.5 styrene. Various tiny kit parts complete the detailing.


The seats have had arm rests and control panels added with a rudimentary joystick.

Detailing of the side tanks has also been completed. These will be adhered to the chassis once painted.


Once the interior is painted I can glue the cabin side bowls in position. They may need some further detailing but I will wait and see after the primer has gone on.

Actually, looking at the photo above, it occurs to me that the front window struts on the interior could do with some detailing as well.


Thanks for looking.

More soon...


Friday, 3 January 2020

Resilient Cruiser Part 10

I think I have completed the detailing of the sides.
In order to conveniently work on the side surfaces I built a cradle to support the model at an appropriate angle from some scrap plywood and pine.
The cradle allowed me to arrange the major detail parts without them sliding about and falling off.
Once the layout of the parts formed a pleasing composition I was then able to commit to gluing them in place.

The angled front and rear side sections on the main hull are for the most part symmetrical whereas the two sides are different from each other. You can only make symmetrical sides if you have enough parts that have a mirror image twin. I find mirrored parts are usually less common in my stash so where possible I will make non symetrical detail and in the case of the left and right sides where they can never be seen at the same time it really doesn't matter and its more fun to do.

Most of the pipework was my usual single core Pvc sheathed electrical wire with the largest diameter piping using Hobby King solid ABS rod heat bent to shape with a hot air gun. A lot of the big detail chunks were from the hoard of broken Transformer toys I was given. The rest of the detail is the usual mix of kit parts, various thicknesses of styrene sheet and evergreen strips and textured sheet.


There is just the hammer head section to go along with a small amount to add to the engines and that should bring the construction phase to an end. I wont know for sure until the primer goes on and reveals if any further work is required.

Thanks for looking.
More soon...

Friday, 13 December 2019

Resilient cruiser part 8

I have been working on the cockpit interior of the Resilient project.
I made up a floor and console complete with a couple of 1/48 scale jet pilot figures and their seats.
Added to that are a couple of side panels and a back wall insert.
All were detailed with kit parts from my tiny parts box and then sprayed with a light coat of primer grey.
The detailing doesn't have to be too fussy here as it will be very difficult to see once the model is buttoned up.
I just want an interesting tech panel texture in there to catch the light.
The idea is that the pilots will mostly just be silhouettes when seen through the windows.


The removable roof interior was also tackled and includes a pelmet that diffuses the direct light from the leds mounted at the back, one white in the middle and a red led each side. Each of the leds has the appropriate resistor soldered to the positive lead to run off 12 volts dc.


The pelmet is made from a piece of 3mm thick opal perspex with some rectangular and small round frame shaped kit parts. Paint was used to block the light except through the frames and the pelmet positioned to allow some light to spill down the back wall. The photos show the effect.


I have still got to do a little painting to the pilot figures and a bit of weathering to the panels before gluing them in permanently.

Thanks for looking.
More soon...

Most Popular Posts in the Last 7 Days