About this Blog
This is about the combination of two interests, Radio Control vehicles and Science Fiction models. This blog documents my science fiction spaceship and radio controlled vehicle projects.
Monday, 28 September 2015
Toy Bash Truck part 7
Part 1, Part 2, Part3, Part4, Part 5, Part 6
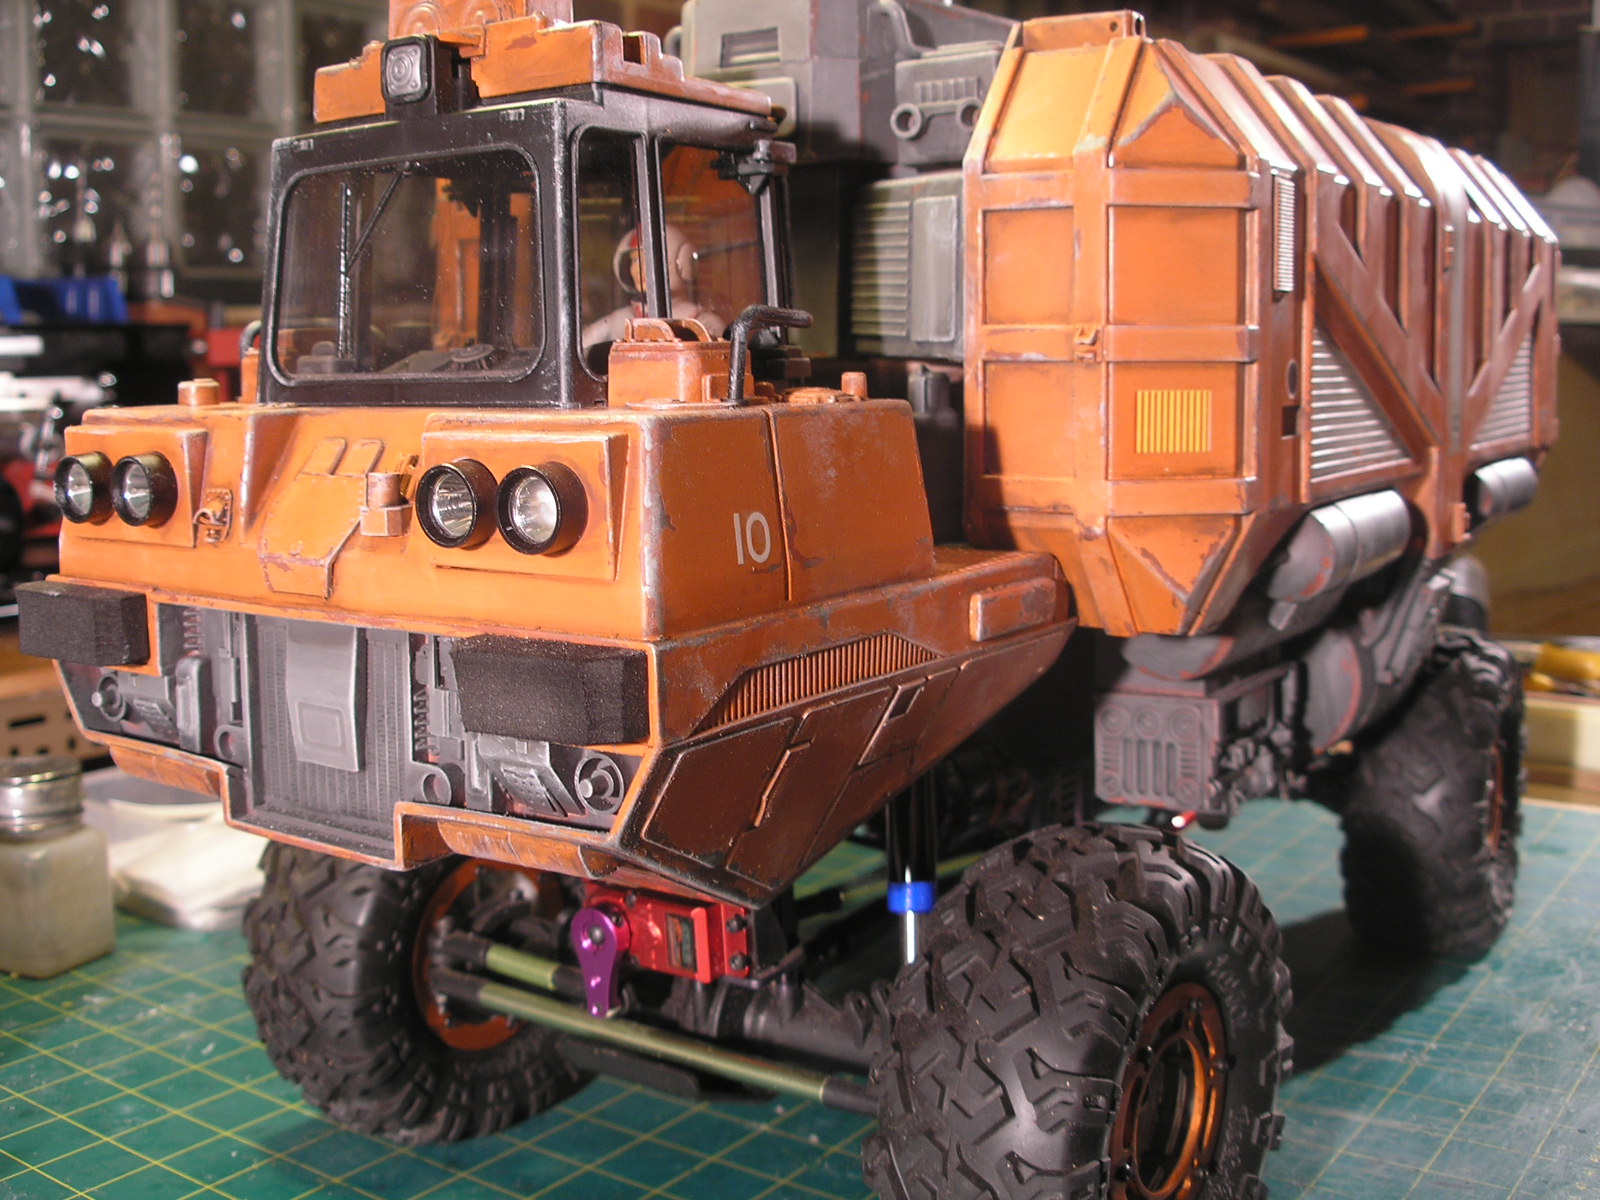
The model was masked up and sprayed with orange car paint from a spray can. The masking was reversed and the detail areas were sprayed with a "sandable" car primer which is a darker grey than the normal car primer. I'm not sure what the difference is, other than the shade of grey, as primer generally is usually easily sandable.
I also masked up and sprayed some white primer markings on the sides and added some old decals from random model kits.
The liquid latex masking (applied earlier in previous post) was peeled off leaving chipped paint revealing the original red primer and silver metal scrapes from the paint pen.
After the paint has been allowed to dry for a at least a day ( 2 days or more is better) I start the application of "poo juice", a roughly five to one mix of methylated spirits ( alcohol) and Tamiya flat black mixed in a jar. Essentially this is a wash that is flowed onto the surface into all the vents, grooves, depressions, edges, lumps etc. Then metho dampened rag is used to wipe it off from the high spots leaving it in the low. The rag is wiped in the direction that grime would run and flow leaving grubby streaks. It is essential for this method to work that the underlying paint is not dissolved by alcohol, so any water based hobby paint such as Tamiya is not suitable. Acrylic car paints and primers are fine, and enamels such as Humbrol will work given sufficient time to dry.
I have seen Randy Cooper on You tube demonstrating his technique using a water based wash on a wet model getting similar visual results. I find that for me that the methylated spirits based wash flows along edges better with a capillary action that is more effective than I have been able to get using a grime wash based on water.
After the poo juice wash has dried, (it dries pretty fast) I then dry brush white students acrylic paint using a stiff flat oil paint brush onto all the raised spots and edges. The student acrylic is a cheap artists acrylic that is not as densely opaque as a quality artists acrylic so builds up slowly onto the models edges with a pleasing lightening of the underlying value. If you make a mistake the metho dampened rag will easily remove the white for another go.
To people used to subtle pastel shaded weathering on 1/35 scale military models, the result to the eye may seem ludicrously over the top, but in my experience you really have to exaggerate the weathering for the camera to see any of it.
After looking at the photos I realise the chassis needs a bit of weathering to tone down all the colorful anodising on display. More than likely a good run on some dusty dirt tracks will naturally take care of that.
A momentous event for this blog, as a project has actually come to completion and for me personally as it is the first Sci-fi model I have completed in maybe 20 years. I hope there will be plenty more to come.
Thanks for reading.
Labels:
Car primer,
rc vehicle,
tamiya flat black,
Venom Creeper
Friday, 25 September 2015
Toy Bash Truck part 6
Part 1, Part 2, Part3, Part4, Part 5, Part 7
Some work has been done on the cockpit of the truck. In fact the whole model has been painted and weathered but that will follow in a subsequent post as I haven't taken any photographs of that as yet.
I made up a helmet for the 1/16 scale Bruder toys driver figure. It possibly a little big but that's what he's getting.
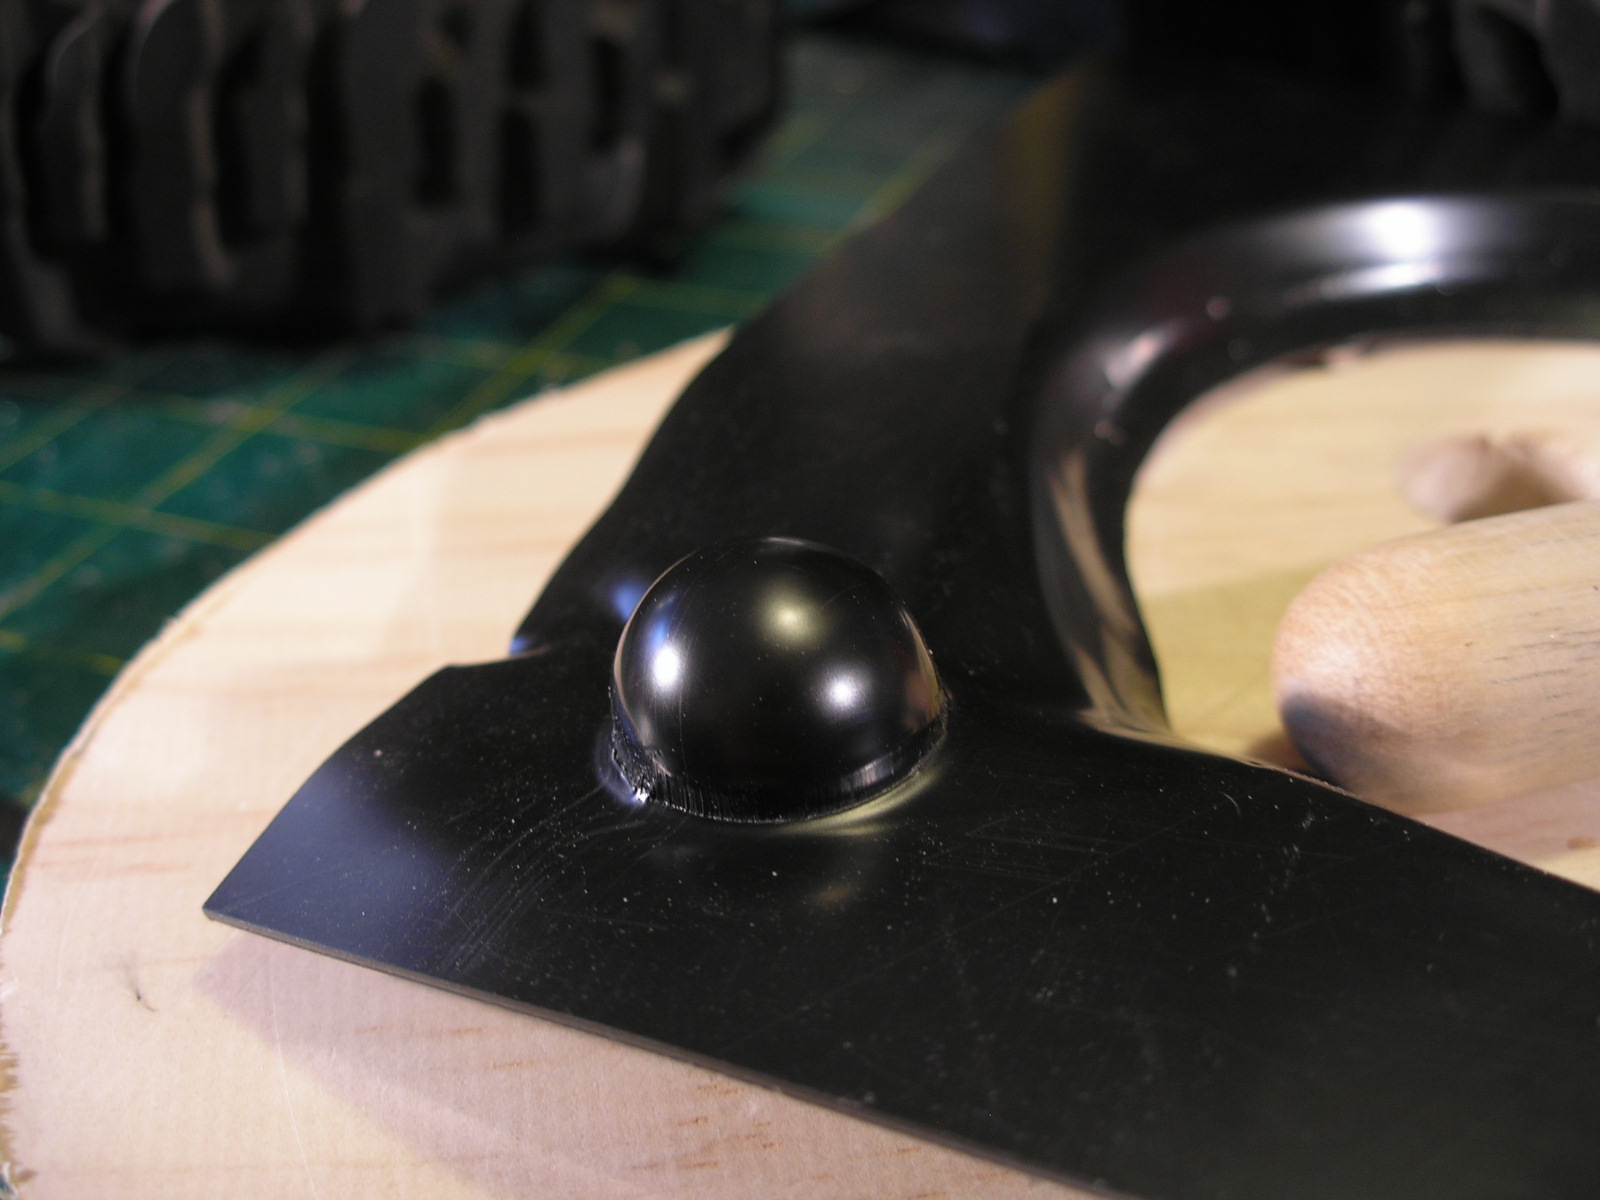
It was made in two halves joined down the middle by pressing a half dome shape into heated 1mm styrene. To heat the plastic I used my Bosch heat gun which is designed to strip paint among other things. It looks like a hairdryer but it puts out industrial grade heat. You would not want to mix up the two.
I made a domed ended bit of broom stick and pressed that into a hole in a piece of wood that was slightly larger. You can see the stick, hole and result below.
The two plastic domes were sawn off with a razor saw, sanded flat and joined with my usual methylene chloride solvent. A dremel was then used along with a sharp olfa blade to cut away the hole for the neck and face. I used a couple more presses of the 1mm plastic to make some side discs and added a strip of 0.5mm styrene down the join. I also added some pieces of closed cell foam as padding on the inner sides which also makes it stay on his head.
Still needs a bit of sanding and then painting to finish.
To cover up the rolled up sleeves molding on the drivers arms I used some heat shrink tubing, with a smaller piece as some sort of cuffs around his wrists. I also put a larger piece around his neck. You can see a bit of filler as yet un-sanded in the v neck of his shirt. A few Drops of thin super glue has been flowed into his arm joints to fix them in position. Eventually he will be painted to look more like he's wearing a jump suit with gloves.
The chassis has been disassembled so that it could be painted with flat black. I always use a Rust guard epoxy style spray paint for any aluminium parts as it sticks very well without flaking off. A couple of lightish coats are sprayed on without any primer. It takes 24 hours to dry fully but a couple of extra days does no harm before reassembly with scratchy tools. Here is the chassis hanging up on a wire hook.
On the shelf behind the chassis are a couple of my old spaceship models readers of this blog will be familiar with, built many many years ago.
More soon...
Labels:
Bruder,
cockpit,
heatshrink,
model,
rc vehicle,
Rust Guard,
space helmet
Make your own foams
I like Imex Jumbo tyres (except for the jumbo Kongs) as they are chunky and nicely proportioned height to width. They are discontinued so are getting pretty impossible to find. In fact wide tyres of any sort seem to have gone out of fashion at the moment, everybody is doing narrow.
I had a pair of the Jumbo Swamp Dawgs but a pair is pretty useless, so I have had a permanent search on ebay for some more. Finally a set of four previously mounted but apparently "unused" turned up and I was the only bidder. With the Aussie dollar being so crap these days and the massively expensive postage costs on top they cost an arm and a leg to get hold of. Eventually they arrived and I was pretty disappointed that they didn't come with any foams. The seller listed them as "ready to mount to the rim of your choice" no mention of a lack of foams. When I queried this he claimed he used to use them for rock crawling without foams ( but hang on aren't these unused). Replacement foams are non-existant and I need them to support the weight of a hefty Sci Fi vehicle so the only option was to make some foams to fit.
I happened to have a chunk of upholstery foam left over from restoring the seat of a small motorbike many years ago which was exactly the right thickness. I measured up a foam from the new pair I had and made a cardboard template to trace around with a fine point sharpie onto the foam.
The first trick is to cut the hole in the donut shape. To do this you need a drill press and a hole saw with the center drill bit removed from the arbor. The problem is that the hole saw is much shallower than the depth I need to cut so I slowly lower it into the foam, stop the drill press, peel out the foam and then saw a bit more out etc until the full depth is achieved. The hole saw goes through foam very easily and makes a relatively neat cut. The drill has to be removed as it will catch on the foam and spin it out of your hands.
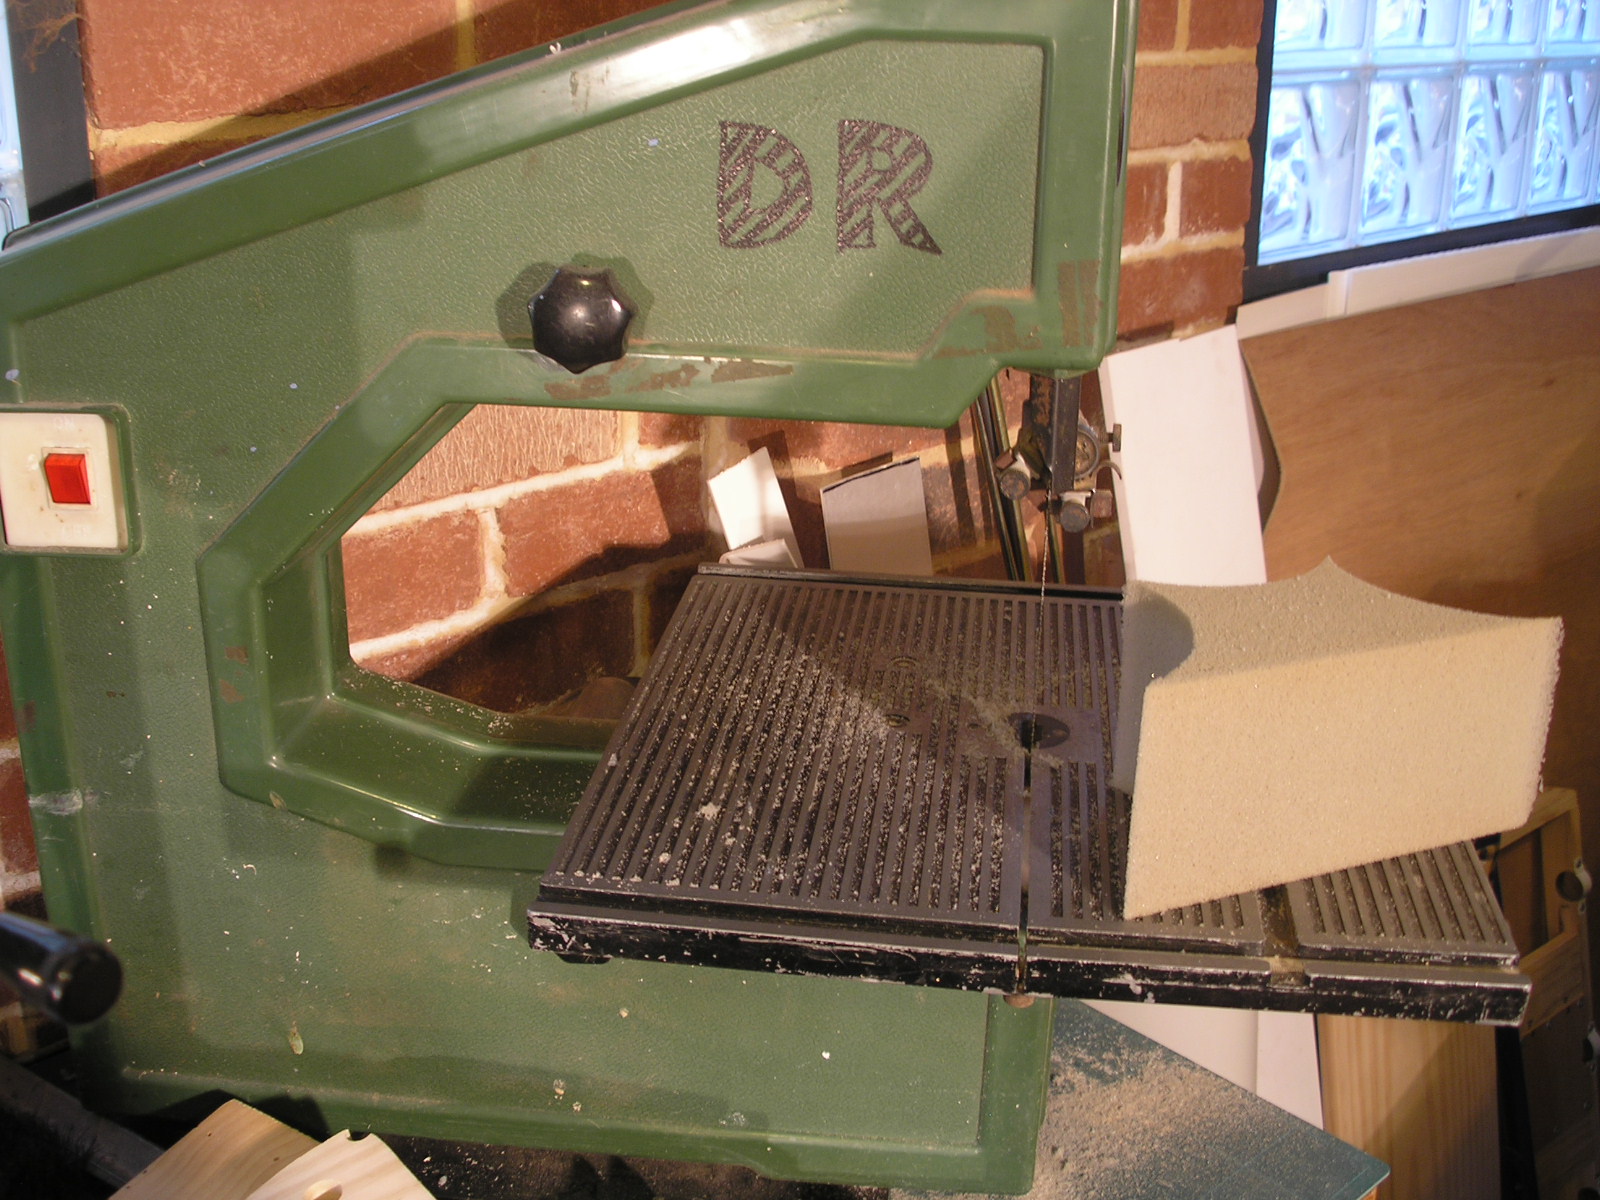
The outside diameter is cut on the bandsaw. Again foam is easily cut on a bandsaw, the denser the foam the better.
When measuring up for the template allow a few millimeters extra on the diameter and a few less on the inside diameter so it grips onto your wheel. As it happens for these 3.2 inch Imex jumbo tyres the hole saw diameter I used for the ID was 86mm or for those still in the living in the dark ages 3 and 3/8 inches.
The other issue with the ebay tyres was the left over chrome plating and super glue still stuck to the rims. I didn't use anything fancy here, no acetone or oven heating, I just used some coarse sandpaper and sanded it off. Worked fine, removed the offending marks of the previous owner easily without any effect to the rubber.
This method can be used to make any sized foams you like and with the right holesaws even dual density foams if you want to get tricky.
Although you cant find the Imex 3.2" rims any more you can still get OFNA monster Pirate rims which fit and are even available in a 17mm hex which is what I will be getting for these tyres for a 6X6 project some time in the future.
More soon...
I had a pair of the Jumbo Swamp Dawgs but a pair is pretty useless, so I have had a permanent search on ebay for some more. Finally a set of four previously mounted but apparently "unused" turned up and I was the only bidder. With the Aussie dollar being so crap these days and the massively expensive postage costs on top they cost an arm and a leg to get hold of. Eventually they arrived and I was pretty disappointed that they didn't come with any foams. The seller listed them as "ready to mount to the rim of your choice" no mention of a lack of foams. When I queried this he claimed he used to use them for rock crawling without foams ( but hang on aren't these unused). Replacement foams are non-existant and I need them to support the weight of a hefty Sci Fi vehicle so the only option was to make some foams to fit.
The first trick is to cut the hole in the donut shape. To do this you need a drill press and a hole saw with the center drill bit removed from the arbor. The problem is that the hole saw is much shallower than the depth I need to cut so I slowly lower it into the foam, stop the drill press, peel out the foam and then saw a bit more out etc until the full depth is achieved. The hole saw goes through foam very easily and makes a relatively neat cut. The drill has to be removed as it will catch on the foam and spin it out of your hands.
The outside diameter is cut on the bandsaw. Again foam is easily cut on a bandsaw, the denser the foam the better.
When measuring up for the template allow a few millimeters extra on the diameter and a few less on the inside diameter so it grips onto your wheel. As it happens for these 3.2 inch Imex jumbo tyres the hole saw diameter I used for the ID was 86mm or for those still in the living in the dark ages 3 and 3/8 inches.
The other issue with the ebay tyres was the left over chrome plating and super glue still stuck to the rims. I didn't use anything fancy here, no acetone or oven heating, I just used some coarse sandpaper and sanded it off. Worked fine, removed the offending marks of the previous owner easily without any effect to the rubber.
This method can be used to make any sized foams you like and with the right holesaws even dual density foams if you want to get tricky.
Although you cant find the Imex 3.2" rims any more you can still get OFNA monster Pirate rims which fit and are even available in a 17mm hex which is what I will be getting for these tyres for a 6X6 project some time in the future.
More soon...
Subscribe to:
Posts (Atom)
Most Popular Posts in the Last 7 Days
-
This model was started around the same time as the "Sony" model. It is so close to being finished I don't know why I didn'...
-
Grey primer - done. The engine bells are wrapped in cling film to mask them off. A commenter on facebook thought the "spare tire...
-
I believe I have completed the surface detailing phase of the project. The plain white panels are mostly cut from 0.5mm styrene sheet. The ...
-
This model was made in the late 90's. It was again made from a disparate collection of shapes. There is a central spine made of some PV...
-
I thought it might be interesting to look at some of my old Spaceship models starting with this one. While this model is not strictly an RC ...
-
The Ultraman production purchased a collection of miniature buildings that were originally made for an unfinished version of Total Recall ...