Here is the Escape Pod Mk2 with the first coat of grey primer. I used a "sandable" primer which is a darker grey than the standard one.
I did add a bit more detail around the engine nozzles and the rear landing gear winglets before spraying the the primer.
There is a little bit of spot filling and sanding to do next and I need to devise a suitable paint scheme for it.
More soon...
About this Blog
This is about the combination of two interests, Radio Control vehicles and Science Fiction models. This blog documents my science fiction spaceship and radio controlled vehicle projects.
Showing posts with label dustbuster. Show all posts
Sunday, 2 October 2016
Saturday, 1 October 2016
Escape Pod Mk2 part2
Part 1 is here
With all this time on my hands (see previous post) I have been beavering away at a few of the other incomplete projects. One of them is the kit bash shuttle project which I am in the latter stages of the painting process. While I wait for the Humbrol enamels to dry thoroughly and before hitting it with the weathering phase I have been paneling and detailing the escape Pod Mk2. I believe I have finished that process but you cant really tell for sure until the first coat of grey primer goes on. I am going to have to wait until the bad weather clears up before attempting any spraying of primer as it's very windy and stormy here at the moment.
Here's some pics of the bare plastic pre primer stage.
I made up the landing skids and made the front one compress with a spring inside two telescoping brass tubes. The outer tube has a small slot and the inner tube has a pin press fitted into a hole that slides in the slot and stops the lower tube from falling out.
The engine intakes have some perforated aluminium screens salvaged from an old ghetto blaster. They are retained with some evergreen strips glued into the recess.
Once the weather clears up I will hit it with some primer and post some more pics.
More soon...
With all this time on my hands (see previous post) I have been beavering away at a few of the other incomplete projects. One of them is the kit bash shuttle project which I am in the latter stages of the painting process. While I wait for the Humbrol enamels to dry thoroughly and before hitting it with the weathering phase I have been paneling and detailing the escape Pod Mk2. I believe I have finished that process but you cant really tell for sure until the first coat of grey primer goes on. I am going to have to wait until the bad weather clears up before attempting any spraying of primer as it's very windy and stormy here at the moment.
Here's some pics of the bare plastic pre primer stage.
I made up the landing skids and made the front one compress with a spring inside two telescoping brass tubes. The outer tube has a small slot and the inner tube has a pin press fitted into a hole that slides in the slot and stops the lower tube from falling out.
The engine intakes have some perforated aluminium screens salvaged from an old ghetto blaster. They are retained with some evergreen strips glued into the recess.
Once the weather clears up I will hit it with some primer and post some more pics.
More soon...
Labels:
dustbuster,
found objects,
plastic,
scratchbuilt,
spaceship
Wednesday, 6 January 2016
Escape Pod part 5
After a slight deviation into the Escape Pod Mk2 project I returned to completing the cockpit of this Escape Pod project or Shuttle Pod as it has become.
I made up a seat assembly which is removable at the moment so that I can get some paint into the interior.
I decided to light the internals of this cockpit with bright blue leds, 4 in total and with a forward drop of 3 volts each all 4 could be wired in series and run on a 12 volt supply without a preliminary in series resistor.
I then made a console that fits over the light housing in much the same way as the Escape Pod Mk2 project using sandpaper frosted acrylic sheet diffusers surfaced with 1mm black styrene fascias perforated with screens and holes for lights. In this instance, due to the blue leds, there was no point using any Tamiya clear colours to back the various switches as they would only come out as darker shade of blue. I thought the blue-lit interior might make an interesting complimentary colour contrast with the hull which I am planning to paint yellow. We'll see if this works out in practice. The console has been nurnied using many tiny parts from a Trumpeter Stryker kit. If you want lots of really tiny nurnies that's the kit for you.
Next up is scribing panel lines and paint.
More soon...
I made up a seat assembly which is removable at the moment so that I can get some paint into the interior.
I decided to light the internals of this cockpit with bright blue leds, 4 in total and with a forward drop of 3 volts each all 4 could be wired in series and run on a 12 volt supply without a preliminary in series resistor.
I then made a console that fits over the light housing in much the same way as the Escape Pod Mk2 project using sandpaper frosted acrylic sheet diffusers surfaced with 1mm black styrene fascias perforated with screens and holes for lights. In this instance, due to the blue leds, there was no point using any Tamiya clear colours to back the various switches as they would only come out as darker shade of blue. I thought the blue-lit interior might make an interesting complimentary colour contrast with the hull which I am planning to paint yellow. We'll see if this works out in practice. The console has been nurnied using many tiny parts from a Trumpeter Stryker kit. If you want lots of really tiny nurnies that's the kit for you.
Next up is scribing panel lines and paint.
More soon...
Escape Pod Mk2 part 1
In the middle of the Escape Pod project I did a trip to the local charity shops and came away with another dustbuster this time a different brand and shape and made of lovely ABS. I do not ever bother attempting to use any shapes made with HDPE ( high density polyethylene) or polypropylene as they cannot be reliably glued, sanded, filled or painted and to attempt to do so is going to be wasted effort.
I was thinking the first escape pod was a bit oversize and was more aptly described by a member of the RPF forum as a shuttle pod, so I thought this dustbuster could make a one person pod more in keeping with the original intent.
Below you can make out the rear DC connector on the right hand side. It should be inconspicuous in amongst the rest of the nurnies.
An oval shaped cockpit window was added. The acrylic sheet clear material was softened with a heat gun and pressed with a cloth pad into the back of the dust compartment access door so that it took on the compound curvature before the hole was cut. It was then glued into position with solvent and masked up both sides. I'm using scotch brand fine edge masking tape here which does as it says, it works very well.
I have also added some fins at the rear. I was toying with some wings of some sort but decided it made it like too "aircraft" like which is not what I want.
The cockpit has had some minimal details added and a chair constructed. I also made up a dashboard which is lit by two bright white leds shining through some roughly sanded acrylic sheet to diffuse the light a bit. The leds have a 470 ohm resistor wired in series calculated for the 12 volt supply. The front surface of the dash has a piece of black 1mm styrene with a screen shape and 1.5mm holes drilled into it to stand in as switches and indicator lights. The back of the frosted acrylic has then been painted with varying hues of Tamiya clear colours to give the multicoloured lights effect. Its crude but should be enough when seen through the cockpit window. The light from the screen lights the pilot.
I had a search in my local Bunnings hardware store for something suitable for the engine lights and came across these 12 volt HPM brand led garden bulbs. They are designed for multiple fixtures and come apart to be adapted for what ever housing required. They were perfect for what I needed and come with a suitable bell shaped nozzle, I just removed the end lens and the internal reflector which just all press fits together. They also have the standard bi pin connector so I added a couple of the ceramic connectors I have in stock to the rear of the engines and plugged in the lights.
Next up is paneling the hull and a final detailing pass but before that I am going to complete the first escape pod project.
More soon...
I was thinking the first escape pod was a bit oversize and was more aptly described by a member of the RPF forum as a shuttle pod, so I thought this dustbuster could make a one person pod more in keeping with the original intent.
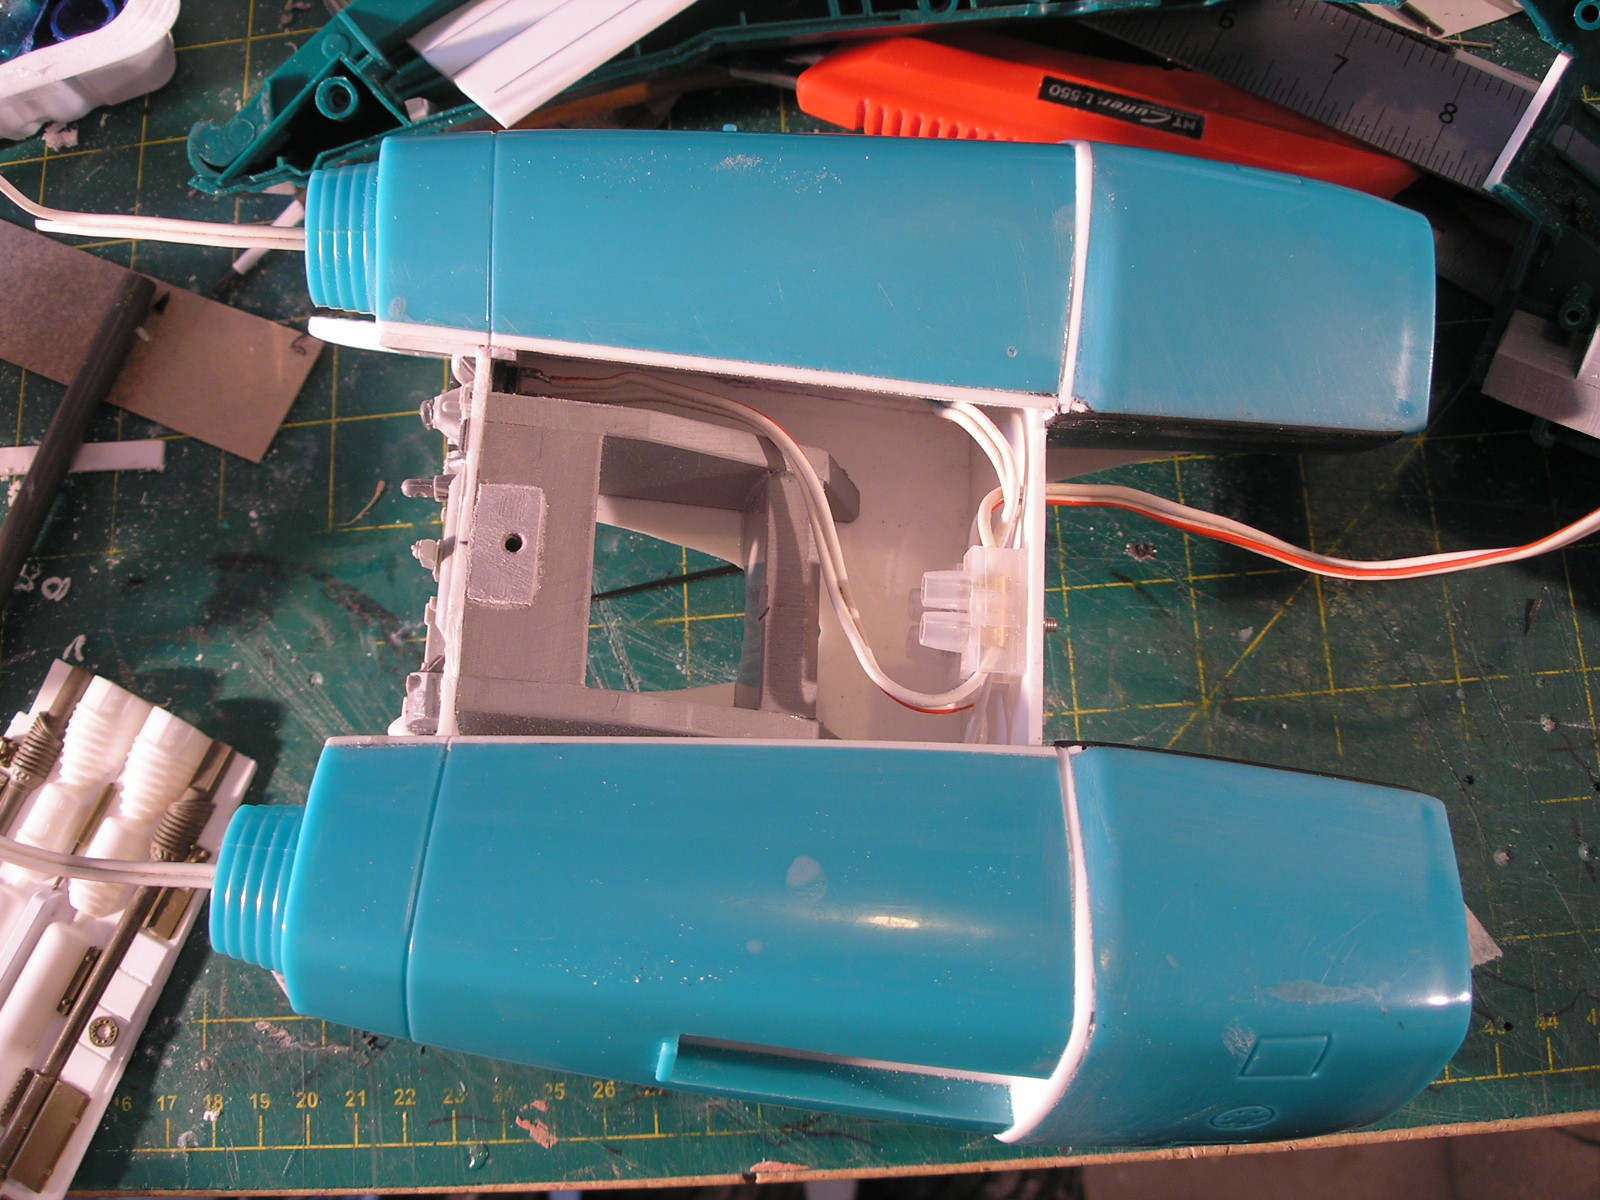
One of the other charity shop finds was a massive pink Barbie Jet Plane (which will become a future project) from which I salvaged the blue engine mouldings which I shortened by removing a section from the middle. The engines are fitted together with a box structure of 2mm styrene at an angle which matches the angle of the lower side of the dustbuster shell which has been gutted of its internals.
Slabs of 10mm and 6mm grey pvc make up the support rod housing underneath and at the rear. A hole was threaded 3/8 whitworth to match the 3/8 whitworth bolt I use as a support rod. Wiring for the engine lights and the cockpit lights is also installed and hooked up to a couple of 12volt DC connectors. The PVC is glued with thick super glue to heavily roughened surfaces.
Some kit part detailing of the back of the engine structure was done.
With all the wiring tested the two halves could be permanently brought together with the aid of the original screws, and the engine assembly glued on with the usual Methylene chloride solvent. The bottom panel of the engine bay was made removable and detailed. You can see the round bottom DC connector next to the support rod access which uses a rectangular hole that already existed in the housing.
Below you can make out the rear DC connector on the right hand side. It should be inconspicuous in amongst the rest of the nurnies.
An oval shaped cockpit window was added. The acrylic sheet clear material was softened with a heat gun and pressed with a cloth pad into the back of the dust compartment access door so that it took on the compound curvature before the hole was cut. It was then glued into position with solvent and masked up both sides. I'm using scotch brand fine edge masking tape here which does as it says, it works very well.
I have also added some fins at the rear. I was toying with some wings of some sort but decided it made it like too "aircraft" like which is not what I want.
I had a search in my local Bunnings hardware store for something suitable for the engine lights and came across these 12 volt HPM brand led garden bulbs. They are designed for multiple fixtures and come apart to be adapted for what ever housing required. They were perfect for what I needed and come with a suitable bell shaped nozzle, I just removed the end lens and the internal reflector which just all press fits together. They also have the standard bi pin connector so I added a couple of the ceramic connectors I have in stock to the rear of the engines and plugged in the lights.
Next up is paneling the hull and a final detailing pass but before that I am going to complete the first escape pod project.
More soon...
Subscribe to:
Posts (Atom)
Most Popular Posts in the Last 7 Days
-
This model was started around the same time as the "Sony" model. It is so close to being finished I don't know why I didn'...
-
Grey primer - done. The engine bells are wrapped in cling film to mask them off. A commenter on facebook thought the "spare tire...
-
I believe I have completed the surface detailing phase of the project. The plain white panels are mostly cut from 0.5mm styrene sheet. The ...
-
For an all too brief period, in the late 1980's, I worked as a modelmaker in the visual effects industry. Miniature effects was the only...
-
I thought it might be interesting to look at some of my old Spaceship models starting with this one. While this model is not strictly an RC ...
-
This model was made in the late 90's. It was again made from a disparate collection of shapes. There is a central spine made of some PV...