About this Blog

This is about the combination of two interests, Radio Control vehicles and Science Fiction models. This blog documents my science fiction spaceship and radio controlled vehicle projects.
Showing posts with label scratchbuildscifimodel. Show all posts

Friday, 24 July 2026

Submarine Kitbash Spaceship part 4

I believe I have completed the surface detailing phase of the project. 

The plain white panels are mostly cut from 0.5mm styrene sheet.

The rest is a lot of flat panel kit parts and a few bits of evergreen textured sheet..


Next step grey primer.

Thanks for looking.

More soon...


Sunday, 12 July 2026

Submarine Kitbash Spaceship Part 3

I added a strip around the back edge to give the rear bulkhead a bit of an inset.


The rear bulkhead was then fully detailed out, quite a fiddly process as I had already glued the engine bells in place.


I then moved on to detailing the lower hull at the front.


The large grey part with a round shape with black strip is the loading door. It would open and become a ramp. Its upside down in the picture below.


I am hoping to get this model finished for WASMEx 2026 which is on the 8th and 9th of August and fast approaching. I have a week off work prior to the show in order to to finish up. I still have a lot to do and need to get cracking.

Thanks for Looking.

More soon...

Sunday, 31 May 2026

AI Desert Racer RC Vehicle part 3

Once the 3D printed main hull was completed it was time to go old school and fill in the undersides with kit-bashed detail. In the picture below is a few parts from a Wall-E truck toy, a Bruder dozer toy and a bunch of bits of old transformer toys. Mixed in is a few plastic kit parts and some garden hose fittings.

The large black rear exhausts are the bass reflex ports from a Sony mini hifi, the same one as is being used as the front of this unfinished spaceship project, Sony Spaceship Two

This was all adhered to a 3mm sheet of foamed PVC. Once all the nurnies were in place I cut the excess pvc backing away at the bottom right up to the edge of the detail.


The rear detail block is mostly made from a couple of Duplo blocks with the requisite kit part details added.


After priming with grey primer I then added a lot of pipes made from some single solid copper core insulated wire and some thicker black multi strand electrical wire. This type of wire can be bent and stay bent due to the solid core. One problem with this insulated wire is that some types of grey primer remains sticky once painted, I think due to the plasticiser in the insulating PVC sheath. I have tried dusting it with talc which removes some of the stickiness. I think it is fine if painted with water based acrylic hobby paints.


Just visible below is a large thick pipe/hose made from solid foamed neoprene rubber.


Nurnies were added to the top surface as well.


Finally all the detail including the pipes received a final coat of grey primer.


It was then time to add the final colours. In this case I used Montana MTN94 spray cans, a grey, two shades of  off white and an orangy-red. I am big convert to the MTN paint. It is designed as grafiti paint but is perfect for these large models. It is a matte finish not affected by the oil wash weathering process and sprays really nicely with excellent cover. It also doesn't smell so bad and is available in 200 colours.


You can see in the picture below I added a couple of headlights (a last minute addition) to the nose. I carefully drilled through the 3D print and added a couple of 12 volt "eagle-eye" cob leds. At this point hey have the lens covered in masking tape.


After the paint had cured for a week I started on the vinyl cut graphics. Using Inkscape, the free open source graphics editor, I made copies of the vague AI graphics depicted in the AI artwork. These were then cut from the appropriately coloured self adhesive vinyl on my Silhouette Portrait 3 cutting machine.

The cut graphics were weeded of the unused bits of vinyl just leaving the symbols on the backing paper. I just used a low tack masking tape as a transfer tape to apply the graphics in the right spot on the model.

A few random rectangles of vinyl were also added here and there.


Next up is the last phase of the build - weathering.

Thanks for looking.

More soon...


Saturday, 21 June 2025

Container Spaceship part 12

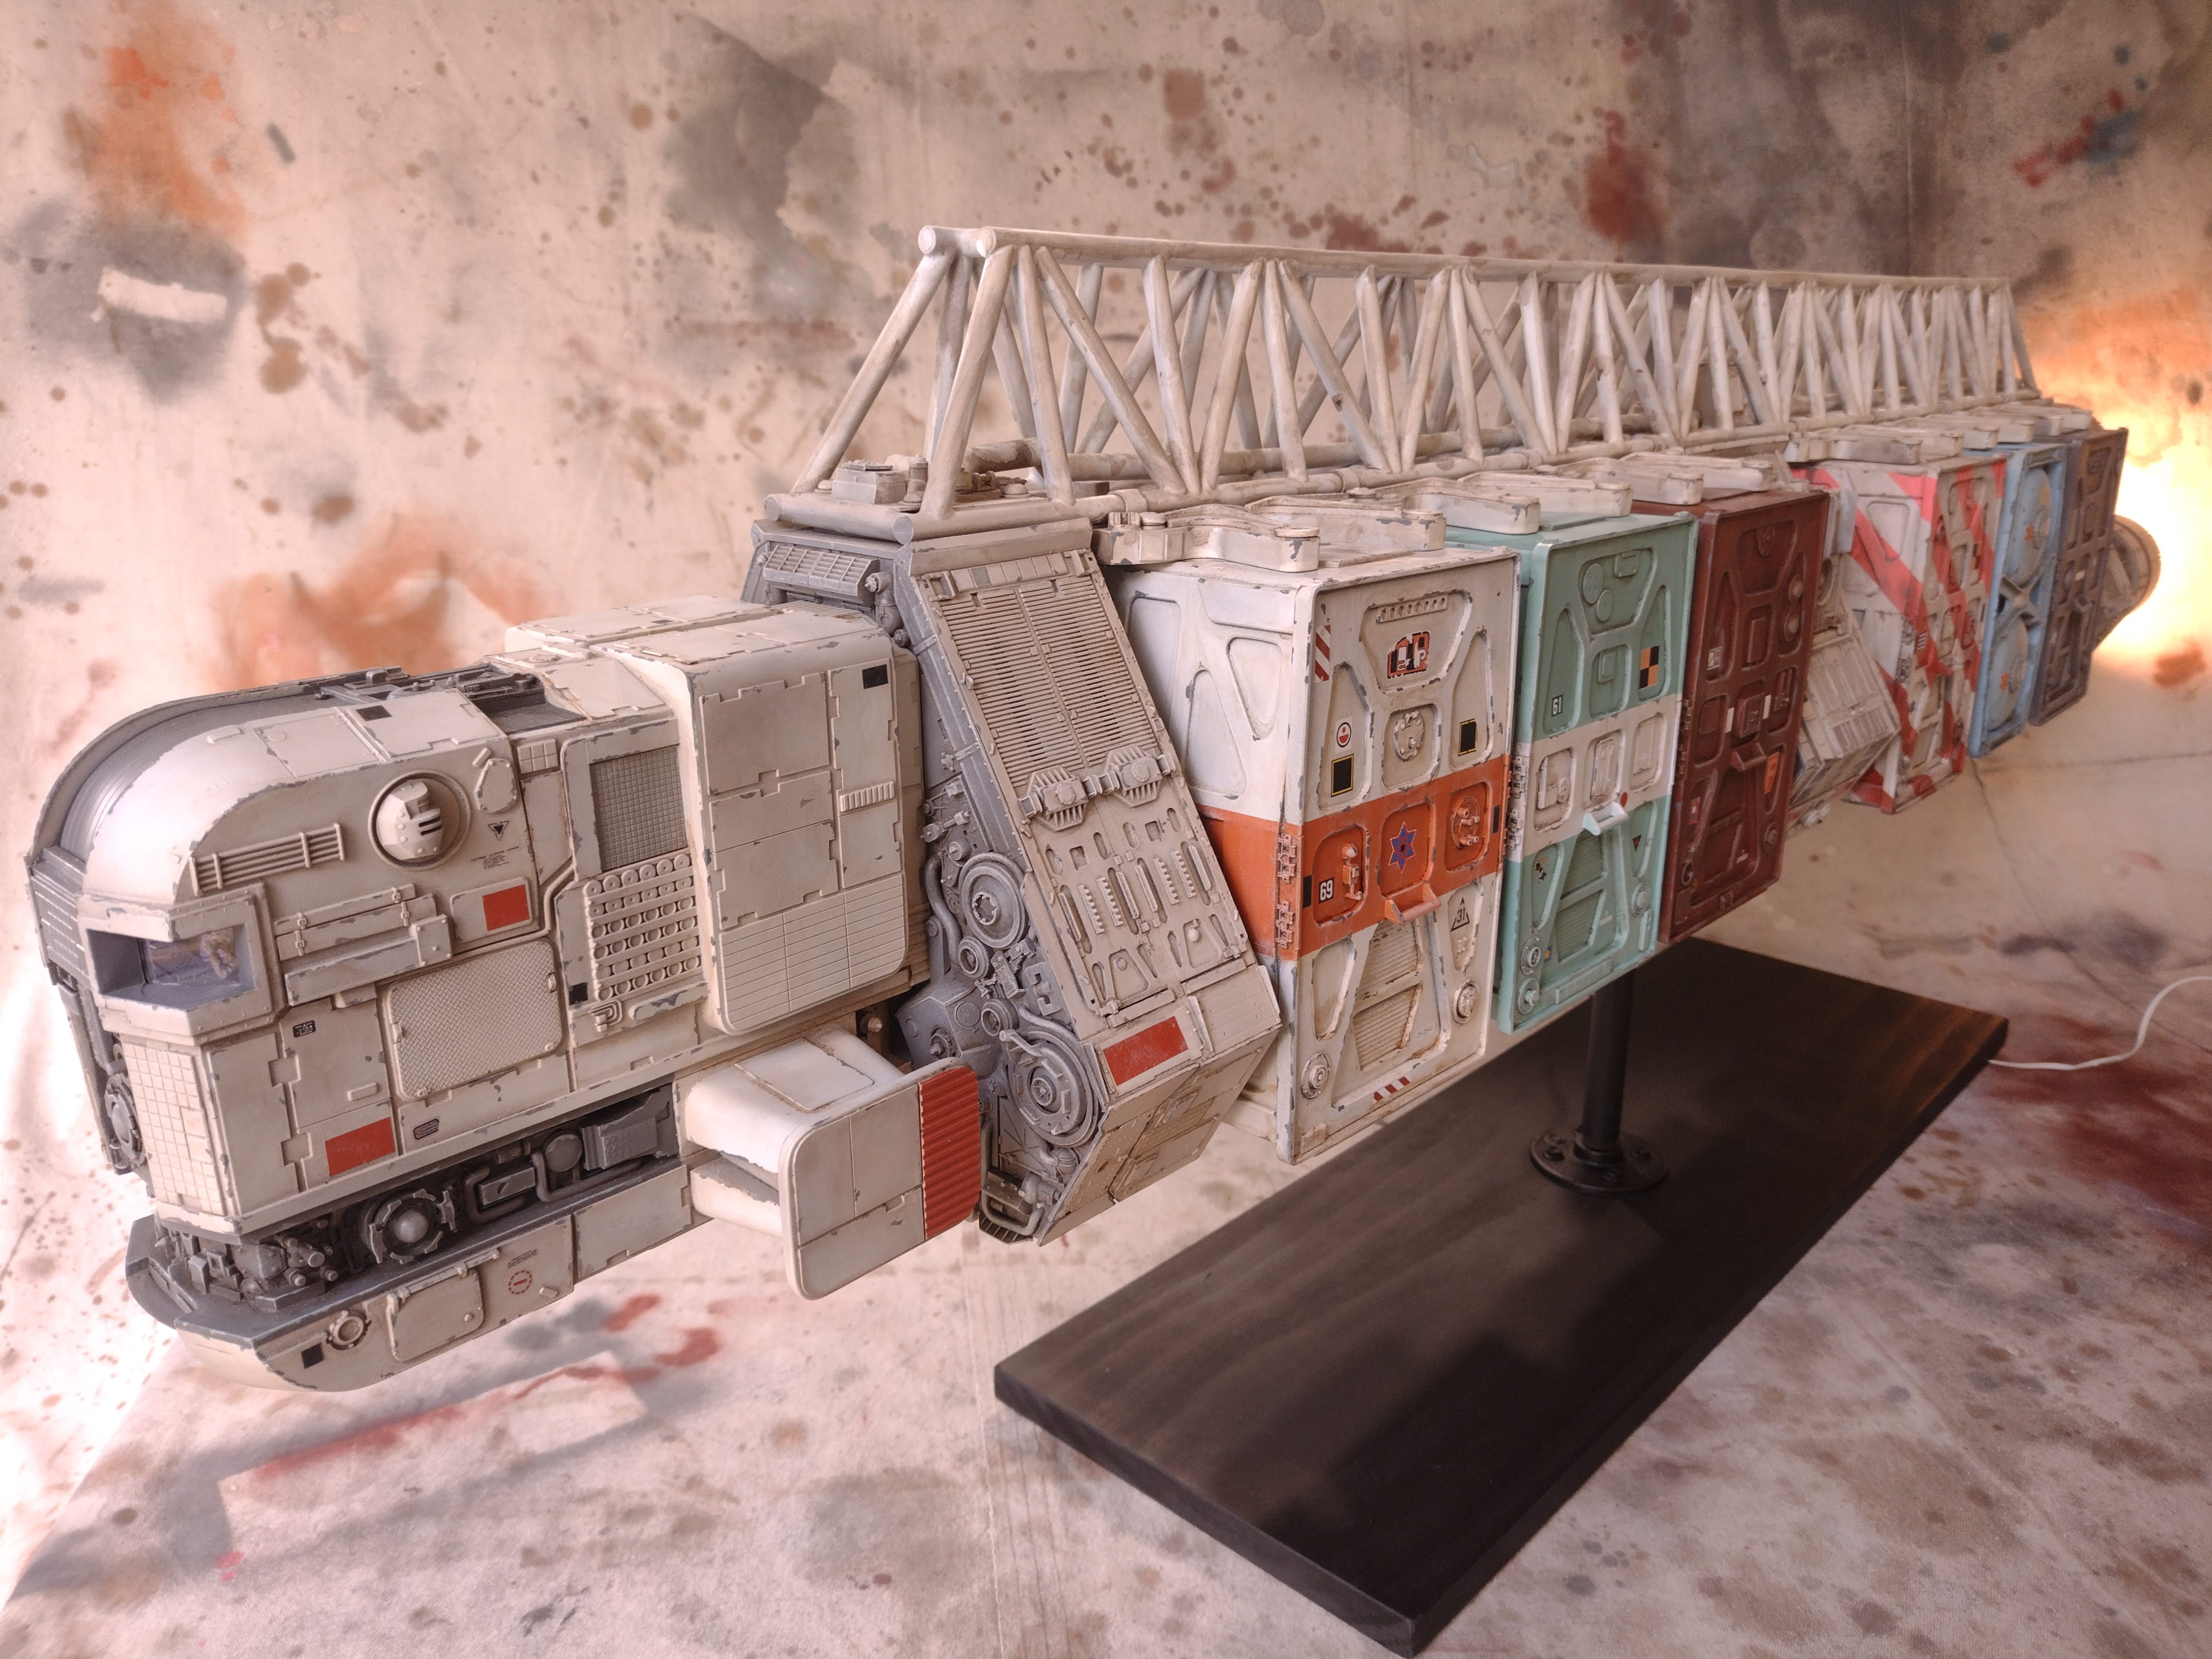
Started in 2016, the container spaceship project is finally done. It has been worked off and on (mostly off) for around nine years.

It has been a big task painting and weathering this model as it is reasonably lengthy at 1515mm (roughly 60 inches) and each container was a separate paint job in itself.

The main ship colour is white primer stained with an oil wash made from burnt umber and a bit of black. The containers were also sprayed using various colour spray cans I already had on hand. 

An assortment of  homemade and plastic model kit decals were applied along with small rectangles and circles cut from self adhesive vinyl in black , white, blue and red. where the decals had to go over matte paint I painted on a layer of coat of clear gloss first. Once the decals were dry I sprayed over them with a squirt of matte spray. I do not like to cover the entire model in matte spray as real objects tend to have varying levels of glossiness over their surfaces. A perfectly matte surface seems too artificial to me.

Panel edge chipping was all hand painted with a small brush.

Inside the engines I sprayed some Tamiya clear orange around the rim of the lights in an attempt to give a more graduated edge to the glow of the engines.


As a reminder, this was the original inspiration for this project found in an August 1991 Hobby Japan magazine apparently from a Tomy toy line called Z Knights.

This means it was 34 years ago that I first thought about making a model inspired by that illustration.

I am glad it is finally finished.


Thanks for looking.

More soon...


Most Popular Posts in the Last 7 Days