Readers of this infrequent blog will know I have an obsession with massive RC tyres and recently I acquired 3 pairs of the biggest RC tyres in the known universe, RC4WD's Interco Super Swamper 40 series. These weigh over a kilogram each and are around 250mm tall (10") and 150mm wide (6"). While as of writing this they have stock of the tyres they dont have any of the aluminium rims to go with them and haven't for a long time. Given that the rims are pretty expensive and not available I had to look for an alternative. I tried some Axial Oversized beadlocks. They have a wedge shaped bead receptacle which required that the bead on the tyre be ground to suit. I tried this on one tyre and managed to get the tyre on but the width is way too narrow at 81 mm, the tyre just looked too squashed.
So the only alternative was to see if I could make some rims. I had done an experiment in making rims out of PVC plumbing fittings before. In this case it was to fit some Imex 2.8 tyres. I found it was impossible to locate any 2.8 rims any more as they seem to have completely gone out of fashion. After wandering about the hardware store measuring various parts I found some 75mm storm pipe couplings that fit the inner diameter of the 2.8 tyres. They had a convenient lip in the center of the coupler that I could glue a disc hub to that would be square to the wheel. They were trimmed to the right width from one side to achieve the desired offset, meaning that the disc is offset so the suspension arms will not bind especially when turning the front wheels.
I then needed some rings to glue around the edge for a lip that the tyre seats against. I lucked upon some other fittings that had the right ID that could be cut up to produce the rings.
I made the hubs from discs of 6mm grey PVC. These were cut on the drill press using a circle cutting tool. You can see a picture of this in the previous post,
tools-part2
I added a bunch of holes and an array of old 1/8th whitworth stainless cap screws I had lying around (as I havn't used imperial fasteners for many many years) for decoration.

The tricky part was how to add a hex of some sort. In the end it wasn't that hard, though how durable they will be is yet to be discovered. I cut a bunch of smaller discs of the 6mm PVC and drilled a 16mm hole with a speedbit ( also see the previous post for a pic of this) almost the same diameter as across the flat faces of a Traxxas 17mm aluminium hex adaptor. Then I roughly filed out a hexagon shape to slightly less than final size. Using the hex adaptor as a kind of broach it was pressed into the disc of PVC using a vise and some spacers to allow it to be pushed right through the PVC cutting its own profile. The aluminium hex edges are sharp enough and the PVC soft enough to shave off the remaining plastic to leave a tightly fitting hexagonal hole. The whole lot was glued together with PVC pipe cement after having first primed the area to be glued with PVC cement priming fluid ( you can see the pink stain left by the priming fluid) for a good bond.


Of course the tyres will have to be supeglued in the usual way to stay on. I tried them briefly on a Traxxas E-Revo that I have put Traxxas Slayer suspension arms on and they work fine. I don't know how long they will last if like to beat on your truck and you are pretty dependent on finding PVC fittings that fit the diameter of the tyres you are wanting to house.
After this experiment I wondered if I could get lucky again and find something that would work for the massive RC4WD series 40 tyres. In the pics below you can see them on the left compared with Proline trencher series 40 tyres in the middle and Imex Jumbo Maxx Swamp Dawg tyres on the right, tyres I used to think were huge. In my test of the Axial beadlocks I determined that at least the beadlock rings fit correctly and that as these are available (though discontinued by Axial) I can employ these and try to make a beadlock rim.
A trip back to the hardware store with a vernier caliper to test out any fittings that might do the job. And as it happened I got lucky again and found a fitting that had a built in bead receptacle. Its a 100mm to 90 mm storm pipe reducer. It has an inner lip to seat the 90mm pipe and an outer lip to seat the 100mm pipe that I had to remove with a ball-bearing guided flush edge routing bit mounted in my Makita laminate trimmer (like a small router).
In the photos below you can see the parts that go together to make the rim of one wheel. There is two of the 100/90 reducers, a 90mm coupler, two pieces of 90mm pipe one short and one long and two rings of 90mm pipe split with a small piece removed from the circumference.
There is also a disc of 6mm PVC and a hex made the same way as before.
The two pieces of PVC pipe are glued into the the reducers and seated against the inner lip. The coupler is then glued over the long pipe that so that it seated against the reducer. The disc is then glued in so that it seats against the long tube. The short tube assembly is then glued so that it seats against the disc. It was pure luck that the couplers were exactly the right length required to space the reducers apart to suit the tyres.

Finally after the glue has dried the inner and outer rim is trimmed to the correct length using a Dremel cutter mounted in the drill press. The outer rim needed to be 2mm shorter than the inner rim to allow for the way the bead on the tyre sits. The depth of the bead receptacle is about 1mm shorter than the depth of the bead so that the tyre bead gets compressed by the beadlock ring as it is tightened down. Finally the rings are glued on the inside of the inner rim to thicken up that area to receive the holes for the M2.5 cap screws I decided to use to secure the beadlock rings. After the rings glue is dry the rims got a final pass with the Dremel cutter.


This process require that the two lengths of 90mm tubing are cut precisely to length and square. Now I used my bandsaw to cut them and although the bandsaw was set up and checked with a set square the cuts still are still not totally accurate. This means that the hubs are slightly out of true and this eventuates in a slight wobble on the axle. Some came out pretty square but a couple were a bit off. With a big lathe you could get these totally on the money ('course with a big lathe you could machine a set of funky beadlocks out of solid), however in my situation, with out a well equipped machine shop it is possible to make something that works and I am not going to be spinning these wheels with a high rpm so I think I will get away with it.
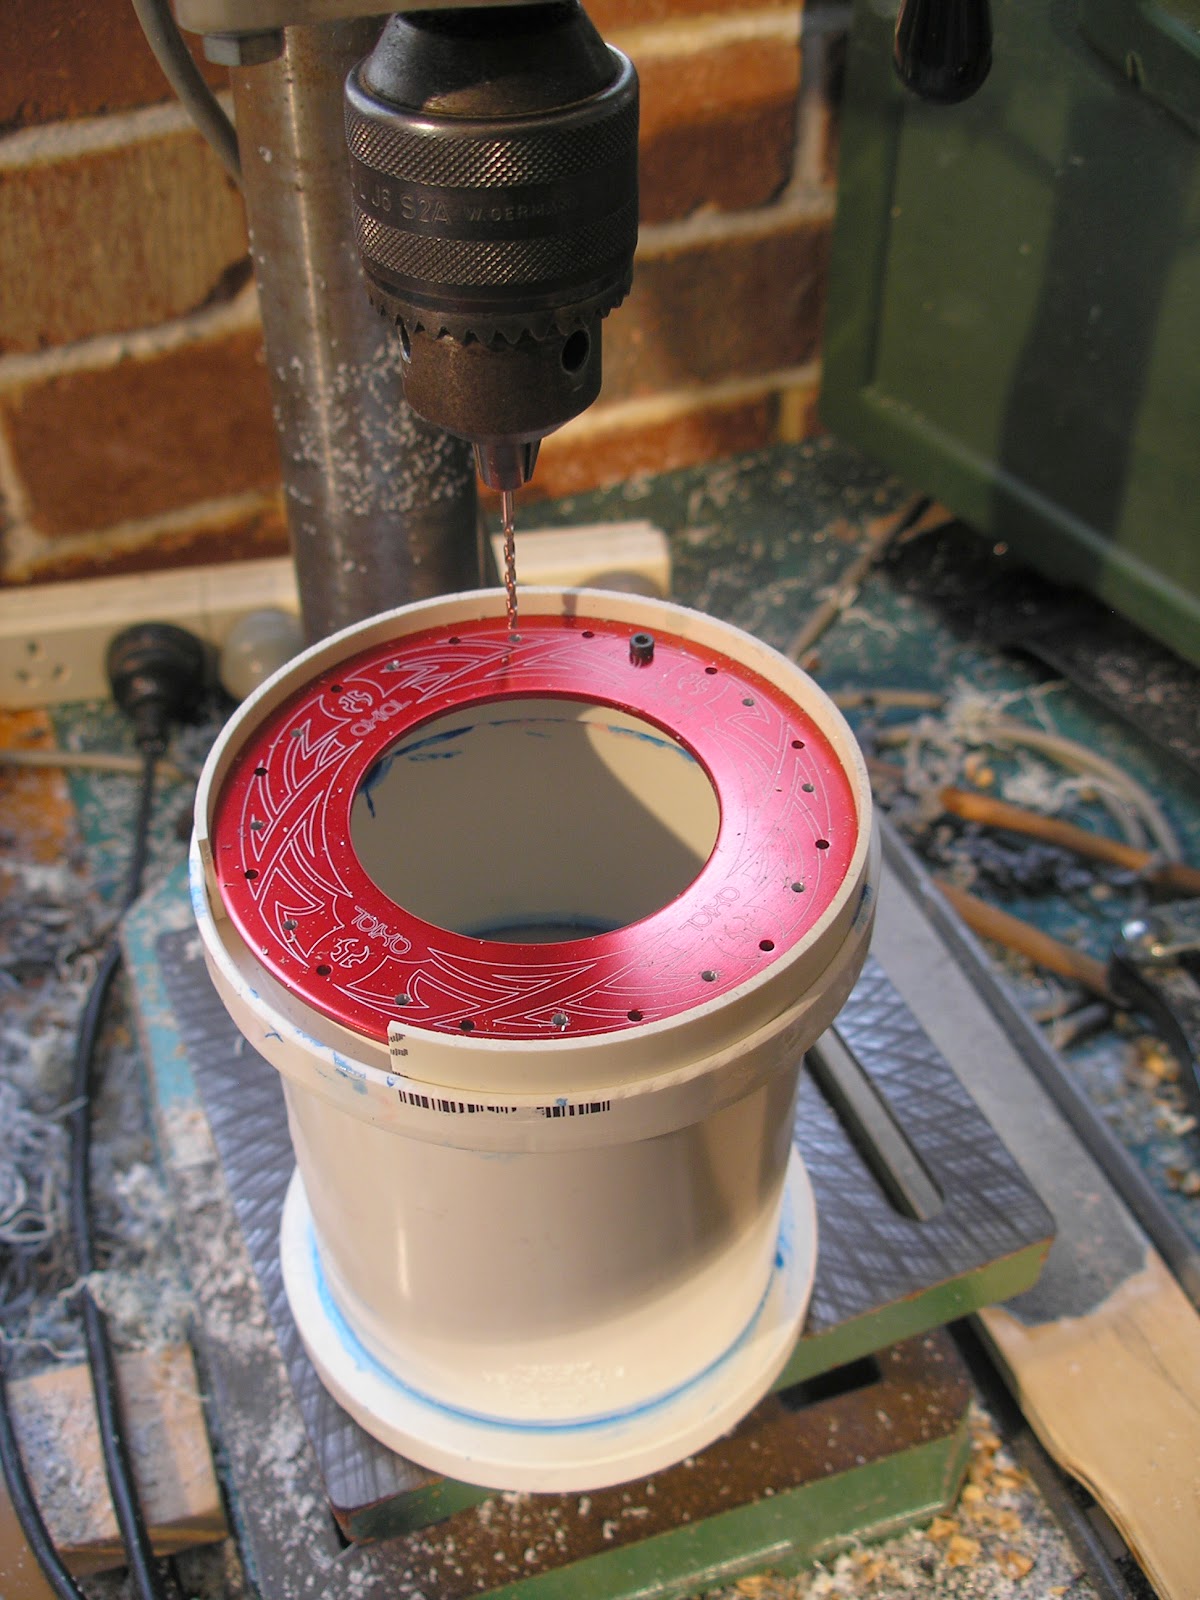
The next task was to redrill the Axial beadlock rings. The pitch circle of my PVC rims is not exactly the same as the Axial ones so I made a jig to drill new 2.5mm holes in the rings. I could only get 3 pairs of the same couloured rings and one pair of those is the skulls design whereas the others are the Tribal design (which I prefer). For the inner rings I used the plain ones from the 3 pairs of Axial beadlocks rims I purchased originally and then managed to fine three pairs of green Holey Roller design rings to replace the ones I hijacked ( for a future project).


The jig was a scrap of plywood with a disc of 2mm high impact Styrene (HIPS) cut to the inner diameter of the ring and clamped to the drill table. I drilled a 2mm hole to line up with the original hole in the ring and used a 2mm drill as a locator pin. A new hole was drilled between the existing and on a slightly shorter pitch diameter. then the pin was removed the disc rotated and the pin put back in, thus the old original holes acted as the guide for the new ones. The inner rings were done the same way using another jig with a bigger diameter plastic disc to suit.
A re-drilled ring was then used to drill the 2mm holes in the rims. A split piece of 90mm pipe was used to center the beadlock ring on the hub. The first hole was drilled and a cap screw put in to stop from rotating as the rest of the holes were drilled. I did not tap the holes for the m2.5 thread in the rims, the cap screws can cut their own thread as they are wound in. It makes for a tighter fit and the PVC is flexible enough to cope.


For the 6 wheels I need 144 m2.5 cap screws. I ordered a box of 100 m2.5 X
10 cap screws thinking I only needed 72 of them, I forgot about the
inner rings. In case I needed slightly longer screws, I also ordered a
box of 100 12mm long cap screws. The box of 100 10mm screws cost me $9.90, the box of 100 12mm screws which I didn't question at the time of ordering arrived with a price of $46.00.
When I asked about this they said it was because 12mm is not the common
size, huh? I need to get another box of the 10mm screws to complete the
task. I can say that after putting three of the tyres on the rims my
wrist was sore from all the screwing in and I had a blister on the palm
of my hand from pressing on the handle of the allen wrench.


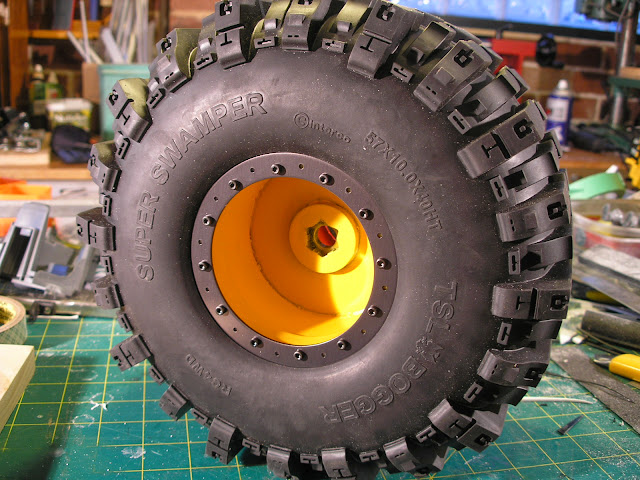
You may notice that the rims are painted yellow. I used a spray can of the typical rust guard epoxy paint. That paint sticks very well to PVC as well as aluminium without flaking off. It needs a day between thin coats, I needed three coats here, so its a slow process. Why yellow? well I stumbled across some concept art, in my searches for futuristic vehicles, that really caught my eye and these tyres will be used for a project that will be very close to the original concept, not a replica but as usual, my take on it.
More soon.