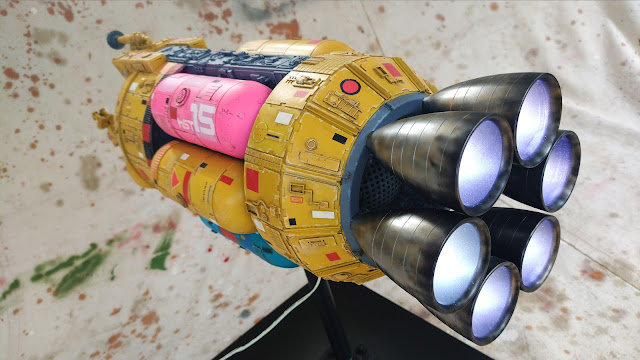
The Heavy Salvage Tug project has been completed.
I finally have something new to display at WASMEx 2023 which is coming up on August 5th and 6th.
The base colours were laid down using spray cans. The yellow was a Dupli-color Sunflower Solid (Hyundai) which was a warm yellow and the tank variations were sprayed using some Montana Gold spray cans I found in the craft store. While the colours are pretty cool the quality was a bit hit and miss. The pink can had a faulty spray nozzle which just spurted out from under and went everywhere. I ended up having to steal the nozzle from the red can which worked fine. The pink came out very matte which was fine, whereas the other two colours were more a satin finish. The blue or Turquoise came out with a very textured finish which was also odd.
These sort of paint issues are a quite common occurrence for me and I have learned to accept these inconsistencies and absorb them into the weathering process. I suppose it is because I prefer to use spray cans for the main colours for my relatively large models rather than try to airbrush everything.
The pictures below show the base colours applied to the model. Certain sections I left in dark Grey primer and the engine bells are still in primer. They will get some AK Xtreme metals applied next.
Some panels I picked out by hand painting some Lifecolour acrylic hobby paints. Various random rectangles were applied using hand cut white and red vinyl as well as some antique black Letraline. The main white HST15 graphics were printed out onto paper and then stuck on low tack masking tape for cutting out with a scalpel. A second layer of slightly tackier masking tape was then used as transfer tape to lift the cut stencil from the cutting matt and apply it to the model. One of these days I will try and find one of those small cnc vinyl cutters (Cricut, Silhouette or Brother) for this task as it would save a lot of agonising steps. Problem is I feel they are a bit pricey at the moment, second hand is likely the answer for me.
Other black lettering and numerals were applied from some ancient letraset dry transfer sheets I still have, must be at least 30 years old.
A wash of my usual recipe of brown poo juice ( Tamiya flat black and brown heavily diluted with methylated spirits) was carefully applied so as not to remove the water based acrylic paint additions.
Students acrylic paint from a tube was dry-brushed over all the raised detail.
Lifecolour acrylic paints in a shade lighter than the base colour was then hand painted around the panels for chipping and scratching. The largest chips were then given an inner touch of grey to look like the paint had scraped through to primer.
Decals that looked like they belonged were then applied with some setting solution ansd the whole lot was given a spray of matte varnish to seal the decals and dry transfer lettering which resulted in the low sheen finish you see in the completed model pictures below.
Any questions, don't hesitate to ask, happy to answer.
Thanks for looking.


Just found your blog .Great lovely work. It is a pleasure to see your work. Inspiring. Thanks for sharing.
ReplyDeleteZ
It turned out great! Well done!!!
ReplyDelete