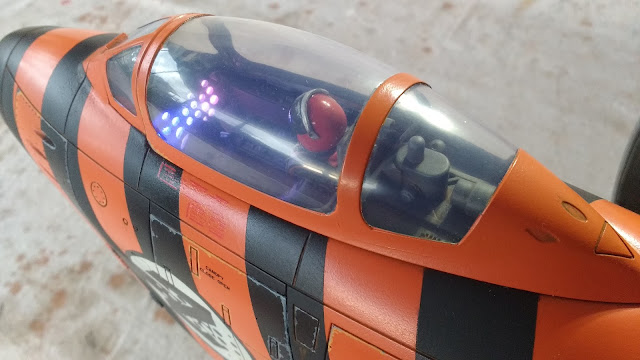
The Stretched Sabre Spaceship project has now been completed.
The first task was to design a colour scheme.
I had a number of suggestions from commenters on various sci-fi modeling Facebook groups which I thought were worthy of some investigation so a grey primer photo was taken into photoshop and ideas were roughed out until I had something I liked.
One of the suggestions was to use an orange and silver scheme like the hero vehicles in Gerry Anderson's Terrahawks. Given that I had recently seen a number of the original screen used models from that show I thought it was a good idea.
Another suggestion was to look at Korean war aircraft markings for inspiration, so I did some google image searching for examples.
Another suggestion was to use colour changing paints which I thought would be ideal for the hexagon wing panels to enhance the future tech look I was after.
Below is the final colour rough from photoshop.
All the areas still in primer grey above were planned to be bare metal on the finished model.
I usually stear clear of bare metal finishes as I have had mixed success in the past trying to achieve a good result. Since the previous failed attempts many years ago there has been a lot of new paints come on the market which appear to give good results. I decided to have a crack at it and purchased some of the AK interactive Xtreme Metals colours which are enamels along with some of the the thinner and a bottle of their clear Gauzy gloss coat which is water based.
For the hex panels I got two of the Green Stuff World acrylic colour changing paints. I chose two colours which were similar hues so there could be a bit of variation in the panel colours.
The main colour base coats were matt black and Tango orange car acrylic lacquer paints in a spray can.
Where all the bare metal was going to go I sprayed a base layer of gloss black also from a car paint spray can. Before using the spray cans I dropped them in a bucket of hot water for a bit to warm up the contents which makes the paint spray finer due to a lowering of the viscosity of the paint and slightly increasing the pressure of the propellant. The hot water method is a very safe technique as if you forget about the spray can it just gradually cools down with no ill effects. I came across this idea on a forum quite recently and it was a genius idea. Previously I had been heating up the spray cans with a hairdryer which I would not now recommend.
I had some issues with the Xtreme metal paints early on where the masking tape gum stuck to the paint and marred the finish. However cleaning it off resulted in a nice weathered effect on the affected panels. Later masking didn't have this effects so maybe it just wasn't dry enough when I first did it. All the bare metal paint was sealed with a coat of the clear Gauzy.
The logo design is just two different fonts of the letter Z combined. One of the fonts is scaled up massively as I just wanted the dot shapes and the tail end of the Z which is the middle line on the design. This was then recreated in Inkscape and scaled up to the correct size for printing out on clear decal paper. The white circle and diagonal stripe are white car primer also sprayed from a can. Before applying the decal I sprayed a layer of the Gauzy so there would be a gloss surface to better adhere to. The same Gauzy was then sprayed to seal the decals for the weathering pass.
Some random panels of black were sprayed with Tamiya Nato Black and some orange panels with lifecolor matt orange for a bit of variation.
Weathering was predominantly a wash of Burnt Umber and black oil paint heavily diluted with artists odourless turpentine. It left a muddy brown sort of colour which worked well in the panel lines across all the colours even the black.
Hand painted chipping was applied to the removable panels using a lighter shade of what ever colour was being chipped with a grey core using acrylic paints from Lifecolor.
All my projects are slightly experimental in the colour finishing stages but this one I tried out a number of processes and products I have not used before. It is always a bit of a leap of faith when the model is mostly covered in masking and you have no real idea of how it will come out and what potential disasters may be lurking underneath all that tape. The benefit of sci-fi modeling is most finish disasters can be turned into interesting weathering or panel damage which makes for a more interesting model.
Finally here is the finished craft.
Thanks for looking.
More soon...


No comments:
Post a Comment